Beginner
Featuring SPRING SHOWERS | Ann Gardner
CLOUD9 PATCH
SIZE: 52 ½ " X 67 ½ "
DESIGNER: Michelle Engel
TECHNICAL EDITOR: Linda Spiridon
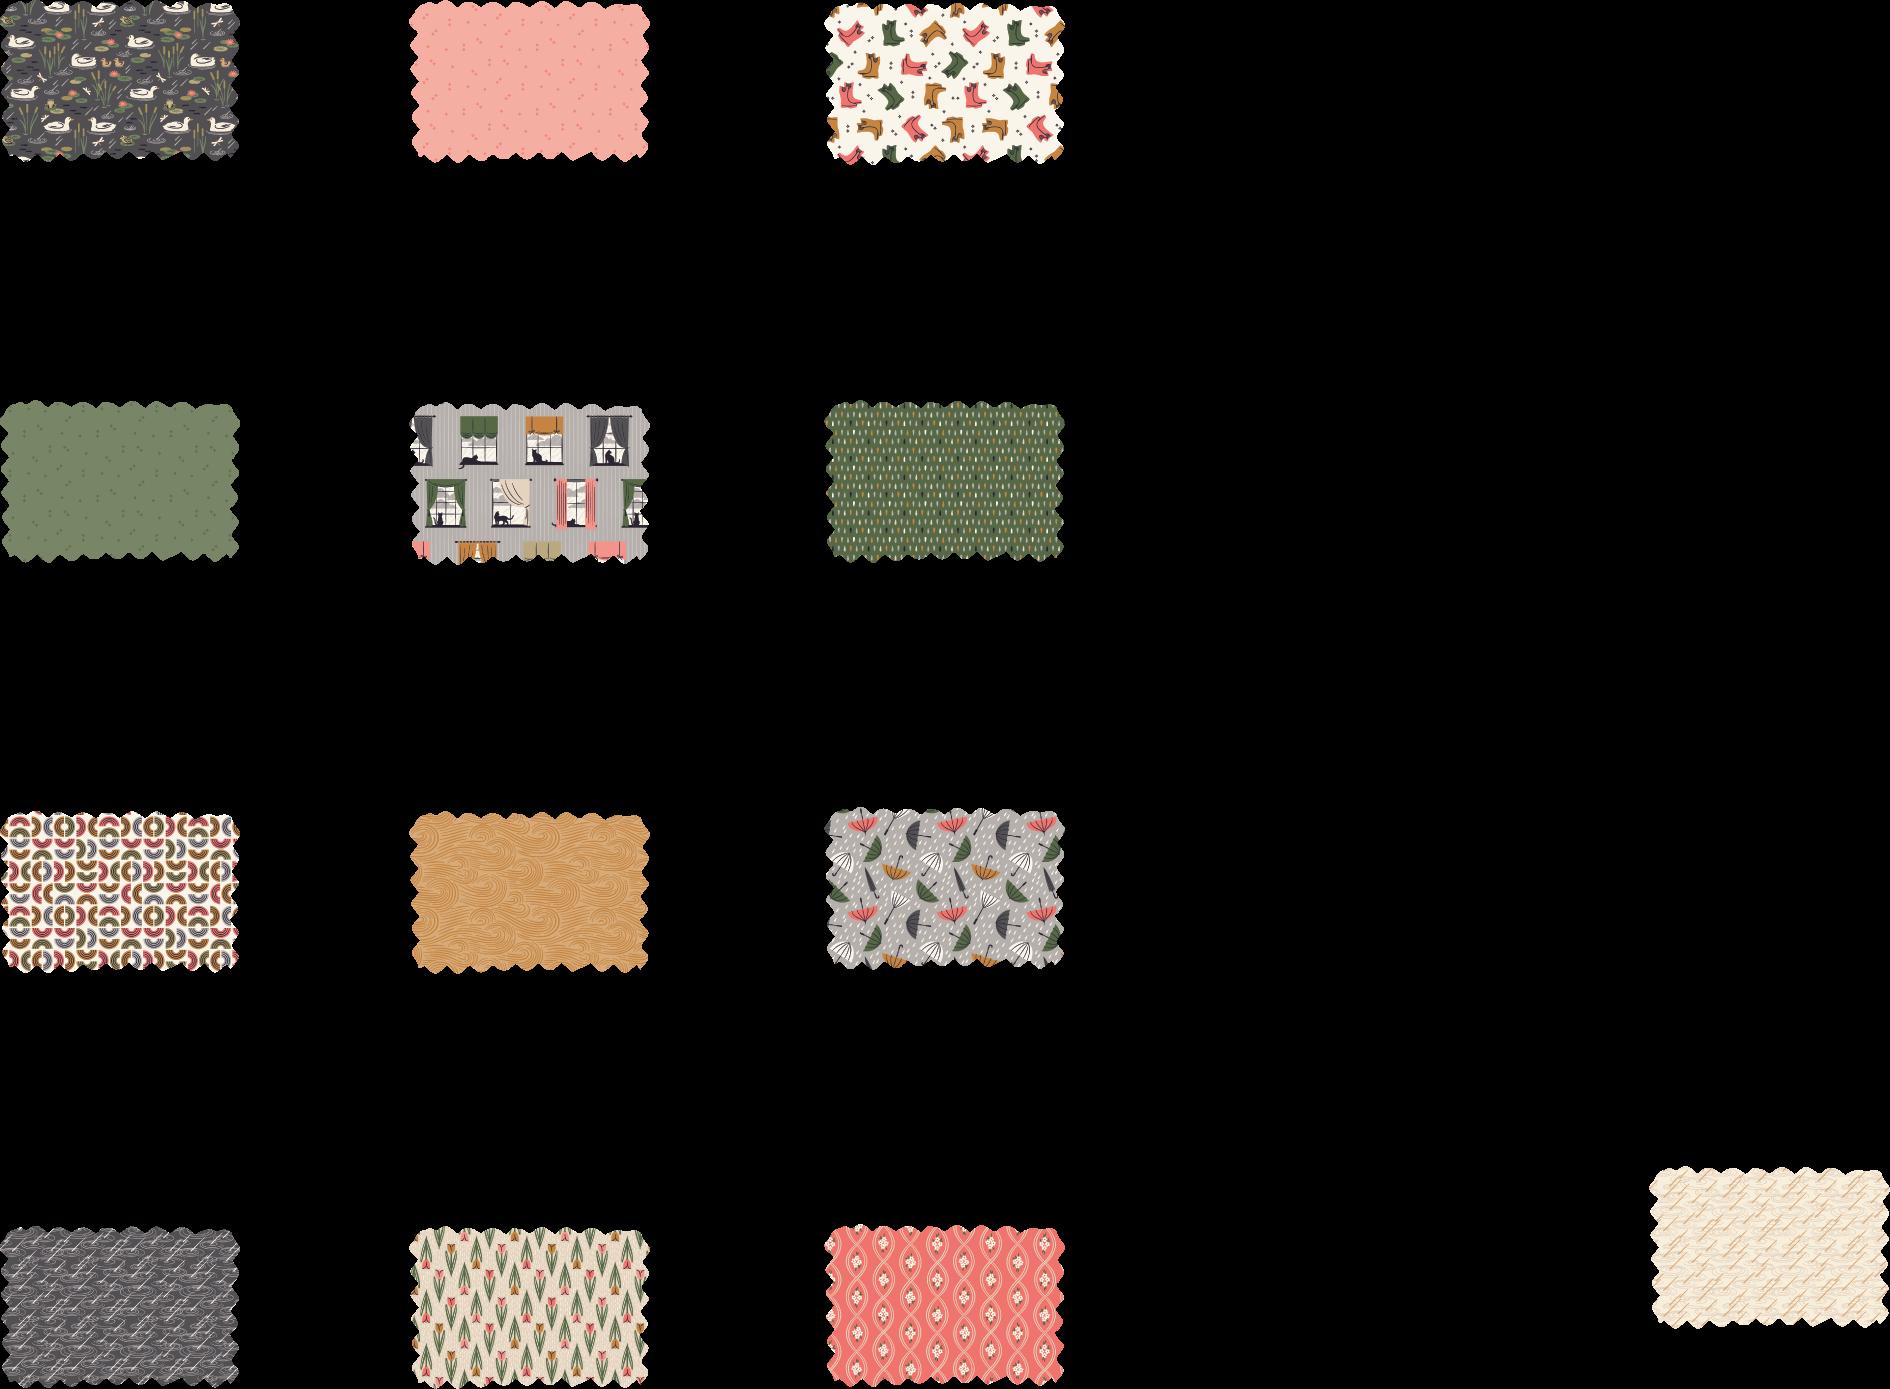
This project uses 12 different fabrics
See chart below for fabric quantities
1½ yd solid background fabric
2 yds print background fabric
½ yd binding
4¼ yd backing
Note: All possible care has been taken to assure the accuracy of this pattern. We are not responsible for printing errors or the manner in which individual work varies. Please read instructions carefully before starting the construction of this quilt. If desired, wash and iron your fabrics before starting to cut.
QUILT FACE MATERIALS
Cutting dimensions include ¼ " seam allowances.
HST = Half Square Triangle Block. WOF = Width of fabric selvedge to selvedte. Press seams as you go.
¼ yd each of 12 different printed fabrics (see chart below)
1½ yds solid background fabric
Use a solid fabric that is the same color on both sides and has no pattern
SOLID BACKGROUND
2 yds print background fabric
From SOLID BACKGROUND FABRIC cut:
12- 4¾" squares. Cut twice on the diagonal for block side triangles. (fig. 2)
12- 2 " squares. Cut once on the diagonal (fig. 1) for block corner triangles.
46- 3½" squares for border HST’s.
78- 3" squares for the blocks
From PRINT BACKGROUND FABRIC cut:
3- 16" squares. Cut twice on the diagonal (fig. 2) These are quilt side triangles. 6- 11 " squares for quilt center blocks.
2- 8 " squares. Cut once on the diagonal. (fig. 1) These are quilt corner triangles.
6- 1¾" strips WOF for sashing
1 fig. 2
For BLOCK 1
From each of FABRICS A, C, E, G, I AND K cut:
4- 3½" squares for top and side boarder HST’s 9- 3" squares for block
For BLOCK 2
From each of FABRICS B, D, F, H, J and L cut:
2- 4¾" square. Cut twice on the diagonal. (fig. 2) For block side triangles. 4- 3½" squares. Cut once on the diagonal. For top and side border HST’s.
4- 3" squares for block.
2- 2 " squares. Cut once (fig. 1) . For block corner triangles. 5/8 3/8 5/8
BLOCK 1 made with FABRICS A, C, E, G, I AND K
1. Start with a 3" print square from FABRIC A . Sew a HST of SOLID BACKGROUND FABRIC which was cut twice on the diagonal from a 4¾" square. Sew to each side of the FABRIC A square. (fig. 4) Press every piece to the print fabric.
2. Using the same print sew row 2 with a HST SOLID BACKGROUND FABRIC , 3 " print square, 3 " SOLID BACKGROUND square and HST SOLID BACKGROUND FABRIC (fig. 5) Continue to press toward print squares.
3. Sew Rows 3, 4, & 5 following block diagram sequence in fig. 3 using the same fabric in each block.
4. Sew all 5 rows together.
5. Using corner triangles cut once from the 2 " square of SOLID BACKGROUND FABRIC , sew a triangle to the top, bottom, and sides of the block. (fig. 6)
6. Make 6 blocks using FABRICS A, C, E, G, I AND K
BLOCK 2 made with FABRICS B, D, F, H, J AND L
7. Begin BLOCK 2 with a 3" SOLID BACKGROUND square and sew a HST of FABRIC B (which was cut twice on the diagonal from a 4¾" square) to each side of the SOLID BACKGROUND square. (fig. 4) Press toward the print fabric.
8. Continue to sew HST’s and squares together in rows as in BLOCK 2 diagram (fig. 7)
9. Sew rows together to make BLOCK 2 .
10. Add corner triangles cut once on the diagonal from 2 " print square.
5/8 5/8
11. Make 6 total blocks using FABRICS B, D, F, H, J AND L . Set blocks aside.
BLOCK DIAGRAMS
fig. 3
6
4
fig. 7
5
BORDER ASSEMBLY
12. Mark a diagonal line from corner to corner on the wrong side of 46- 3½" SOLID BACKGROUND squares. (fig. 8) (You will have 2 extra 3½” print squares)
13. Place the SOLID BACKGROUND 3½" square RST (right sides together) with a 3½" print fabric RST. Sew ¼" on each side of the diagonal line. Cut on the line, press open, square up to 3" square. Make 92 HST’s of various print fabrics.
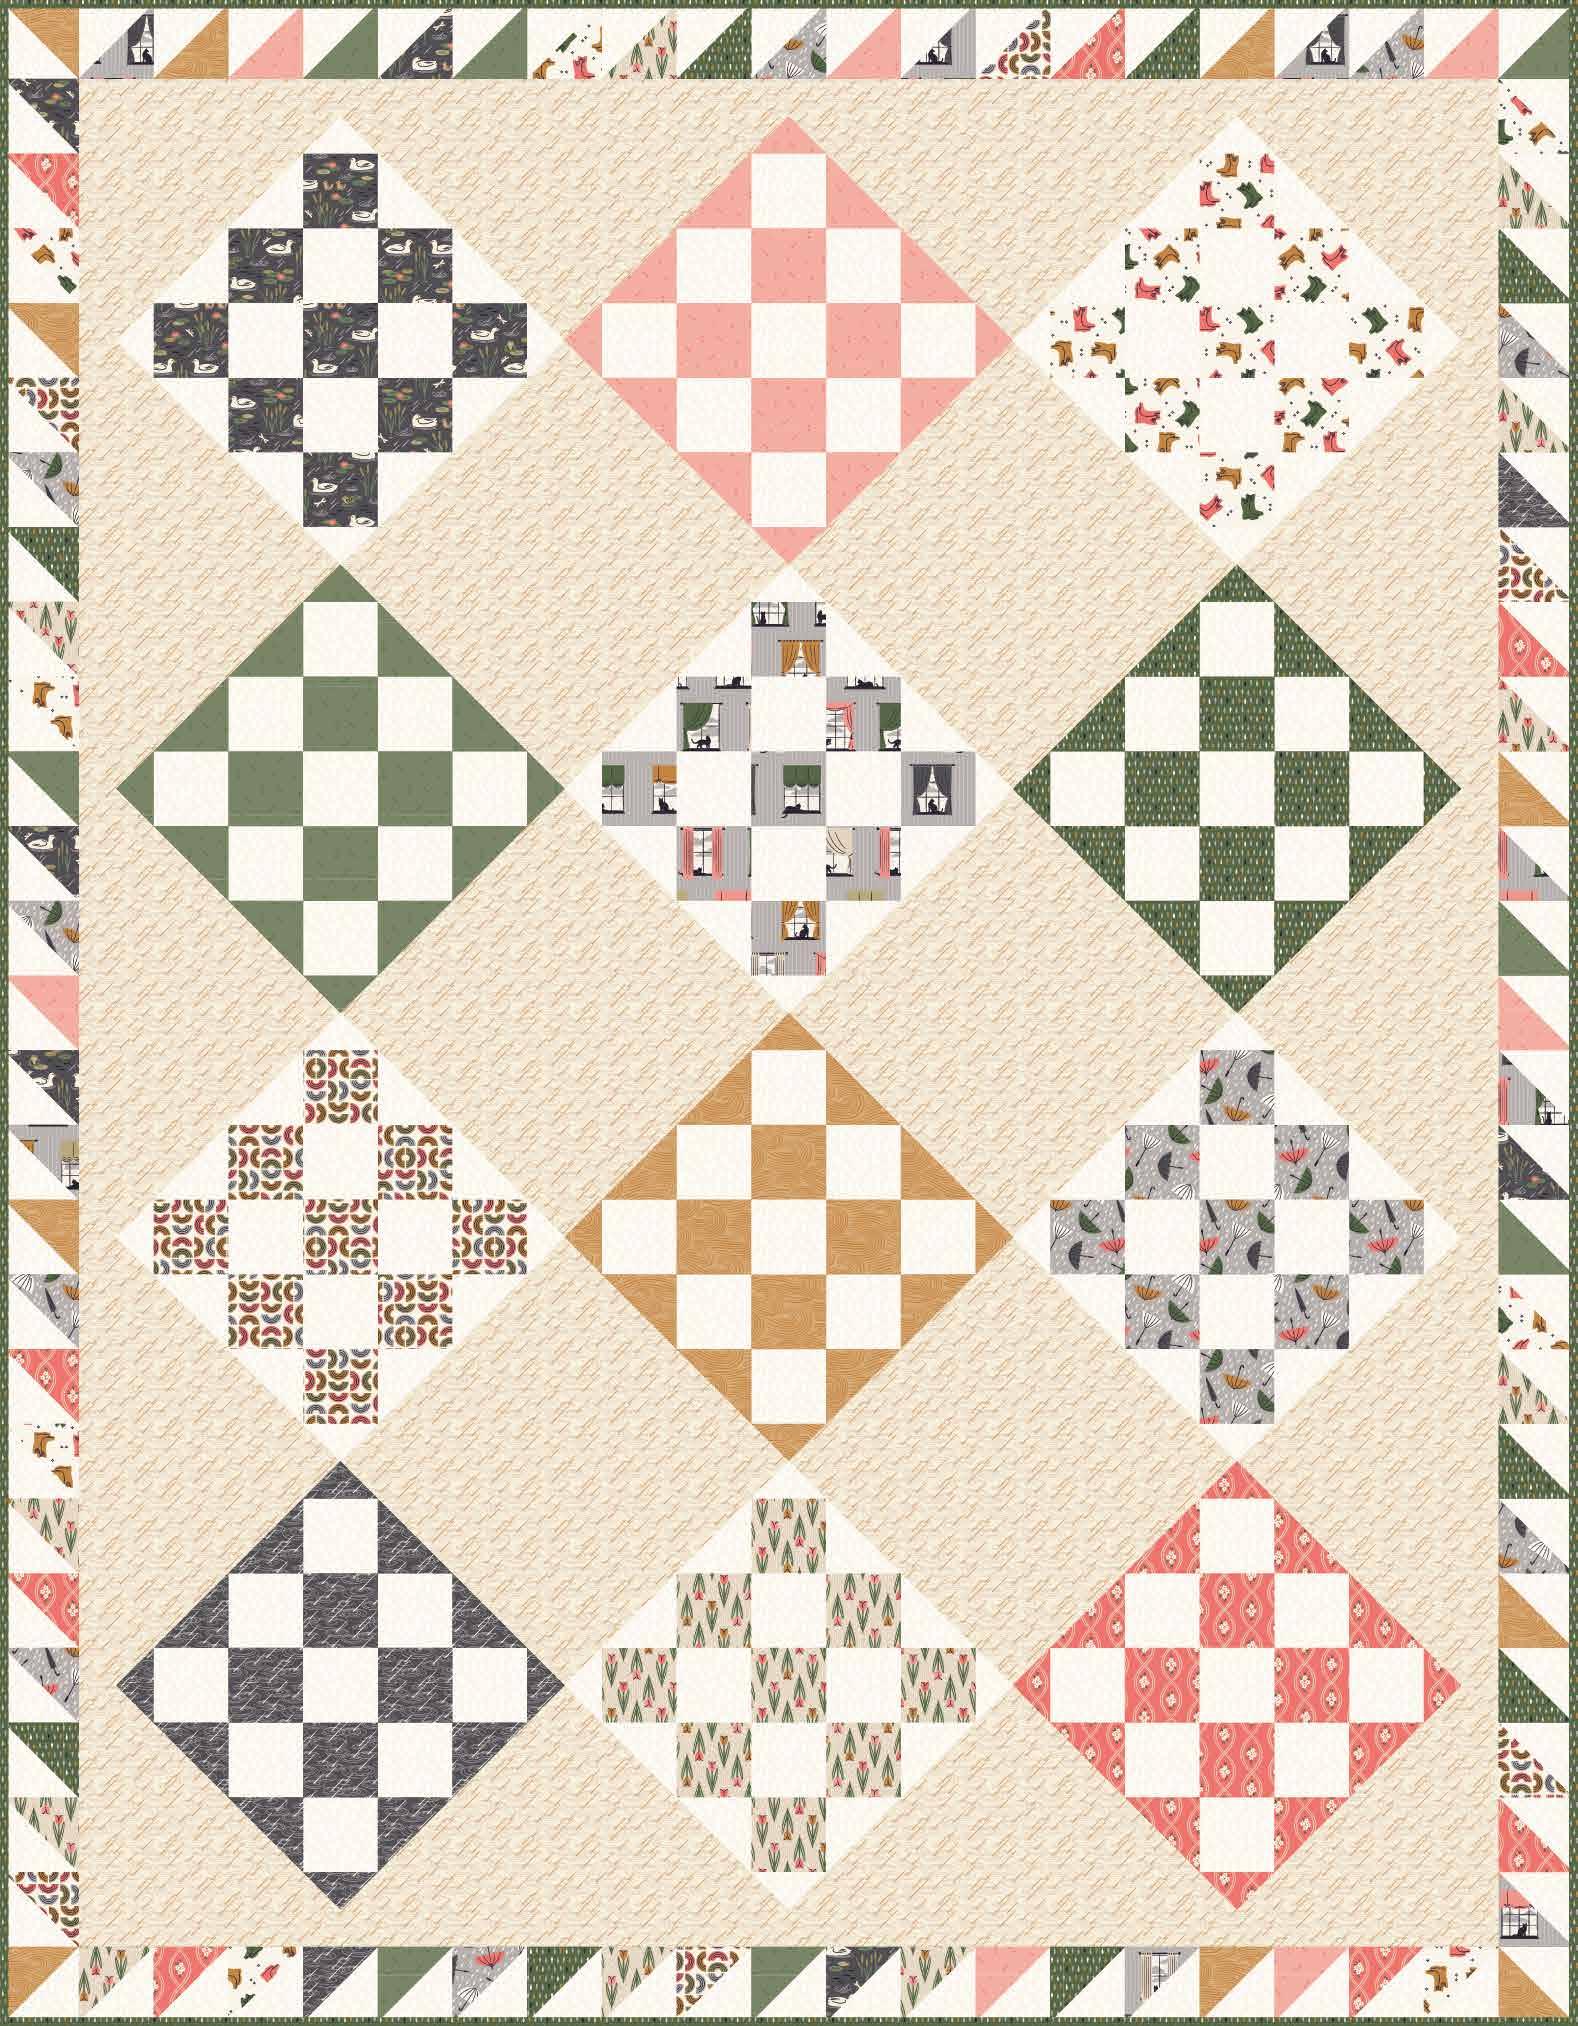
14. Following the QUILT LAYOUT DIAGRAM , sew 25 HST’s together to make a side border. Note the direction of the HST’s in the QUILT LAYOUT DIAGRAM . (fig. 9) Make 2 strip sets. Arrange prints as desired. Set aside.
15. Following the QUILT LAYOUT DIAGRAM , sew 21 HST’s together to make the top border. Note the direction of the HST’s in the QUILT LAYOUT DIAGRAM . Make the bottom strip set. Arrange prints as desired. Set aside.
BORDER DIAGRAMS
8 fig. 9
QUILT ASSEMBLY
16. Referring to the QUILT LAYOUT DIAGRAM , sew triangles cut from the 16" PRINT BACKGROUND squares to each side of BLOCK 1 . Press block seams toward the background fabric.
17. Continue to sew HST’s, pieced blocks, and 11" PRINT BACKGROUND squares together following the direction as in the QUILT LAYOUT DIAGRAM .
18. Sew all rows together.
19. Sew the corner triangles to top and bottom corners.
20. Sew 1¾" sashing strips together to equal the length of the quilt. Make two. Sew to each side of the quilt.
21. Sew sashing strips together to equal the width of the quilt. Make two. Sew to the top and bottom of the quilt.
22. Using the HST strips made in steps 14 and 15, sew them to the sides and top and bottom to complete the quilt top.
23. Layer backing, batting, and quilt top. Baste, quilt, and bind.