


As we worked on curating this issue, one truth became impossible to ignore—fall really is magic. Not the kind of magic that shouts for attention, but the quiet kind that settles in slowly and makes everything feel a little softer. It’s in the way the air sharpens and the light turns golden, in the crunch of leaves beneath your feet and the smell of cinnamon wafting through the kitchen. Fall doesn’t rush in—it drifts, reminding us that change can be both beautiful and grounding. It asks us to slow down, to notice, and to find meaning in the in-between spaces.
This issue of Home by Geneva is a reflection of that rhythm. Every story, recipe, and reflection inside was chosen to celebrate what makes this season feel so alive—the warmth of gathering, the calm of creating, and the comfort of coming home. You’ll find cozy interiors that inspire a sense of peace, recipes that spark connection around the table, and heartfelt stories that remind us why fall feels like such a reset. It’s a season that teaches us to balance nostalgia with new beginnings, to take stock of where we are, and to prepare our hearts and homes for what’s next.
As you turn these pages, I hope you rediscover what makes this season so unforgettable. Let fall’s magic remind you that slowing down can be its own kind of progress, that beauty lives in the ordinary, and that there’s joy in simplicity when we make space for it. Here’s to candlelit evenings, meaningful moments, and the golden spell of a season that never fails to feel like home.

Cierra Dootson Geneva Financial Executive Director Of Marketing
Managing Editor Home By Geneva
by GENEVA
Geneva Financial
180 S. Arizona Ave Ste 310 Chandler, AZ 85225 www.GenevaFi.com
MANAGING EDITOR
Cierra Dootson
ART DIRECTOR
Jacque Huerta
CONTRIBUTING WRITERS
Bryce Freshour
Fall isn’t just a season—it’s a reset button for your wardrobe. As the days get cooler and the nights stretch longer, breezy sundresses and sandals give way to layers, textures, and rich autumn tones. Making the switch from summer to fall fashion is less about starting over and more about reimagining what you already own, sprinkling in a few timeless staples, and creating a closet that feels as warm and inviting as the season itself.


The first step in any seasonal switch is deciding what stays and what goes. Before chunky knits and tall boots take center stage, give your summer wardrobe a thoughtful edit. Pull everything out and ask: Can this transition into fall, or should it rest until next year? Pieces like denim jackets, midi skirts, and neutral tanks can easily bridge the seasons, while breezy sundresses and flip-flops are better stored away. To make it simple, create three piles—keep, store, and donate. This way, you’re left with only what serves your fall style, and your closet instantly feels lighter and more intentional.
Fall fashion isn’t about buying an entirely new wardrobe—it’s about layering textures and introducing warmth. Instead of heading straight to the mall, start at thrift stores, consignment shops, or vintage markets. Look for timeless pieces like chunky knits, tailored blazers, patterned scarves, and well-loved leather boots. Neutrals such as camel, cream, forest green, and burgundy never go out of style, but don’t shy away from a statement sweater or a patterned coat that makes you smile. A little thrifting not only saves money but also adds unique personality to your fall lineup.
One of the best parts of fall fashion is layering— transforming summer favorites into autumn-ready looks. Slip a turtleneck under a sundress, pair shorts with tights and ankle boots, or throw a chunky cardigan over a breezy blouse. Even lightweight skirts and tanks can work with the right layers. Accessories do the heavy lifting here: a wide-brim hat, a plaid scarf, or a bold belt can instantly make an outfit feel seasonally on point. It’s less about replacing what you have and more about reimagining it for cooler days.

Once you’ve decided what to keep and thrifted a few new staples, it’s time to reorganize. Bring cozy essentials—jackets, sweaters, denim—front and center while storing away the summer-only pieces. Use clear bins or under-bed storage to keep items safe but accessible for next year. If you want to make your closet both stylish and functional, try grouping by category (knits, denim, outerwear) or by color palette to make outfit-building effortless. A little organization now saves you time later and helps you enjoy getting dressed each morning.
Instead of rushing through your closet switch, turn it into a seasonal ritual. Light a pumpkinspice candle, sip on a chai latte, and play your favorite cozy playlist while you fold and hang. Creating a vibe transforms the task into something enjoyable, almost celebratory. Think of it as a reset not just for your wardrobe, but for your mindset—setting the tone for the cozy, creative season ahead.
At the end of the process, you’ll have more than a refreshed closet—you’ll have a collection that reflects both the season and your personal style. Fall is about comfort and creativity, but it’s also about confidence. When you open your closet and see only pieces you love, dressing becomes easier and more intentional. Your wardrobe should feel like an extension of who you are, not just a collection of clothes. This fall, let it tell your story—layer by layer, cozy piece by cozy piece.
So, grab your storage bins, hit the thrift racks, and let your fall fashion story unfold—layer by layer.
Warm tones, grounded greens, and a confident return of blue are setting the stage for cozy, stylish homes this season.
Fall always feels like nature’s most dramatic redecoration. Leaves turn to fire, evenings grow crisp, and we instinctively reach for richer textures and warmer tones indoors. This year, design experts and color houses agree: autumn is about embracing quiet, layered palettes colors that soothe, ground, and add depth while still feeling fresh.
We’ve rounded up the top fall color schemes for 2025, with ideas on how to use them in real homes, no matter your style.

Think cinnamon, terracotta, and clay, warm, earthy shades that feel cozy yet elevated.
• Why it works: Adds depth without overwhelming, pairs beautifully with wood, stone, and brass.
• How to use it: Try a terracotta accent wall, cinnamon-hued throw pillows, or clay pottery against cream walls. For a bolder statement, color-drench a small space like a powder room.
Warm golden tones and meloninfused accents are filtering in from fashion into interiors.
• Why it works: Brightens spaces without feeling summery; perfect for transitional fall décor.
• How to use it: Swap in ochre velvet throw pillows, melon-striped runners on your table, or small ceramics in lemongrass hues.
Olive, dill, and moss tones are the season’s “new neutrals.” They echo the outdoors while still feeling sophisticated indoors.
• Why it works: Calming, timeless, and adaptable in kitchens, offices, and built-ins.
• How to use it: Olive cabinetry with brass pulls, moss-green curtains in a living room, or a muted sage accent wall to anchor neutral furniture.
A tailored mix of camel, mushroom, and near-black delivers quiet sophistication.
• Why it works: Versatile, timeless, and resale-friendly if you’re planning to sell.
• How to use it: Keep walls in warm mushroom tones, trim in soft white, and doors in near-black. Layer boucle throws, ribbed glass, and smoked oak furniture for added texture.
Deep, confident blues are back in a big way, bridging heritage charm and modern drama.
• Why it works: Blue makes a striking accent while remaining classic and easy to live with.
• How to use it: Paint your front door a bold navy, or add depth to a den with moody blue built-ins balanced by tan leather and parchment-colored textiles.
Moody, romantic shades that feel dramatic yet surprisingly versatile.
• Why it works: Adds richness and warmth, perfect for cozying up bedrooms or dining rooms.
• How to use it: Burgundy velvet pillows on a cream sofa, plum-brown walls in a dining space, or even ruby-toned table linens for holiday gatherings


• Pick an anchor. Choose one color for large surfaces (walls, cabinetry) and let accents build around it.
• Layer textures. Boucle, velvet, raw linen, and aged metals bring these colors to life.
• Color-drench thoughtfully. Painting walls, trim, and even built-ins in the same hue creates a cozy, enveloping effect.
• Try accents first. Not ready to repaint? Introduce fall shades through pillows, rugs, art, or ceramics.
Fall’s color story this year is less about bold statements and more about atmosphere. It’s about creating rooms that feel lived-in, grounded, and timeless, with accents that can shift as seasons do. Whether you lean into olive greens, moody plums, or cameland-charcoal neutrals, the best palette is the one that makes your home feel like your own personal retreat.

Exploring seasonal shifts in mood and habits

As the days shorten and the air turns crisp, our bodies and minds naturally adjust. With less daylight, our circadian rhythms shift, nudging us to rest more and lean into slower routines. It’s no coincidence that cozy nights in, warm drinks, and layered outfits feel especially satisfying this time of year. Fall acts like nature’s gentle reminder to pause, reflect, and recharge.
Comfort isn’t just a preference in the fall—it’s psychological. Cooler weather encourages us to seek warmth, not only through blankets and sweaters but also through food, rituals, and connections. That’s why we crave hearty meals, spiced lattes, and evenings with loved ones. Our senses respond to texture, scent, and taste more deeply when the environment shifts, and comfort becomes a form of self-care.
Autumn often sparks memories—apple picking, pumpkin patches, football games, or simply the smell of cinnamon in the kitchen. Psychologists note that nostalgia can boost mood, helping us feel grounded and connected during seasonal change. Fall traditions, whether old or newly created, give us something to look forward to and strengthen our sense of belonging.
There’s a reason “nesting” feels instinctive in the fall. As we spend more time indoors, we want our spaces to feel warm and inviting. Soft lighting, plush textures, and seasonal décor provide comfort and security. This desire to create a haven isn’t just aesthetic—it’s psychological, helping us adapt to the external shift by cultivating internal calm.
Just like our homes, our closets play a role in how we adapt. Pulling out soft knits, layering scarves, or slipping into boots doesn’t just keep us warm—it boosts our mood. Studies show that clothing can impact confidence and comfort, making fall fashion both practical and deeply emotional. Dressing for the season is another way of aligning with the shift and embracing the cozy mindset.
Fall isn’t just about changing leaves—it’s about changing rhythms. Our craving for comfort is a natural, healthy response to the season, helping us slow down, connect, and take care of ourselves. By leaning into those instincts—whether through rituals, nesting, or style—we can fully embrace the beauty of autumn, inside and out.

Fall fashion is all about balance—warm enough to handle the morning chill but flexible enough for a sunny afternoon. That’s where layering comes in. The right mix of textures and pieces lets you adjust throughout the day without sacrificing style. Think of layers as a toolkit: sweaters, scarves, jackets, and accessories that you can add or remove as needed.
Nothing says fall like the perfect sweater. From chunky cable-knits to sleek turtlenecks, sweaters set the tone for the season. Pair oversized knits with skinny jeans or leggings for effortless balance or go classic with a fitted turtleneck tucked into wide-leg trousers. Neutral tones like cream, camel, and gray never fail, while rich hues—mustard, burgundy, and forest green—bring autumn’s palette to life.
Sweaters are versatile enough to layer with almost anything. Slip a cardigan over a slip dress for an easy day-to-night look or wear a cropped sweater over a button-down for a touch of structure. Denim jackets, leather moto coats, or tailored blazers layer perfectly over knits without feeling bulky. The key is proportion: balance oversized sweaters with slim bottoms, or layer fitted knits under voluminous outerwear.
Accessories make layered looks feel polished. Add a plaid scarf for texture, a beanie for warmth, or a statement belt to give shape to oversized pieces. Boots are fall’s best friend—ankle boots with jeans, knee-highs with skirts, or chunky lug soles for a modern edge. Don’t underestimate jewelry: gold hoops or layered chains peek beautifully from under cozy collars.
Layering isn’t just stylish—it’s practical. A lightweight base, a midlayer sweater, and a top layer like a jacket or coat let you adapt to unpredictable fall weather. Materials matter, cotton or silk camisoles as a base, wool or cashmere sweaters for warmth, and water-resistant outerwear for sudden showers. This formula keeps you cozy without overheating.
Sweater weather is more than a fashion moment—it’s a seasonal reset. With just a few versatile sweaters, smart layers, and well-chosen accessories, your wardrobe can carry you stylishly from crisp mornings to cool nights. Layering is about comfort, creativity, and confidence—so experiment, mix textures, and let your fall fashion story unfold, one cozy look at a time.
There’s something magical about the crisp air, rustling leaves, and glow of a jack-o-lantern that makes us crave a movie night filled with thrills, chills, and just the right amount of nostalgia. Whether you’re a fan of classic slashers, familyfriendly fun, or bone-chilling psychological horror, we’ve crafted the ultimate Halloween movie guide to keep you entertained all season long. Grab your popcorn, a warm blanket, and dim the lights, it’s time to stream your way into spooky season.


These are the films that defined Halloween viewing and still hold their power decades later.
Halloween (1978) – Michael Myers, that haunting score, and the ultimate “final girl.” (Stream: Peacock, AMC+)
The Shining (1980) – “Here’s Johnny!” and all the psychological terror that follows. (Stream: Max)
Beetlejuice (1988) – A perfect mix of creepy and comedic. (Stream: Prime Video)
Hocus Pocus (1993) – The Sanderson sisters return every October like clockwork. (Stream: Disney+)

MODERN HORROR ESSENTIALS
These films push boundaries and redefine what horror can be.
Get Out (2017) – A social thriller that’s equal parts smart and scary. (Stream: Peacock)
Hereditary (2018) – Disturbing and unforgettable, with performances that linger long after. (Stream: Max)
Talk to Me (2023) – A fresh take on supernatural terror with Gen-Z edge. (Stream: Max)
The Witch (2015) – Moody, slowburn, and unsettling in the best way. (Stream: Max, Prime)
JUMP SCARES & SCREAMS
If you love that heart-pounding, “did you hear that?!” experience, these are for you.

A Quiet Place (2018) – Silence is deadly. (Stream: Prime Video, Paramount+)
Creep (2014) – Found footage horror that feels disturbingly real. (Stream: Netflix)
Barbarian (2022) – Twists, turns, and pure nightmare fuel. (Stream: Hulu)
The Conjuring (2013) – Based on true events (which somehow makes it scarier). (Stream: Max)


THRILLERS WITH A TWIST
Less gore, more mind games these films keep you on the edge of your seat.
Us (2019) – Doppelgängers you’ll never forget. (Stream: Prime Video)
Rosemary’s Baby (1968) – A chilling slow build into paranoia. (Stream: Paramount+)
Gone Girl (2014) – Not horror, but a psychological thriller perfect for a fall night. (Stream: Hulu)
For when you want Halloween spirit without the nightmares.
It’s the Great Pumpkin, Charlie Brown – A tradition that never gets old. (Stream: Apple TV+)
The Nightmare Before Christmas – Is it a Halloween movie or Christmas movie? The answer: both. (Stream: Disney+)
Halloweentown (1998) – Disney Channel magic at its finest. (Stream: Disney+)
Casper (1995) – Friendly ghost, heartwarming story. (Stream: Peacock)
STREAMING SERVICES FOR EVERY SPOOKY MOOD
Shudder – The ultimate horror lover’s library.
Disney+ – Nostalgia, familyfriendly, and classics.
Max & Peacock – The heavy hitters of horror.
Netflix & Prime Video – Reliable mix of originals and hidden gems.
Tubi (free!) – Packed with cult classics and deep cuts.
Whether you’re snuggling up with family-friendly fun or braving the creepiest corners of cinema, the right movie has the power to transform your night into a memory. Pair it with a crackling fire, spiced cider, or a homemade blanket fort, and you’ll have the perfect fall evening.
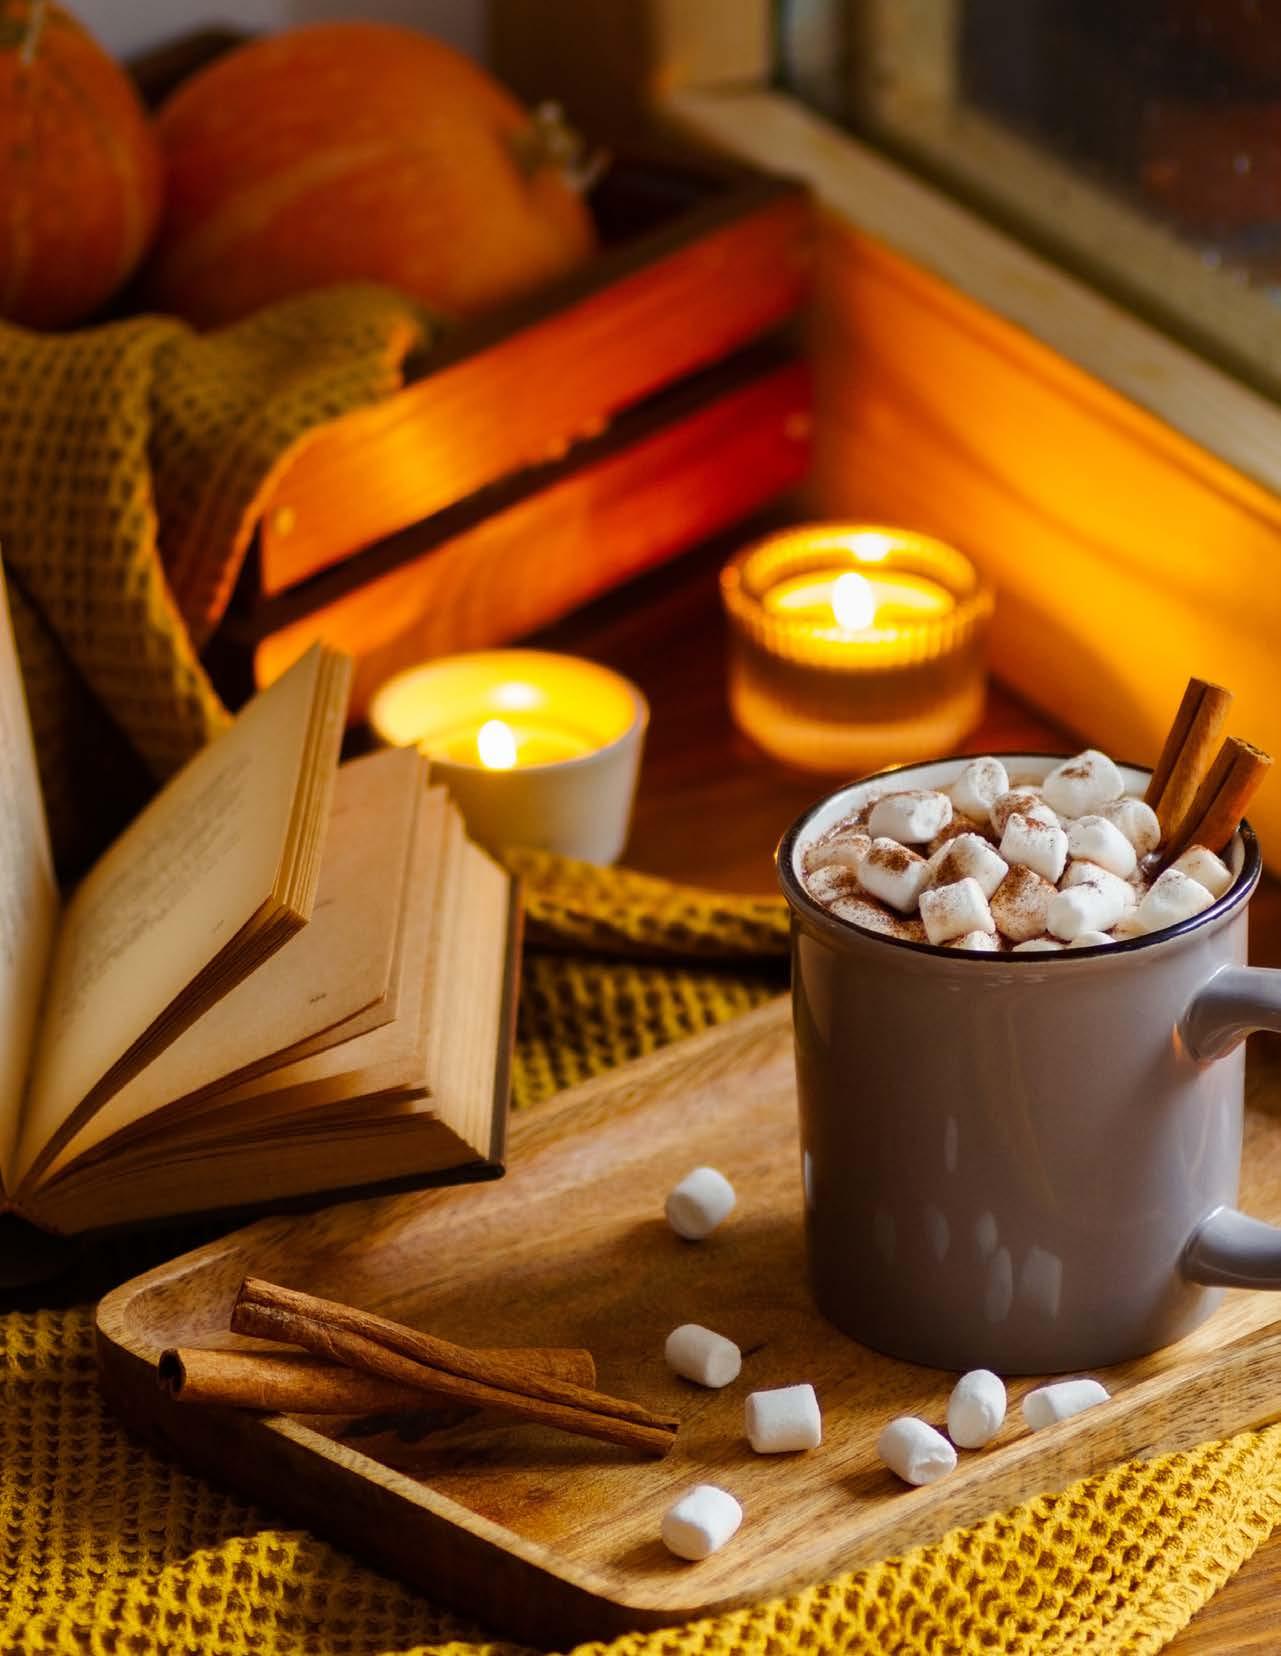
There’s a stillness to fall that no other season carries. The air sharpens, evenings stretch longer, and suddenly the smallest rituals feel extraordinary. A casserole bubbling in the oven, the steam of spiced apple cider curling into the air, the comfort of a flannel draped across your shoulders— these are the moments that remind us home is more than walls, it’s where connection lives.
This season, more than any other, draws us closer. Families circle the table, neighbors stop to chat under porches glowing earlier each night, and cozy nights at home become the backdrop for stories that will be retold for years. Whether it’s laughter spilling during a Halloween movie marathon or the simple comfort of a shared meal, fall isn’t about extravagance—it’s about intimacy. About savoring the kind of warmth you can only find when the world outside turns crisp.
But fall’s magic is not just nostalgic—it’s timely. Humans today are leaning into experiences that feel intentional and grounding. After years of unpredictability, we crave rituals that anchor us: familiar meals, gatherings that feel easy rather than elaborate, and spaces that bring us comfort without complication. Autumn delivers all of this effortlessly.
Inside these pages, you’ll find inspiration to lean into fall’s rhythm. From the way we dress, to the food we gather around, to the homes we shape, to the goals we set as the year winds down—fall is both an embrace and a compass. It slows us down, yes, but it also points us forward.


There’s a reason fall fashion feels timeless. Sweaters and flannels aren’t just staples—they’re signals of comfort, reliability, and warmth. This season, consumers are leaning toward pieces that balance coziness with longevity. It’s not about chasing trends, but choosing layers that fit every context: the school drop-off, a family dinner, a quiet night by the fire.
Style in autumn reflects the season itself, practical yet poetic. A scarf becomes a hug you carry with you. A well-worn flannel feels like a permission slip to slow down. Even color palettes echo the season’s poetry: rust, plum, golden ochre, and soft caramel tones that bring fall indoors and out. It’s fashion as a reflection of our need for ease and grounding.
Fall food has always been about more than taste—it’s about togetherness. At a time when schedules get busier, meals anchor us. A simple casserole, baked with love, has a way of bringing everyone to the table.
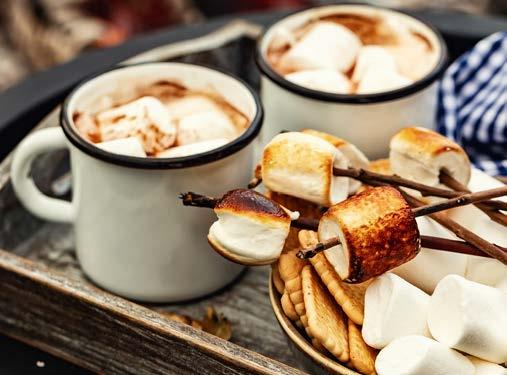
This year, many are leaning into family-centered comfort foods that stretch across meals and invite sharing. Charcuterie boards take on autumn flair, stacked with figs and cinnamon crackers. Hot cocoa bars become an event in themselves— overflowing with whipped cream, candy canes, and enough toppings to make Santa jealous. Recipes don’t need to be complicated to be meaningful. They just need to create space for gathering, for slowing down, for connection.
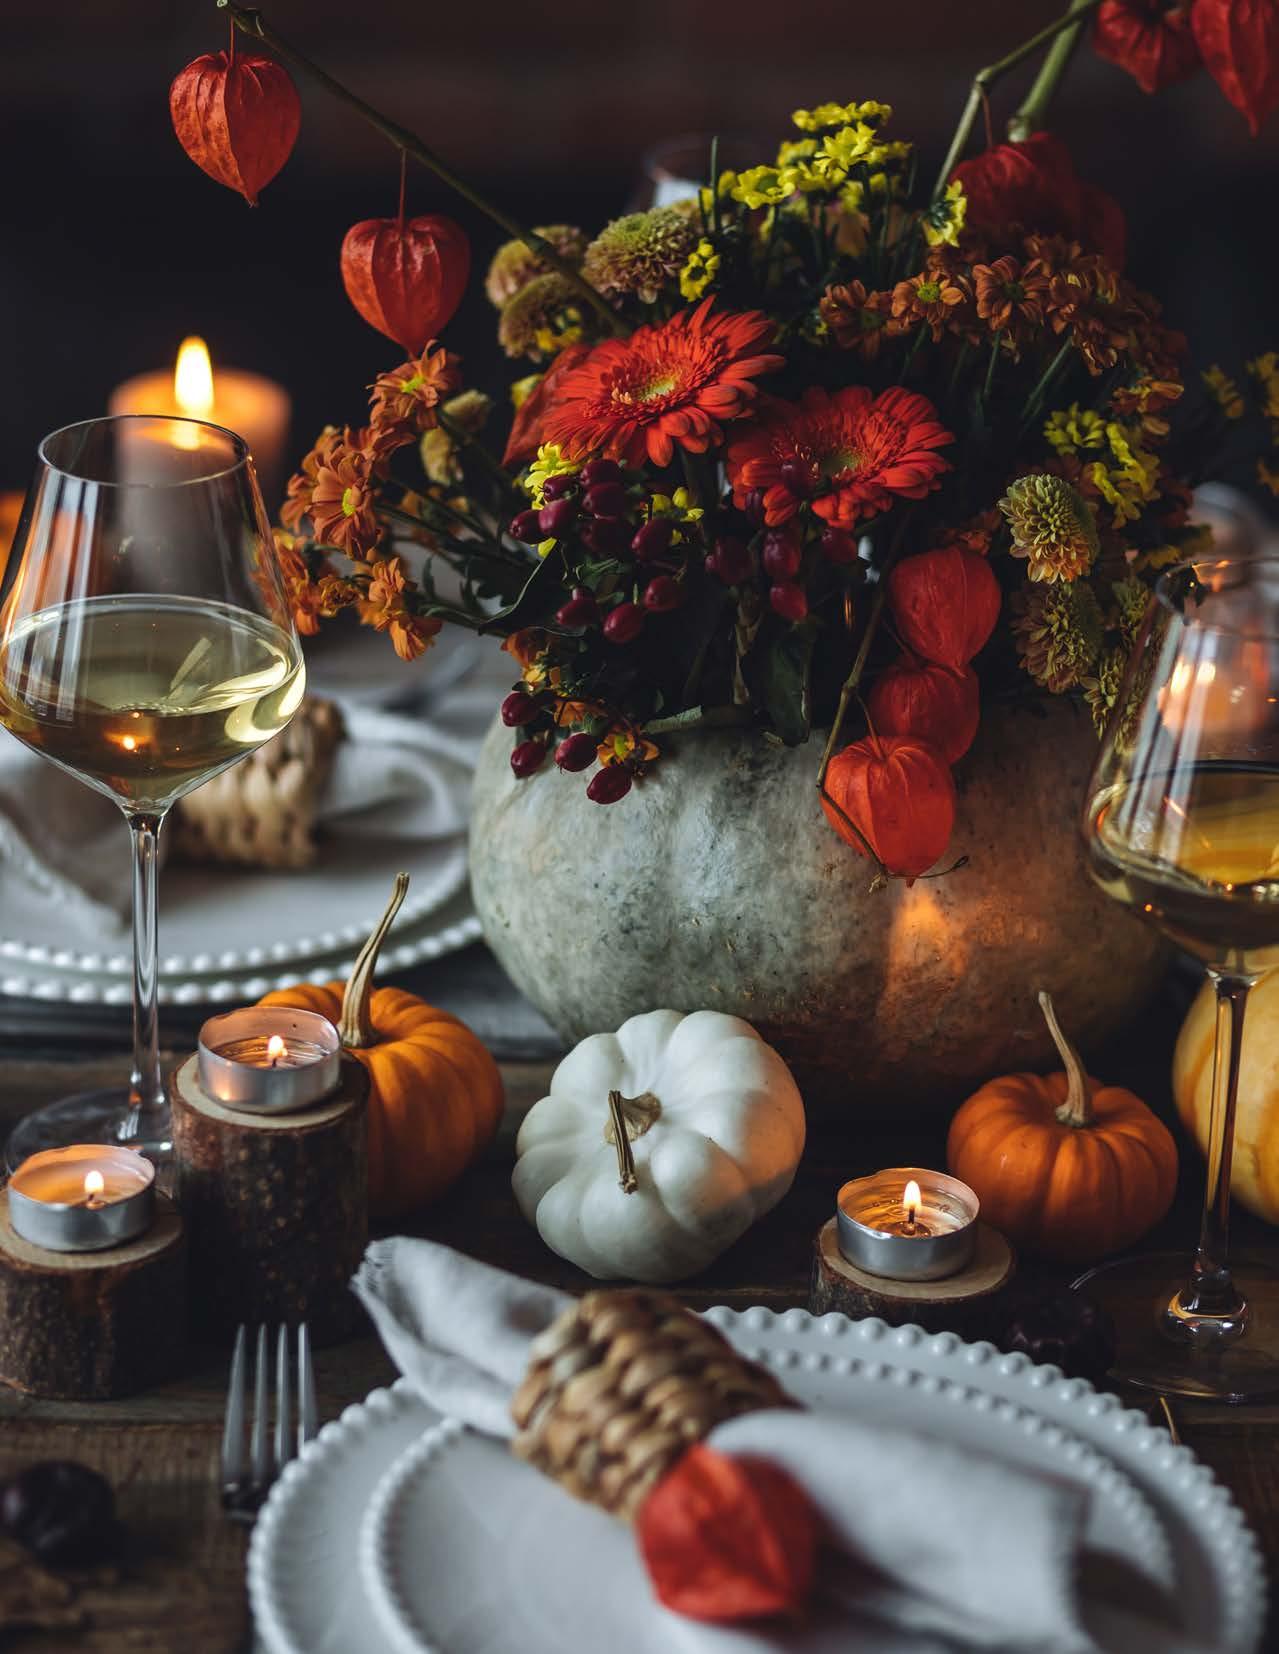
Our homes take on new roles in the fall—they become sanctuaries and stages for seasonal tradition. Some lean fully into nostalgic, bright Halloween décor, while others prefer an aesthetic that blends with their existing style. What unites them is the yearning for spaces that feel intentional, warm, and alive with tradition.
From candlelight to layered throws, from pie stations to holiday card displays, fall décor isn’t just about looks—it’s about creating an environment where people want to linger. It’s home as hospitality, and home as heart.
Fall is a paradox: both a winding down and a beginning. As the year closes, we naturally reflect— but many also use this season to gain momentum. It’s the perfect time to build new routines, set health goals, or create a vision for the year ahead.
November, in particular, offers an easy reset. Thirty days of simple, on-the-go fitness can carry you through the holiday season. At the same time, fall invites us inward: autumn asks us to slow down, to balance outward productivity with inner reflection. To gather energy from stillness as much as from motion. It’s in this balance—between reflection and motivation—that fall’s deepest magic resides.
Even finances find their rhythm in fall. It’s the season to look at budgets with fresh clarity, to map out what’s next, and even to explore the possibility of homeownership. Pre-approval may not feel cozy in the same way as cider or cocoa, but think of it as a gift to your future self—peace of mind before the holiday rush.
The true gift of fall is the way it holds opposites. It’s comfort and clarity, nostalgia and forward motion, intimacy and anticipation. It reminds us to gather, to savor, to look inward—while also giving us a head start toward what comes next.
So whether it’s sweaters and flannels, casseroles and cider, traditional décor or modern twists, movie nights or meal prep hacks, wellness routines or financial goals—fall is an invitation. To live fully in the present, while preparing joyfully for the future. Here’s to falling for


Luxurious self-care doesn’t have to mean a pricey trip to the spa.
Between busy schedules and holiday budgets, finding time (and money) for a salon visit isn’t always easy. The good news? Some of the best beauty treatments can be done right in your own home, often with ingredients you already have in your kitchen. From glowing skin to shiny hair, here are DIY treatments that bring the spa experience to your bathroom no appointment necessary.

Self-Care Rituals
• DIY Lip Balm: Mix melted beeswax, coconut oil, and a few drops of peppermint oil. Pour into small tins or tubes for a personal touch.
• Under-Eye Green Tea Compress: Chill used green tea bags in the fridge and place them under your eyes for 10 minutes to reduce puffiness.
• At-Home Facial Steam: Fill a bowl with hot water, add a few sprigs of rosemary or a drop of eucalyptus oil, drape a towel over your head, and steam for 5–10 minutes.


Glowing Skin, Straight from the Pantry
Honey & Oat Soothing Mask
• Why it works: Honey is naturally antibacterial and moisturizing, while oats calm irritation.
• How to make it: Mix 2 tablespoons of ground oats with 1 tablespoon of honey and a splash of warm water. Apply for 10–15 minutes, then rinse.
• Perfect for: Calming redness, adding softness.
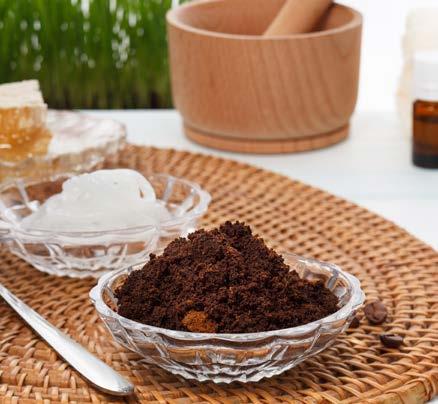
Coffee & Yogurt Brightening Scrub
• Why it works: Coffee grounds gently exfoliate while yogurt’s lactic acid smooths and brightens.
• How to make it: Combine 1 tablespoon of used coffee grounds with 2 tablespoons of plain yogurt. Massage gently onto damp skin, then rinse.
• Perfect for: A morning pick-me-up that wakes up your skin.
Coconut Oil Deep Treatment
• Why it works: Rich in fatty acids, coconut oil penetrates the hair shaft for deep hydration.
• How to use it: Warm a tablespoon of coconut oil in your hands and apply from mid-length to ends. Leave on for 30 minutes (or overnight under a shower cap), then shampoo out.
• Perfect for: Dry, frizz-prone hair.
• Why it works: Balances scalp pH, adds shine, and removes buildup.
• How to use it: Mix 2 tablespoons of apple cider vinegar with 1 cup of water. After shampooing, pour over hair, let sit for a minute, then rinse.
• Perfect for: Dull, heavy-feeling hair.
Body Bliss
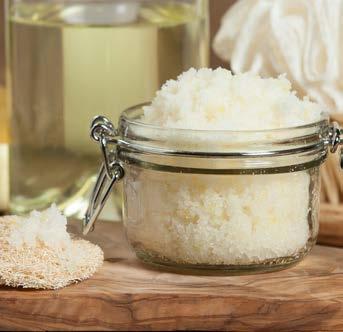
DIY Sugar Scrub
• Why it works: Exfoliates dead skin cells and boosts circulation.
• How to make it: Mix 1 cup of sugar with ½ cup of olive oil and a few drops of your favorite essential oil. Store in a jar for up to two weeks.
• Perfect for: Silky smooth arms, legs, and hands.
DIY beauty isn’t just about saving money it’s about slowing down, reconnecting with yourself, and creating little moments of care in the comfort of your home. So, light a candle, put on your favorite playlist, and transform your bathroom into your personal spa sanctuary.
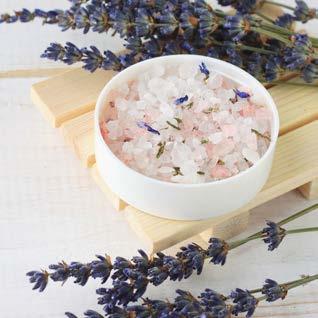
Epsom Salt Detox Bath
• Why it works: Soothes sore muscles and reduces stress.
• How to use it: Add 2 cups of Epsom salt and a few drops of lavender oil to warm bathwater. Soak for at least 20 minutes.
• Perfect for: Relaxing evenings after long days.
DESIGN/DIY
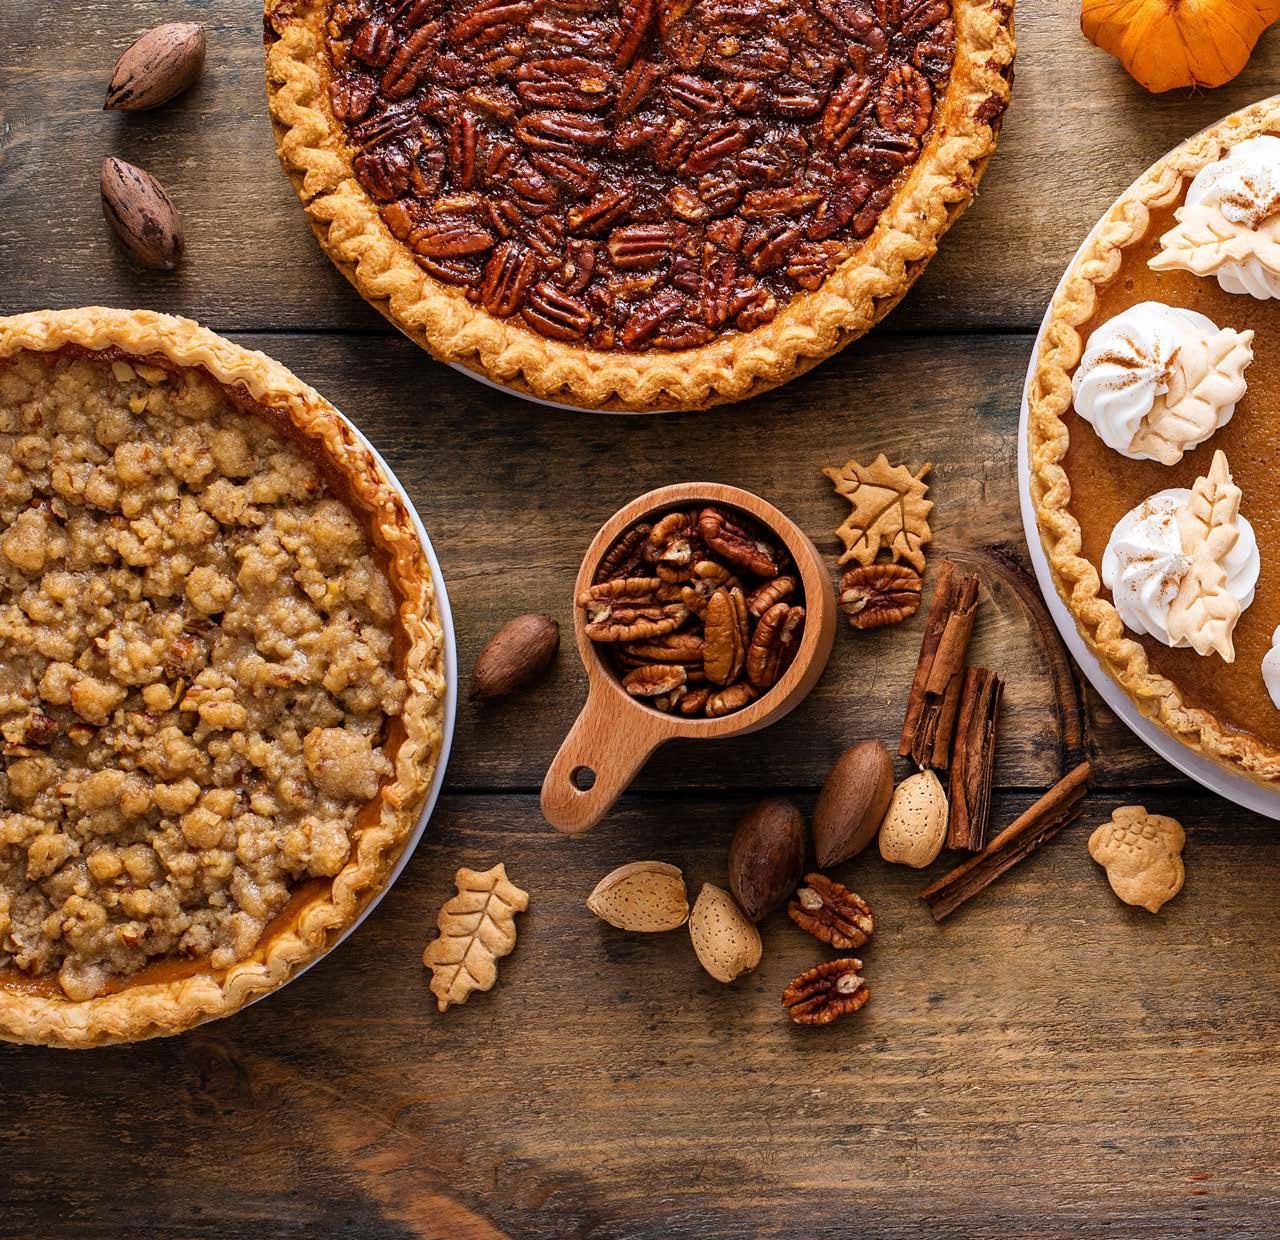
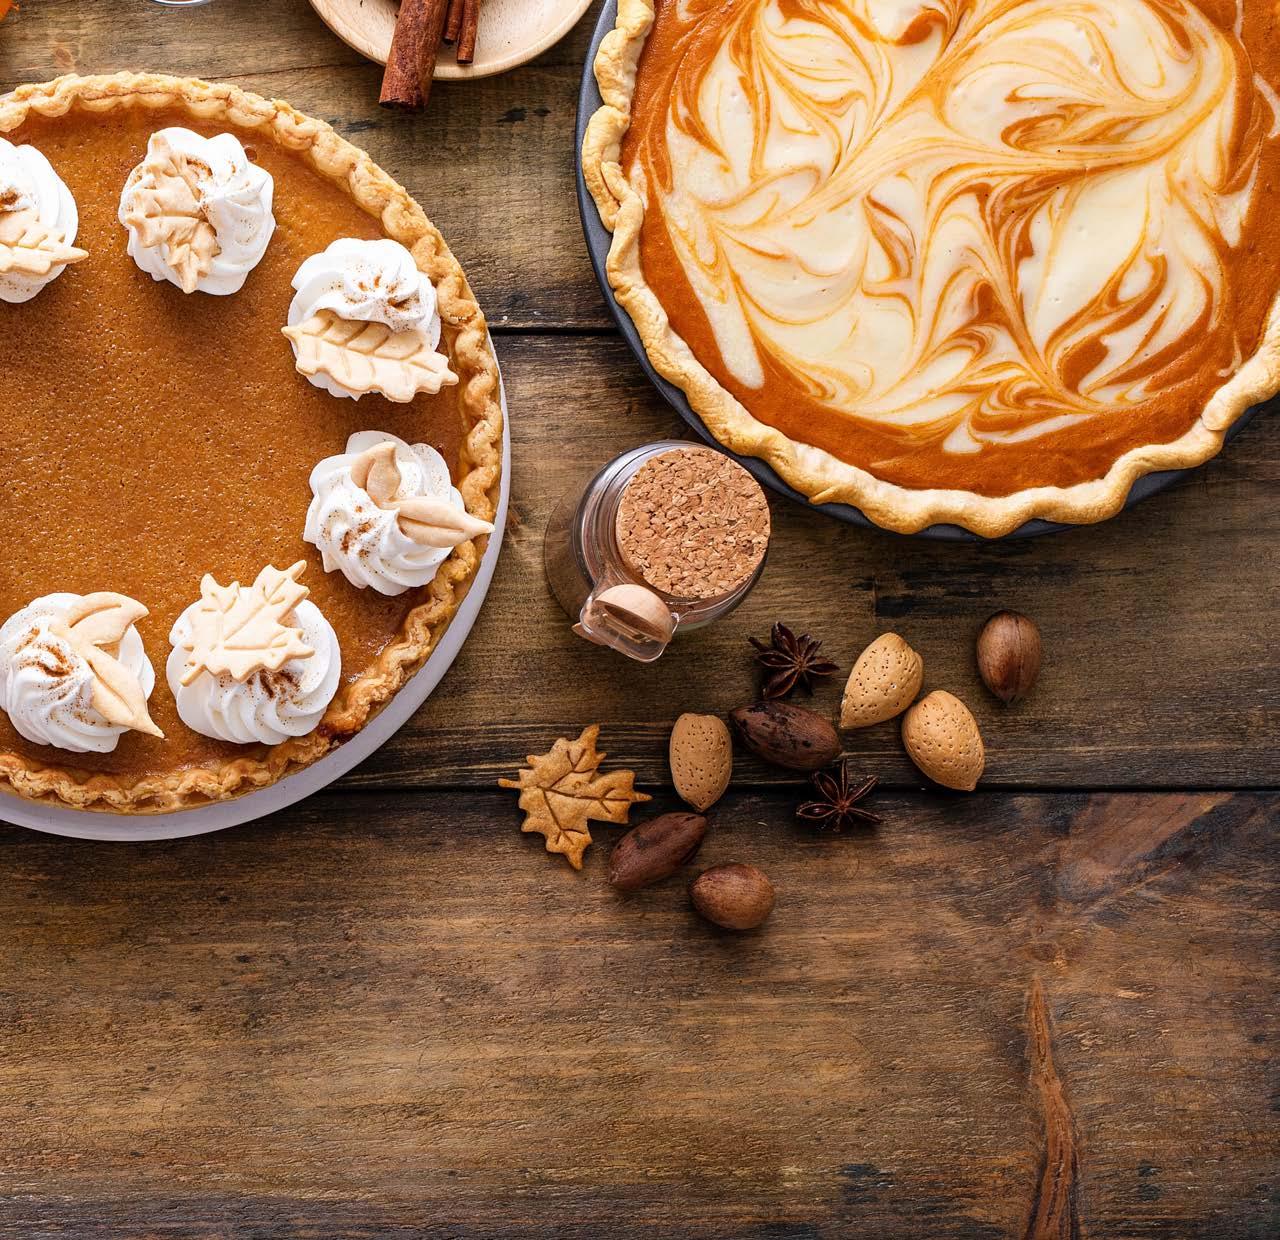
Nothing feels more festive—or more inviting— than gathering around a table of desserts. A DIY pie station elevates that experience, transforming your holiday or fall get-together into something both delicious and decorative. Think of it as the ultimate two-for-one: a dessert spread that doubles as a statement piece for your celebration.
Start with variety. Offer a mix of flavors—classic pumpkin, tart apple, rich pecan, and maybe one adventurous option like chocolate chess or cranberry crumble. Mini pies or hand pies add charm and make sampling easier. Displaying different shapes and sizes creates visual interest while giving guests plenty of choice.
Presentation is everything. Use cake stands, wooden boards, or tiered trays to create height and dimension. Rustic crates or cutting boards lean into cozy fall vibes, while metallic stands or glass domes add a more polished, elegant look. Mixing textures—wood, glass, linen— makes the station feel thoughtfully curated.
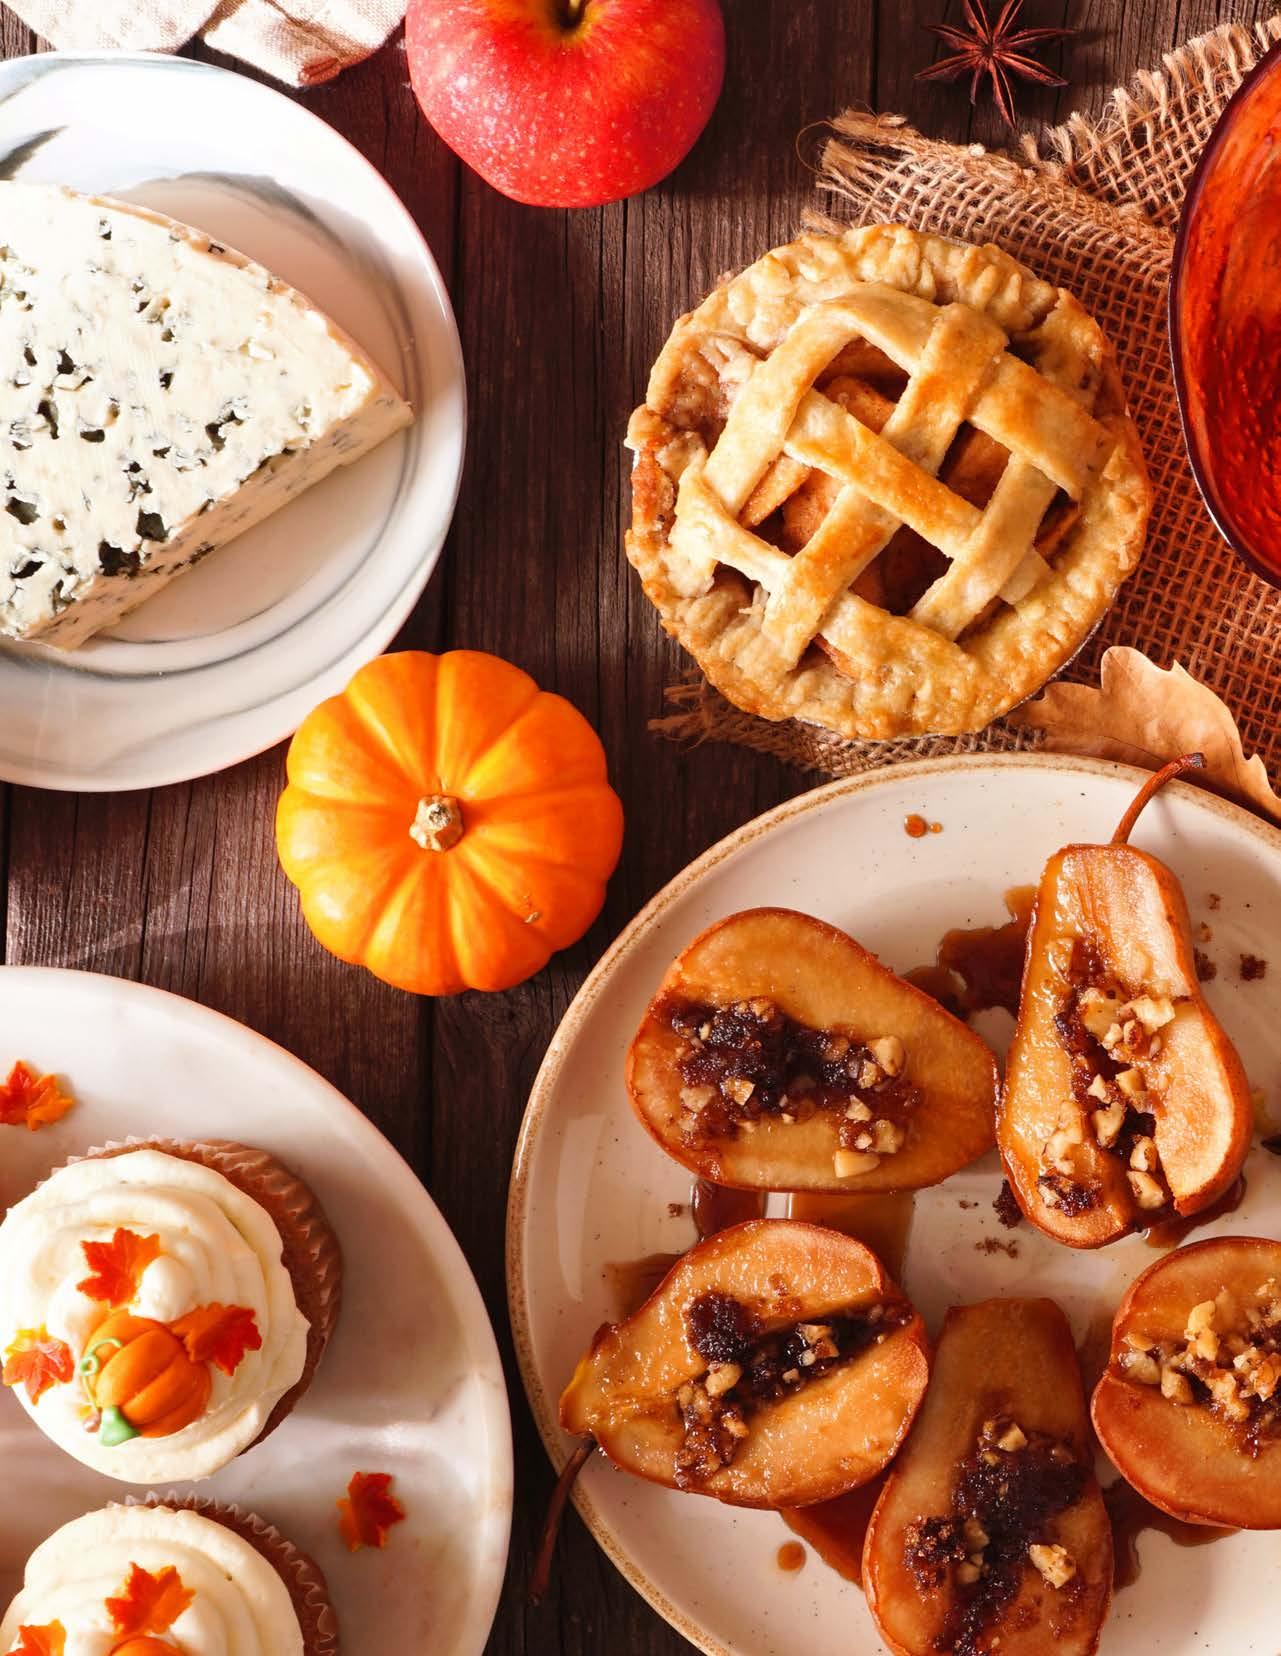
Turn your dessert table into décor by styling around the pies. Scatter seasonal accents like mini pumpkins, pinecones, or fresh greenery. Drape a plaid table runner, or layer neutral linens for warmth. Candles in varying heights add glow, while fairy lights tucked around the display bring a magical, inviting touch.
Little extras take your pie station from good to unforgettable. Provide pretty plates, vintage forks, and napkins in fall hues. Create handwritten pie labels on kraft paper or chalkboard signs so guests know exactly what they’re digging into. A toppings tray with whipped cream, caramel drizzle, or cinnamon sugar gives everyone a chance to customize their slice.
Encourage guests to sample and share. Offer pie flights (small slices of multiple flavors) so no one has to choose just one. If you’re feeling extra creative, include a DIY topping station or invite friends to bring their own signature pie. It’s an easy way to spark conversation and build memories around dessert.
A pie station isn’t just about food—it’s about creating an experience. By blending delicious flavors with thoughtful styling, you’ll build a centerpiece that delights both the eye and the appetite. It’s proof that sometimes the most inviting décor is the kind you can eat.

Holiday décor doesn’t always have to follow tradition. While a big, green tree is a staple for many, it isn’t the only way to bring festive cheer into your home. Whether you’re short on space, looking for something sustainable, or just want to shake things up, tree alternatives can be just as magical—sometimes even more so.


If clean lines and simplicity are your style, consider a minimalist approach. Wall-mounted “trees” made from string lights, wooden dowels, or washi tape create a festive focal point without taking up floor space. Add a few ornaments or photos clipped along the design, and you’ll have a modern holiday statement that feels personal and fresh.
Love the cozy, organic look of the season? Gather large branches, dried pampas grass, or eucalyptus stems and arrange them in a tall vase. Hang a few ornaments or weave in fairy lights for a whimsical glow. It’s a budgetfriendly option that nods to nature without requiring a full evergreen.
For the crafty decorator, alternatives can be as creative as you want them to be. Try stacking wrapped gift boxes into a tree shape, building a “book tree” with stacked novels, or arranging ladders with garlands and ornaments. Each option doubles as décor and conversation starter—proof that holiday spirit thrives in creativity.

Why not let your “tree” work double-duty? A decorated coat rack, shelving unit, or even a bar cart can transform into a holiday centerpiece. Add twinkle lights, seasonal trinkets, and cozy touches like candles or pinecones. You’ll get festive vibes without sacrificing function or space.
For those seeking eco-friendly options, think reusable and long-lasting. Felt trees, wooden cutouts, or even sculptural metal trees can be used year after year. These pieces don’t just save resources—they often become unique heirlooms that stand out far more than a traditional tree.
The holidays aren’t defined by tradition—they’re defined by how you make them your own. Whether you’re crafting a book tree, lighting up a ladder, or arranging a vase of branches, the goal is the same: creating warmth, joy, and a festive atmosphere. Your holiday “tree” can be as unique as you are—and still look amazing.


Everyholidayseason,thecardsrollin:smilingfamilyphotos,glitter-dusted greetings, and notes that remind us how connected we are. But let’s bethemhonestmostofusendupstickingthemtothewallwithtapeorscattering on a counter. This year, give your holiday cards the spotlight they(anddeservewithcreativedisplaysthatdoubleasfestivedécor.Herearesimple stylish)hackstoupgradeyourholidaycardgame.
String twinkle lights, greenery, or ribbon across a mantel, staircase, or doorway. Use mini clothespins, ornament hooks, or decorative clips to attach cards along the line. It instantly adds sparkle and creates a warm, festive focal point.
Tip: Layer fresh pine garland with fairy lights for a scent-andsight combo that feels straight out of a holiday movie.

Turn an old frame into a holiday card gallery. Remove the glass, stretch festive ribbon or twine across the frame, and clip cards onto the lines. Hang it like a piece of art in your entryway.

Style twist: Spray-paint thrifted frames in metallic gold or forest green for a luxe holiday vibe.
Skip the greenery alone turn your holiday wreath into a rotating card display. Use small clips or pins to tuck cards around the circle. It’s an easy way to greet guests with a little love from friends and family before they even step inside.
Gather bare branches (real or faux) and arrange them in a large vase. Clip cards to the branches like ornaments. This minimalist hack works beautifully on dining tables, kitchen islands, or console tables.
Bonus: Swap cards for photos in January, and you’ve got instant winter décor.
Arrange cards in the shape of a Christmas tree directly on your wall or bulletin board using washi tape or pushpins. Top it with a star ornament for a playful, modern twist.
Tip: Keep the cards in color order (reds, greens, neutrals) for a sleek, intentional look.
6.

Not all displays need to hang. Place cards in woven baskets, tiered trays, or decorative bowls on coffee tables and shelves. Add pinecones or ornaments to make it feel festive and inviting for guests to flip through.

7.
Wrap wide ribbon down the length of interior doors or cabinet panels, then clip or pin cards along the ribbon. It’s space-saving, functional, and adds instant cheer to overlooked spots like kitchens and mudrooms.
Paint inexpensive clipboards in holiday hues or use a chalkboard as a backdrop. Swap out cards as they arrive, and add doodles, greetings, or countdowns alongside them. Perfect for entryways or kids’ spaces.
Holiday cards are about connection, love, and celebration. By giving them a thoughtful display, you turn those heartfelt messages into part of your home’s holiday story. This year, skip the tape and lean into creativity your cards deserve better, and so does your décor.
BAKING POWDER
1 Teaspoon
1/2 tsp cream of tartar + 1/4 tsp baking soda
LIGHT BROWN SUGAR
1 Cup
1 cup dark brown sugar OR 2 TBL molasses + 1 cup granulated sugar OR 1/2 cup firmly packed dark brown sugar + 1/2 cup granulated
COCOA POWDER
1/4 Cup
1 ounce unsweetened chocolate, chopped superfine or melted.
HALF & HALF
1 Cup
1-1/2 TBL butter + enough milk to equal 1 cup
BAKING SODA
1 Teaspoon
2 tsp double-acting baking powder + replace acidic liquid ingredient in recipe with non-acidic liquid
DARK BROWN SUGAR
1 Cup
1 cup light brown sugar OR 1/4 cup molasses + 1 cup granulated sugar OR 1 TBL molasses + 1 cup firmly packed light brown sugar
CORN SYRUP
1 Cup
1 cup sugar dissolved in 1/4 cup warm water OR 1 cup honey
HEAVY CREAM
1 Cup
3/4 cup milk + 1/3 cup butter; OR 1 cup evaporated milk OR shelf stable cream
Cup
3/4 cup soft bread crumbs OR 1/4 cup cracker crumbs OR 1/4 cup crushed cornflakes OR 2/3 cup regular rolled oats
FRESH HERBS
To equal 1 TBL fresh herbs substitute 1 teaspoon dried. Dried herbs are generally more potent & concentrated than fresh herbs.
LEMON JUICE
1 Teaspoon
1 tsp lime juice, OR 1/2 tsp vinegar; OR 1 tsp white wine
SOY SAUCE
1/2 Cup
1/2 cup coconut aminos OR liquid aminos (like Bragg's) OR 1/4 cup Worcestershire sauce + 1 TBL water
TBL = TABLESPOON
TSP = TEASPOON
1 Cup
1 cup plain yogurt OR 1 TBL lemon juice OR vinegar plus enough milk to 1 cup (let stand 5-10 minutes)
BREAD FLOUR 1 Cup
1 Cup
7/8 cup vegetable oil + 1/2 tsp salt (omit salt for unsalted butter); OR coconut oil, unsweetened apple sauce (do not sub with whipped butter or margarine)
1 cup all-purpose flour + 1 tsp wheat gluten OR try subbing 1 cup all-purpose flour. May not be ideal, but should work in a pinch. CAKE FLOUR
CREAM OF TARTAR
1/2 Teaspoon
1/2 tsp white vinegar or lemon juice
SWEETENED CONDENSED MILK
14 oz can
2/4 cup white sugar + 1/2 cup water + 1 1/8 cups dry powdered milk; bring to a boil, stirring until thickened, about 15-20 minutes
1 Cup
3/4 cup + 2 TBL all-purpose flour + 2 TBL cornstarch
EGG
1 Egg
1/4 cup vegetable oil, 1/4 cup mashed banana, 1/4 cup unsweetened applesauce. OR 1 TBL ground flaxseed with 3 TBL water, stir to combine, and let stand for 5 minutes to thicken.
ROOT
Clove 1/2 tsp minced garlic or 1/8 tsp garlic powder, OR 1 cube Dorot Frozen Garlic
Cup
1/4 cups white sugar + 1/3 cup water
MAYONNAISE
Tablespoon 1/4 tsp ground ginger; ground is much more concentrated in flavor than fresh, OR 1 -2 cubes Dorot Frozen Ginger
cup tomato sauce + 1 TBL sugar + 1 tsp vinegar
OR CHICKEN BROTH 1 Cup
1 cup vegetable broth; OR 1 bouillon cube (1 tsp granules or soup base) + 1 cup hot water, OR 1 TBL soy sauce + ¾ cup + 3 TBL water
BASED SOUP
Cup 1 TBL flour, 3 TBL butter, ½ cup chicken broth, 1/2 cup milk. Melt butter, whisk flour until bubbly, slowly add broth & milk whisk until thickened. Season with salt & pepper.
SOUR CREAM
1 Cup
1 Cup 1 cup plain yogurt; OR 1 cup sour cream MILK
1 cup non-dairy milk; OR 1 cup water OR juice; OR 1/4 cup dry powdered milk + 1 cup water; OR 2/3 cup evaporated milk + 1/3 cup water
TOMATO SAUCE
2 Cup
3/4 cup tomato paste + 1 cup water; mix to combine
VINEGAR (BALSAMIC)
1 Tablespoon
1 TBL cider vinegar or red wine vinegar + 1/2 tsp sugar
1 Cup
1 cup plain yogurt; OR 3/4 cup buttermilk + 1/3 cup butter; OR 1 TBL lemon juice OR vinegar + 3/4 cup + 3 TBL cream

https://blackberrybabe.com
DIRECTIONS:
Preheat oven to 350° F.
Prepare your 9×13” casserole dish with cooking spray.
6 - 8
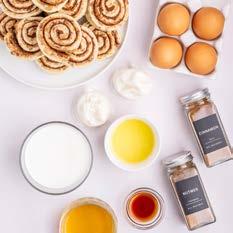
INGREDIENTS: 55 MIN
4 eggs
1/2 c. half and half or heavy cream
2 tsp. vanilla extract
1/4 tsp. cinnamon
1/4 tsp. nutmeg
2 tubes refrigerated cinnamon rolls, cinnamon roll dough, 16 rolls total FOR TOPPING:
1/4 c. maple syrup
2 cinnamon roll icing packets

In a medium bowl add the eggs, half and half (or heavy cream), vanilla extract, cinnamon, and nutmeg. Whisk vigorously until fully combined. Set aside.
Cut cinnamon roll dough into 1-inch pieces with scissors and place them into the baking dish.
Pour the egg mixture over the top of the cinnamon roll pieces.
Place casserole dish into a preheated oven. Bake for 30-35 minutes until the top is golden brown and slightly crunchy.
Remove from the oven.
Drizzle the maple syrup and included icing packets on top of the warm cinnamon rolls casserole. Then, allow to rest for 5-10 minutes before slicing. Serve warm.
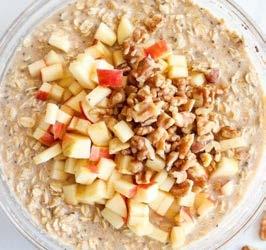
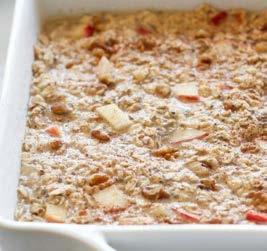
DIRECTIONS:
Preheat the oven to 375° F.
https://therealfooddietitians.com
INGREDIENTS:
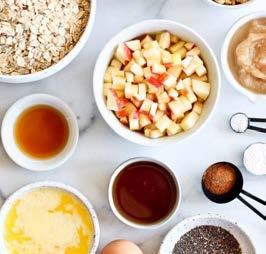
2 & 3/4 c. old fashioned rolled oats
1 tbsp. chia seeds (optional)
1 & 1/2 tsp. ground cinnamon
1 tsp. baking powder
1/4 tsp. fine salt
1/4 c. maple syrup or honey
1/2 c. unsweetened applesauce
2 large eggs
1 & 1/4 c. milk of choice
1/4 c. melted unsalted butter or coconut oil
1 tsp. pure vanilla extract
1 c. shredded apple or finely diced, more for topping
1/3 c. chopped walnuts, toasted
Spray a 9×9 or 8×8-inch baking dish with cooking spray.
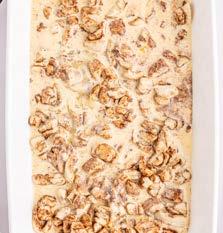
In a bowl, combine the old-fashioned rolled oats, cinnamon, chia seed, baking powder, fine salt, maple syrup, applesauce, eggs, milk, butter, and vanilla. Stir until combined.
Fold in the apples and toasted walnuts (see toasting notes below).
Transfer batter to the prepared dish. Top with a few chopped toasted walnuts.
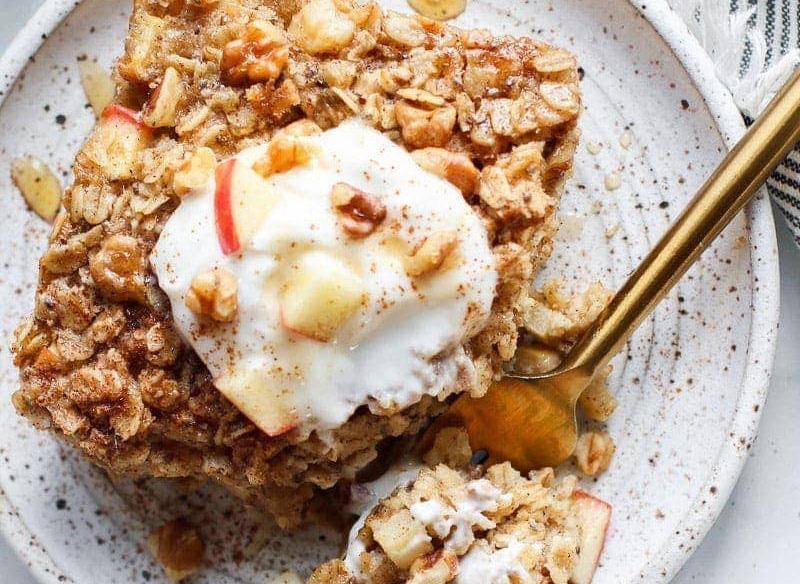
Bake for 30-35 minutes or until the center is set.
Let sit for 10 minutes before serving.
Top servings with whipped topping or yogurt and maple syrup, if you please.
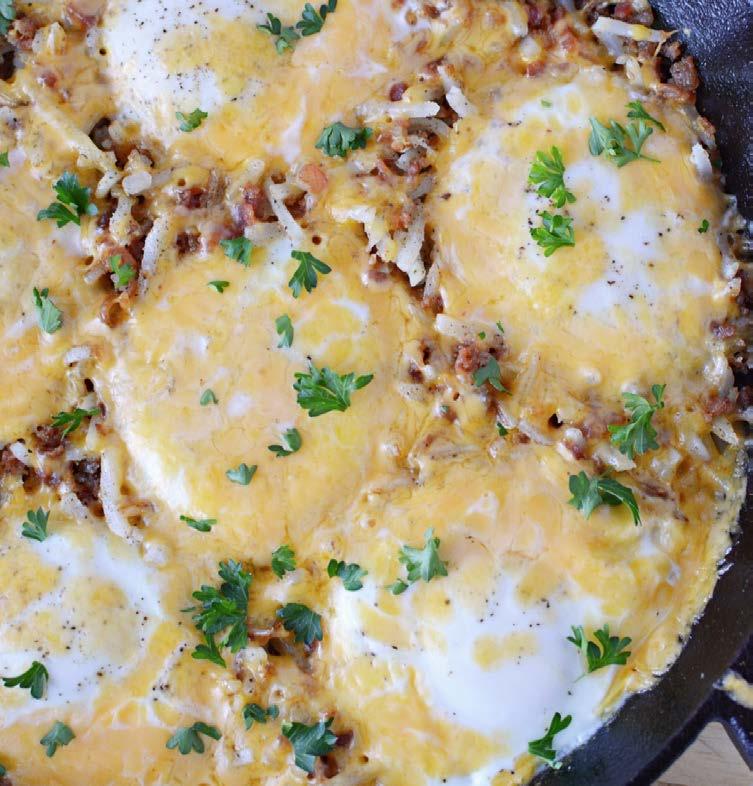
https://therebelchick.com
DIRECTIONS:
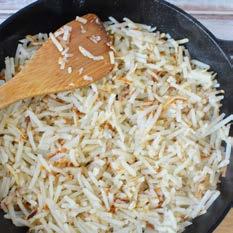
INGREDIENTS: 20
2 tbsp. vegetable oil
16 oz. frozen hash browns
1 tsp. salt
1 tsp. garlic powder
1/2 tsp. ground pepper
1 c. real bacon bits
6 eggs
1 c. shredded cheddar cheese
Chopped fresh parsley optional for serving

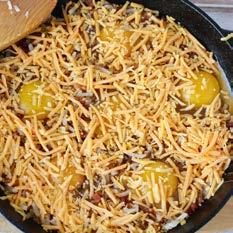
Add oil, frozen hash browns, salt, garlic powder and pepper to a skillet and stir. Cook over medium high heat, stirring occasionally until potatoes begin to brown. About 10-12 minutes.
Add in your bacon bits and spread them evenly throughout the potatoes in the cast iron skillet. Spread potatoes evenly into the pan and use the back of a spoon or measuring cup to create 6 divots in the potatoes.
Add 1 egg in each divot. Season with salt and pepper and sprinkle with cheese.
Cover and heat for 5-10 minutes depending on how done you'd like your egg yolk.
Remove from heat. Top with chopped fresh parsley and serve immediately.

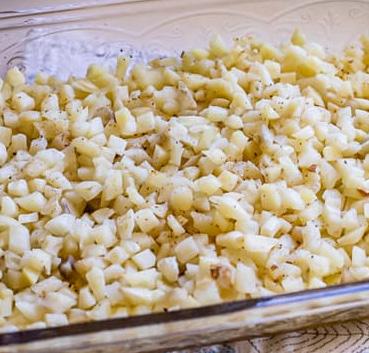


DIRECTIONS:
Preheat the oven to 400° F.
MAKE THE POTATO LAYER
https://therealfooddietitians.com
1/2 c. butter
1 (30-oz) package shredded hash brown potatoes, diced is ok Salt and pepper
1 lb. breakfast sausage, bulk
1/2 green pepper, chopped
1/2 red pepper, chopped
1/2 small onion, diced
1 & 1/2 c. shredded Monterey Jack cheese, packed
1 & 1/2 c. shredded sharp cheddar cheese, packed
8 large eggs
1 & 1/3 c. half and half, cream, evaporated milk, or whole milk*
1 tsp. seasoned salt
1/4 tsp. salt
1/2 tsp. black pepper
1/4 tsp. dry mustard, optional
Add the package of frozen (shredded is best, diced is ok) hash browns to a 9×13 inch dish. You don't have to thaw them first. Spread them out evenly.
Melt 1/2 cup butter in a small bowl in the microwave and pour the butter over the hash browns. Mix it together so the potatoes get coated. Sprinkle with salt and pepper.
Place the pan in the oven and bake for 30-35 minutes, until the potatoes are mostly cooked and some are starting to lightly brown. Remove from the oven. Lower the oven temperature to 350.
PREPARE THE SAUSAGE LAYER
Meanwhile, chop up the green and red pepper. Chop half of a small onion. Make sure all the veggies are chopped small.
Add 1 pound breakfast sausage and all the veggies to a skillet set over medium high heat. Break up the sausage and saute for 5-7 minutes, until the sausage is browned and the onion is getting soft. Drain the grease if there is any.
Add the cooked sausage mixture on top of the baked hash browns. You can spread it out so that it is a layer on top of the potatoes, or you can stir it in so everything is evenly distributed. Add cheese. Sprinkle 1 and 1/2 cups Monterey Jack and 1 and 1/2 cups cheddar cheese over the top.
MAKE THE EGG MIXTURE
In a large bowl use a whisk to stir together 8 eggs, 1 and 1/3 cups half and half,* salt, pepper, and dry mustard.
Pour the egg mixture over the casserole, making sure to distribute evenly.
Bake at 350 (remember to lower the oven temperature) for about 35-45 minutes, until the edges are browned and bubbly, and the center doesn’t jiggle a lot when you shake the pan.
Take out of the oven and let set for 5 minutes before serving.

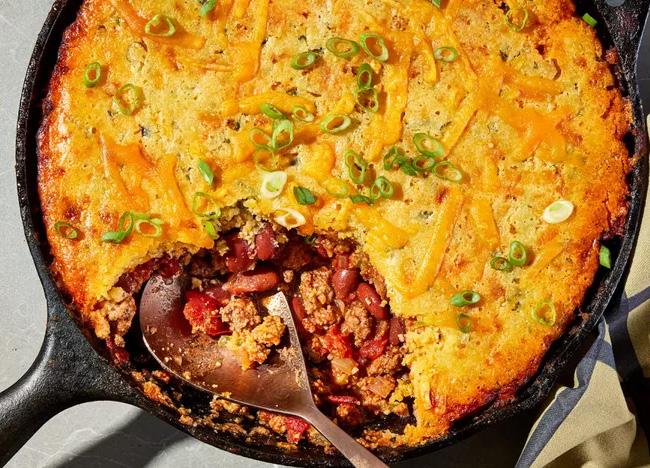
DIRECTIONS:
Preheat oven to 400° F.

INGREDIENTS:
Cooking spray
1 large egg
1 box corn muffin mix
1/2 c. canned creamed corn
1/2 c. sour cream
1 tbsp. extra-virgin olive oil
1 yellow onion, chopped
1 tsp. chili powder
1 tsp. ground cumin
Kosher salt
Freshly ground black pepper
2 cloves garlic, finely chopped
1 lb. ground beef
1/3 c. red enchilada sauce
1 c. shredded cheddar
1 c. shredded Monterey Jack
Chopped fresh cilantro


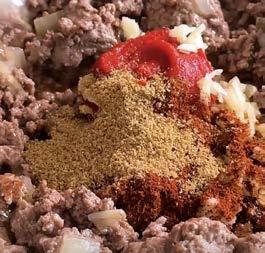
Grease a large ovenproof skillet with cooking spray. In a large bowl, whisk egg, corn muffin mix, creamed corn, and sour cream. Transfer to prepared skillet.
Bake cornbread until golden, about 20 minutes. Let cool.
Meanwhile, in a large skillet over medium heat, heat oil. Add onion, chili powder, and cumin; season with salt and pepper. Cook, stirring, until softened, about 7 minutes. Add garlic and cook, stirring, until fragrant, about 1 minute more. Add ground beef and cook, breaking up meat with a wooden spoon, until no longer pink, about 6 minutes.
Poke entire surface of cornbread with a fork and pour enchilada sauce over. Top with beef mixture, cheddar, and Monterey Jack.
Cover dish with foil and bake tamale pie until cheese is melty, about 20 minutes.
Turn on broiler. Uncover dish and broil, watching closely, until cheese is golden, about 5 minutes. Sprinkle with cilantro.


DIRECTIONS:
DOUGH:
https://sallysbakingaddiction.com
1 lb homemade rough puff pastry, or store-bought frozen & thawed puff pastry (2 sheets)
EGG WASH:
1 large egg beaten
1 tbsp. water or milk
FILLING:
1 c. fresh cranberries, rinsed*
6 tbsp. water
2 tbsp. fresh orange juice*
1/3 c. granulated sugar
1/2 tsp. orange zest*
1/2 tsp. pure vanilla extract
6 oz. brie cheese
Coarse sugar, for sprinkling
1–2 pecan halves for each, optional
Flaky sea salt & fresh thyme, optional
Prepare homemade rough puff pastry dough through 2nd refrigeration. If using store-bought frozen puff pastry, make sure it’s thawed. Keep either dough in the refrigerator until step 4 below.
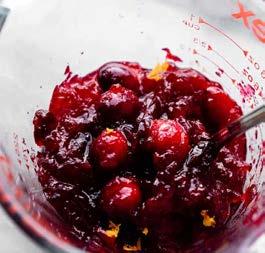
MAKE THE CRANBERRY SAUCE:
After rinsing the cranberries, set 1/4 c. cranberries aside. You will stir these in at the end for extra texture. Combine the remaining cranberries, water, orange juice, and sugar together in a medium saucepan over medium heat.
Stir occasionally as the mixture comes to a simmer. Once simmering, reduce heat to medium-low. While stirring occasionally, continue to cook until liquid has reduced and cranberries have burst and thickened, about 10 minutes.
Remove from heat and stir in 1/4 c. reserved cranberries, orange zest, and vanilla extract. Allow to cool slightly while you continue.
Preheat oven to 400°F. Grease a 12-cup muffin pan.
On a lightly floured work surface using a lightly floured rolling pin, roll pastry dough into a 12×16-inch rectangle; it doesn’t have to be perfect. With a sharp knife or a pizza cutter, cut dough into 12 4-inch squares.
EGG WASH & ASSEMBLE:
Brush egg wash all over puff pastry squares, including the edges. Transfer the squares to the prepared muffin pan, pressing them down to fill each cup as a “crust.” Slice the brie into 12 pieces, about 1/2 oz. each. Place the slices of brie in the centers of the dough crusts. Top each with a spoonful of slightly warm or cold cranberry sauce. Gently fold the corners of the dough in toward the center of each tart. Sprinkle coarse sugar over the tops of tarts.
Bake for 20 minutes, or until tarts are golden brown. If adding pecans, at the 10-minute mark, gently place them in the center of each tart and continue baking for the remaining 10 minutes.
Remove from the oven and garnish each tart with flaky sea salt and fresh thyme leaves. Cool for a couple minutes, and then use a spoon to help remove the tarts from the pan. Serve warm.
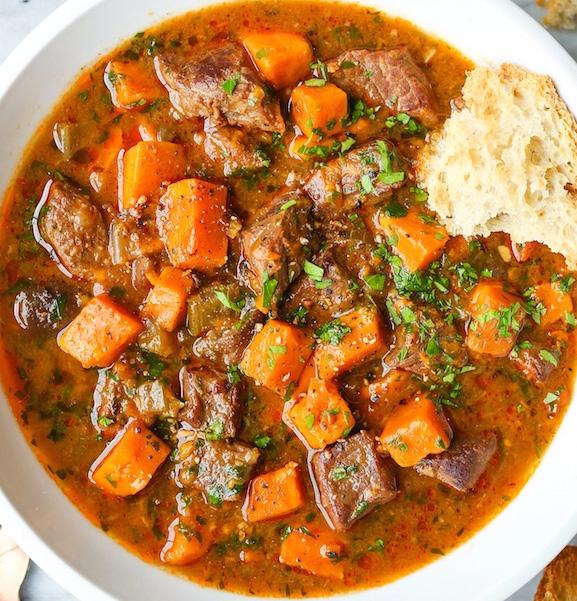
https://damndelicious.net
DIRECTIONS:

INGREDIENTS:
2 tbsp. olive oil
2 lbs. top sirloin steak, diced
Salt and pepper, to taste
1 medium sweet onion, diced
1 medium carrot, peeled and diced
2 celery ribs, diced
3 cloves garlic, minced
8 oz. cremini mushrooms, quartered
1/4 c. all-purpose flour
2 tbsp. tomato paste
1/2 c. dry red wine
4 c. beef stock
4 sprigs fresh thyme
2 bay leaves
1 large sweet potato, about 1 1/2 pounds, peeled and cut in 1/2-inch chunks
2 tbsp. chopped fresh parsley leaves


Heat olive oil in a large stockpot or Dutch oven over medium heat. Season steak with salt and pepper, to taste. Working in batches, add steak to the stockpot and cook, stirring occasionally, until evenly browned, about 6-8 minutes; set aside.
Add onion, carrot and celery. Cook, stirring occasionally, until tender, about 3-4 minutes.
Add garlic and mushrooms, and cook, stirring occasionally, until tender and browned, about 3-4 minutes.
Whisk in flour and tomato paste until lightly browned, about 1 minute.
Stir in wine, scraping any browned bits from the bottom of the stockpot.
Stir in beef stock, thyme, bay leaves and steak. Bring to a boil; reduce heat and simmer until beef is very tender, about 30 minutes.
Stir in sweet potatoes; simmer until potatoes are just tender and stew has thickened, about 20 minutes. Remove and discard thyme sprigs and bay leaves. Stir in parsley; season with salt and pepper, to taste.*
Serve immediately.
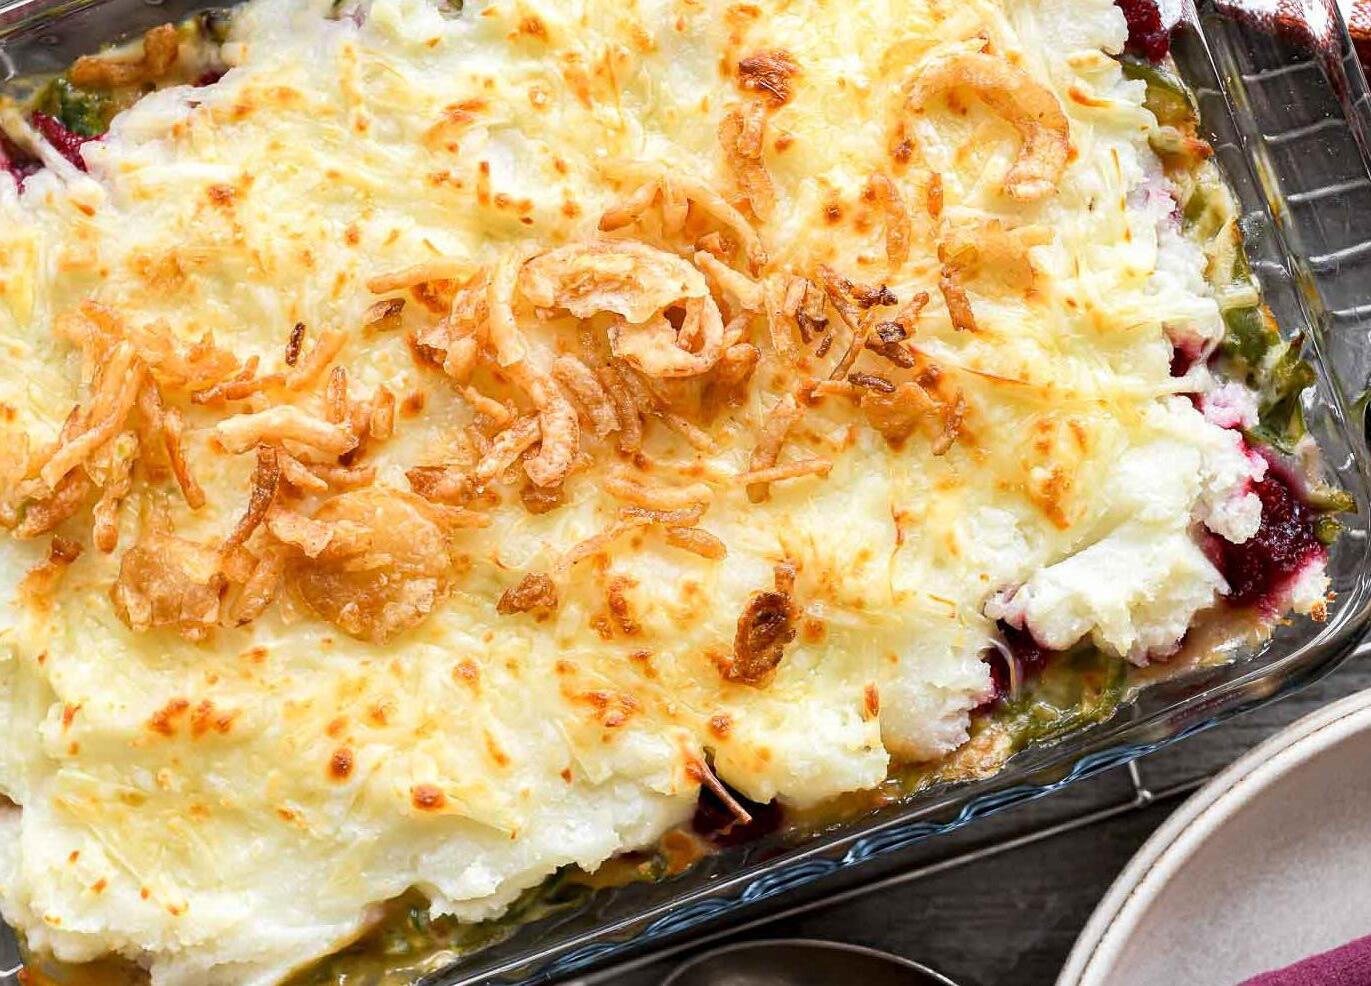
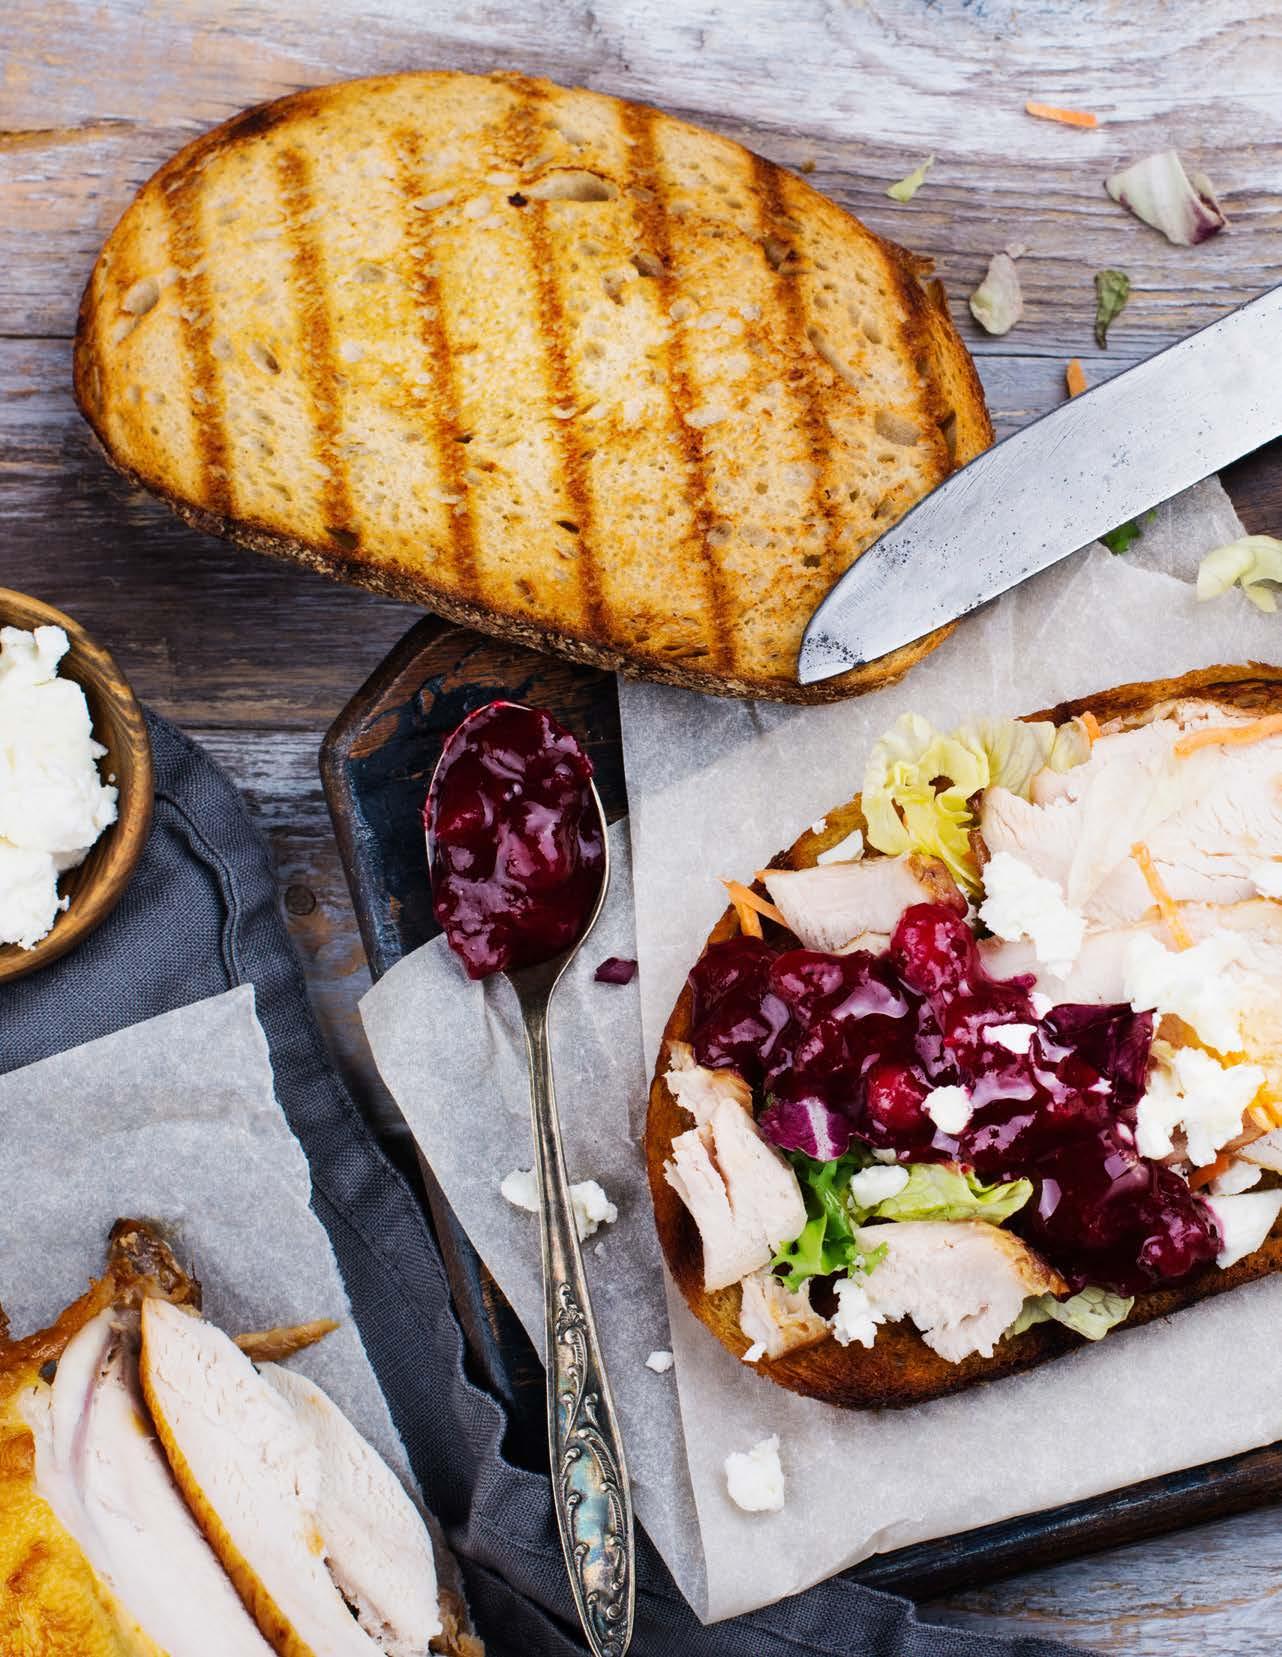
INGREDIENTS:
2-3 c. stuffing
7-10 slices roasted turkey, or enough shredded turkey to generously cover the stuffing.
2/3 c. gravy
2 cups green bean casserole (or other veggie)
1 c. cranberry sauce
3-4 c. mashed potatoes
TOPPINGS:
1 & 1/2 c. shredded white cheddar cheese
1/2 c. French's® Fried Onions
https://theviewfromgreatisland.com
DIRECTIONS:
Preheat the oven to 350° F.
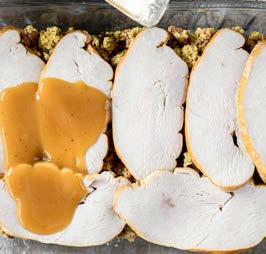
Add a layer of stuffing to the bottom of your casserole. This is the base of your casserole, so make sure it covers the entire bottom. If you love stuffing, add as much as you like.
Arrange sliced or shredded turkey over the stuffing. I suggest overlapping slices or, if using shredded turkey, using plenty. The turkey should be the star of your casserole.
Ladle a liberal amount of gravy over the turkey.
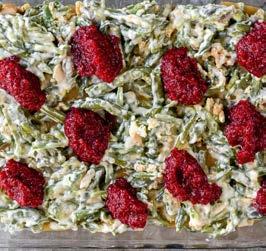
Next add your green bean casserole, or whatever veggie you're using. Spread it out evenly.
For the cranberry sauce you can add small dollops over the beans. You can spread it out evenly or leave it as dollops.
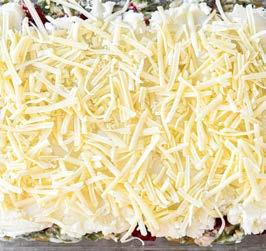
Add a thick layer of mashed potatoes over top. I don't spread the potatoes all the way to the edges, I think it looks more appetizing that way.
Sprinkle the potatoes with the cheddar cheese. Tent with foil (you don't want it sticking to the cheese, so use toothpicks if necessary to keep the foil off the casserole surface.)
Bake for about 50 minutes, or until hot and bubbling throughout. Untent the casserole for the last 10-15 minutes. Serve hot, topped with the fried onions.
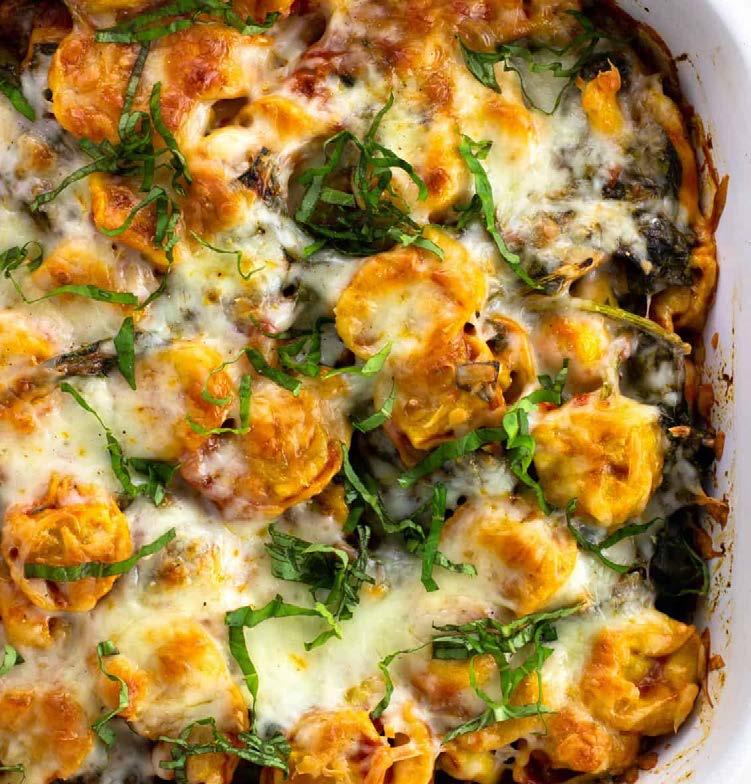
https://www.mysequinedlife.com
DIRECTIONS:
Heat oven to 350°F.
INGREDIENTS:
38 oz. fresh or frozen tortellini
28 oz. marinara sauce (about 3 cups)
9 oz. fresh spinach leaves
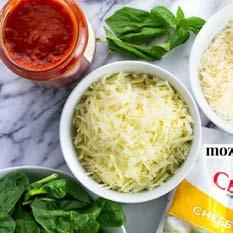
1/2 c. grated Parmesan
1 & 1/4 c. shredded mozzarella cheese
Fresh basil chiffonade for serving


Spray a large and deep-sided rectangular baking dish with cooking spray and set aside for now. The dish pictured is 13" x 9" x 3".
Bring a large pot of water to boil on the stove. Once boiling, salt the water and stir in tortellini. Cook the tortellini according to package directions to the shortest time listed in the cook time range. For my frozen tortellini, this was only 2 minutes. Drain and add the tortellini back to the pot.
Pour marinara sauce and fresh spinach into the pot and stir to evenly combine with the tortellini. Stir for 1-2 minutes as the spinach leaves begin to wilt, then pour out the mixture into the prepared pan. Press the surface into an even height throughout.
Scatter Parmesan and mozzarella evenly over the surface, then place in the oven and bake for 20 minutes. If you'd like the melted cheese to be a bit more toasty in places, at the end of the bake time switch the oven to broil for a very brief time until it has browned to your liking (provided your baking dish is broiler-safe).
Serve with plenty of fresh basil to garnish.


Preheat oven to 425°F.
INGREDIENTS:
2 tbsp. olive oil
1 & 1/4 lbs. 90/10 lean ground beef
1 small yellow onion, chopped
3 tbsp. tomato paste
1 tbsp. finely chopped garlic
1 tbsp. chili powder
2 tsp. ground coriander
1 tsp. ground cumin
1 tsp. dried oregano
1/2 tsp. black pepper
1 (15 oz.) can red kidney beans, drained
1 (14.5 oz.) can diced fire-roasted tomatoes, undrained
1/2 c. chicken stock
2 tsp. kosher salt, divided CORNBREAD:
1/2 c. fine yellow cornmeal
1/2 c. all-purpose flour
1 tablespoon granulated sugar
1 & 1/2 tsp. baking powder
4 oz. sharp Cheddar cheese, shredded, divided 1/2 c. thinly sliced scallions, plus more for garnish
1 jalapeño, finely chopped, plus more for garnish
3/4 c. whole buttermilk
1/4 c. unsalted butter, melted
1 large egg lightly beaten
Heat oil in a 10-inch cast-iron skillet over medium-high. Add beef and onions; cook, stirring often, until beef is browned and crumbly, 5 to 7 minutes.
Stir in tomato paste, garlic, chili powder, coriander, cumin, oregano and pepper; cook on medium, stirring constantly, until fragrant and ground beef is coated in tomato paste, about 1 minute.
Stir in beans, diced tomatoes, chicken stock and 1 teaspoon salt. Bring to a boil over mediumhigh, and cook 2 minutes. Remove from heat.
Stir together cornmeal, flour, sugar, baking powder, 1/2 cup Cheddar, scallions, jalapenos, and remaining 1 teaspoon salt in a medium bowl. Whisk in, buttermilk, melted butter, and egg, until fully combined. Pour batter over hot filling in skillet, spreading batter to edges of skillet. Top with remaining 1/2 cup Cheddar. Place skillet on a rimmed baking sheet.
Bake until topping is golden and firm, about 20 minutes. Let rest at least 5 minutes before serving.

4 - 6
INGREDIENTS: 1 HR 30 MIN
3 oz. finely grated Gruyère or Comté cheese
2 oz. finely grated Parmigiano-Reggiano cheese
2 c. heavy cream
1 tbsp. fresh thyme leaves, roughly chopped
2 medium cloves garlic, minced
Kosher salt and freshly ground black pepper
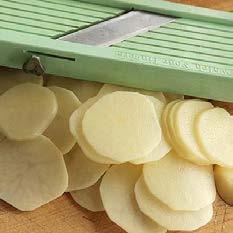
3 to 3 1/2 lbs. russet potatoes, peeled and sliced 1/8 inch thick on a mandoline slicer
2 tbsp. unsalted butter
DIRECTIONS:

Adjust oven rack to middle position and preheat oven to 400°F.
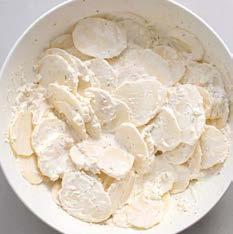
Grease a 2-quart baking dish with butter. Combine cheeses in a large bowl. Transfer 1/3 of cheese mixture to a separate bowl and set aside. Add cream, thyme, and garlic to first bowl of cheese mixture. Season generously with salt and pepper. Add potato slices and toss with hands until every slice is coated with cream mixture, making sure to separate any slices that are sticking together so the cream mixture gets between them.
Pick up a handful of potatoes, organizing them into a neat stack, and lay them in prepared baking dish with their edges aligned vertically. Continue placing potatoes in dish, working around the perimeter and into the center until all potatoes have been added. Potatoes should be very tightly packed. If necessary, slice additional potatoes, coat slices with cream mixture, and add to dish (see notes). Pour excess cream/cheese mixture evenly over potatoes until mixture comes halfway up sides of dish. You may not need all excess liquid (see notes).
Cover tightly with foil and transfer to oven. Bake for 30 minutes. Remove foil and continue baking until top is pale golden brown, about 30 minutes longer. Carefully remove from oven, sprinkle with remaining cheese, and return to oven. Bake until deep golden brown and crisp on top, about 30 minutes longer. Remove from oven, let rest for a few minutes, and serve.


DIRECTIONS:
https://damndelicious.net
INGREDIENTS:
3 tbsp. unsalted butter
1 shallot, diced
8 oz. cremini mushrooms, diced
3 cloves garlic, minced
2 tsp. chopped fresh thyme leaves
3 tbsp. all-purpose flour
2 & 1/2 c. chicken stock
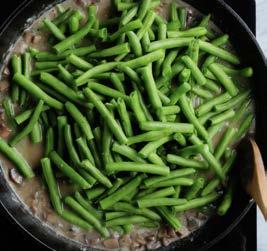
1 &1/2 lbs. fresh green beans, trimmed and halved
2 c. freshly grated white cheddar cheese, divided
1/2 c. heavy cream
Kosher salt and freshly ground black pepper, to taste
1/2 c. Panko*
FOR THE CRISPY FRIED SHALLOTS:
2 c. canola oil
4 shallots, thinly sliced into 1/8-inch-thick rings
Heat canola oil in a large skillet over medium high heat until it registers 325 degrees F on a deepfry thermometer.
Working in batches, dredge shallots in flour, separating the rings and coating them thoroughly; shake off excess flour.
Add shallots to the skillet, a handful at a time, and cook, stirring constantly, until evenly golden and crispy, about 2-4 minutes. Transfer to a paper towel-lined plate.
Preheat oven to 350°F.
Melt butter in a large oven-proof skillet over medium heat. Add shallot and mushrooms, and cook, stirring occasionally, until mushrooms are tender and browned, about 5 minutes.
Stir in garlic, thyme and flour, and cook, stirring frequently, until fragrant, about 1 minute.
Stir in chicken stock, scraping any browned bits from the bottom of the pan. Bring to a boil; reduce heat and simmer for 4-5 minutes.
Stir in green beans, and cook, stirring occasionally, until crisp-tender, about 5-6 minutes.
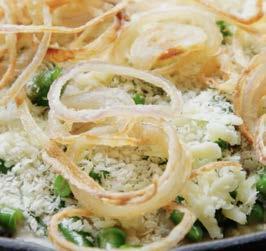
Remove from heat; stir in 1 cup white cheddar cheese and heavy cream until smooth, about 1-2 minutes; season with salt and pepper to taste. Top with remaining 1 cup white cheddar cheese, Panko and shallots.
Place into oven and bake until golden brown and bubbly, about 25-30 minutes.
Serve immediately.

DIRECTIONS:
INGREDIENTS:
2-1/3 to 3 c. all-purpose flour
3 tbsp. sugar
1 package (1/4 oz.) active dry yeast
1/2 tsp. salt
1/2 c. water
1/4 c. milk
1/4 c. butter, cubed
APPLE TOPPING:
4 c. sliced peeled tart apples
2 tbsp. butter
1/2 c. sugar
2 tbsp. all-purpose flour
1 tsp. ground cinnamon
CHEESE TOPPING:
4 oz. cream cheese, softened
1/4 c. packed brown sugar
2 tbsp. caramel ice cream topping
STREUSEL:
2/3 c. all-purpose flour
1/3 c. sugar
1/4 c. cold butter, cubed
In a large bowl, combine 1-1/2 cups flour, sugar, yeast and salt. In a saucepan, heat water, milk and butter to 120°-130°. Add to dry ingredients; beat for 2 minutes. Stir in enough remaining flour to form a firm dough. Turn onto a floured surface; cover and let rest for 15 minutes.
Meanwhile, in a large skillet, cook and stir apples in butter over medium heat for 2 minutes. Combine the sugar, flour and cinnamon; stir into skillet. Cook 3 minutes longer. Reduce heat to low; cook, uncovered, for 4-6 minutes or until apples are tender, stirring frequently.
In a small bowl, combine the cheese topping ingredients. For streusel, in a small bowl, combine flour and sugar; cut in butter until crumbly.
Pat dough onto a greased 14-in. pizza pan, building up edges slightly. Spread with cheese topping, then apple topping. Sprinkle with streusel.
Bake at 375° for 20-25 minutes or until crust is golden brown. Serve warm or cold. If desired, top with additional caramel ice cream topping just before serving.


https://sallysbakingaddiction.com
1/2 recipe homemade pie crust*
1 teaspoon cornstarch
1 Tablespoon (15ml) warm water
5 large, perfectly round and firm apples (I prefer Granny Smith or Honeycrisp)
1 teaspoon ground cinnamon
1/2 cup (100g) granulated sugar
1 teaspoon pure vanilla extract
1 large egg
1 teaspoon milk
optional: homemade salted caramel sauce, for drizzling
Prepare the pie crust, including allowing it to chill for at least 2 hours.
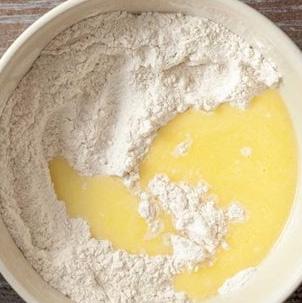
MAKE THE APPLE FILLING:
In a very small bowl, mix the cornstarch and warm water together until smooth, creamy, and the cornstarch has dissolved. Set aside. Peel and dice 1 apple. In a medium saucepan over medium heat, cook the apple pieces, cornstarch/water mixture, cinnamon, and sugar. Stir constantly for 5 minutes. Switch to low heat and allow to simmer for 5 minutes. Remove from heat, stir in the vanilla, and allow to cool off for 20 minutes.
ASSEMBLE:
On a floured work surface, roll out the pie dough. Turn the dough about a quarter turn after every few rolls until you have a circle 10-11 inches in diameter. Cut into fourths, as if you were cutting a pizza. (Pizza cutter works best here!) Then, cut each quarter into 1/4-inch wide strips. I like to chill the strips as I cut out the apples.
Preheat oven to 375°F.
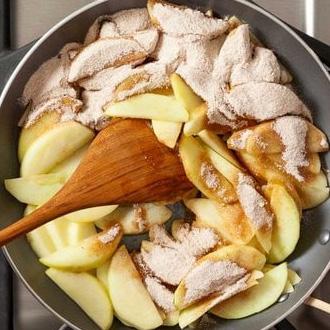
Slice off the tops of the 4 remaining apples. Using a spoon (or melon baller), dig out the core. It doesn’t have to look perfect. Spoon the prepared apple filling into the cored-out apples. You may have some filling leftover—it’s great warmed up over vanilla ice cream.
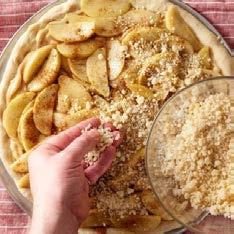
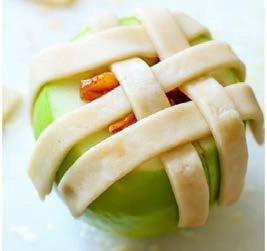
Lay 3-4 strips of the pie dough on top of the apple. Then, working with one new strip at a time, alternate weaving it over and under the dough strips already in place. Repeat until the top of the apple has been covered in this lattice style crust. Using a sharp paring knife, trim excess pie crust around the edges. Repeat with remaining apples and pie dough strips.
Place apples into an 8-inch square baking pan, 9-inch square baking pan or 9-inch pie dish—really any size baking pan works. In a small dish, whisk the egg and milk together. Lightly brush the tops with egg wash. I sprinkled a little bit of cinnamon on top of the egg wash before going into the oven—this is optional.
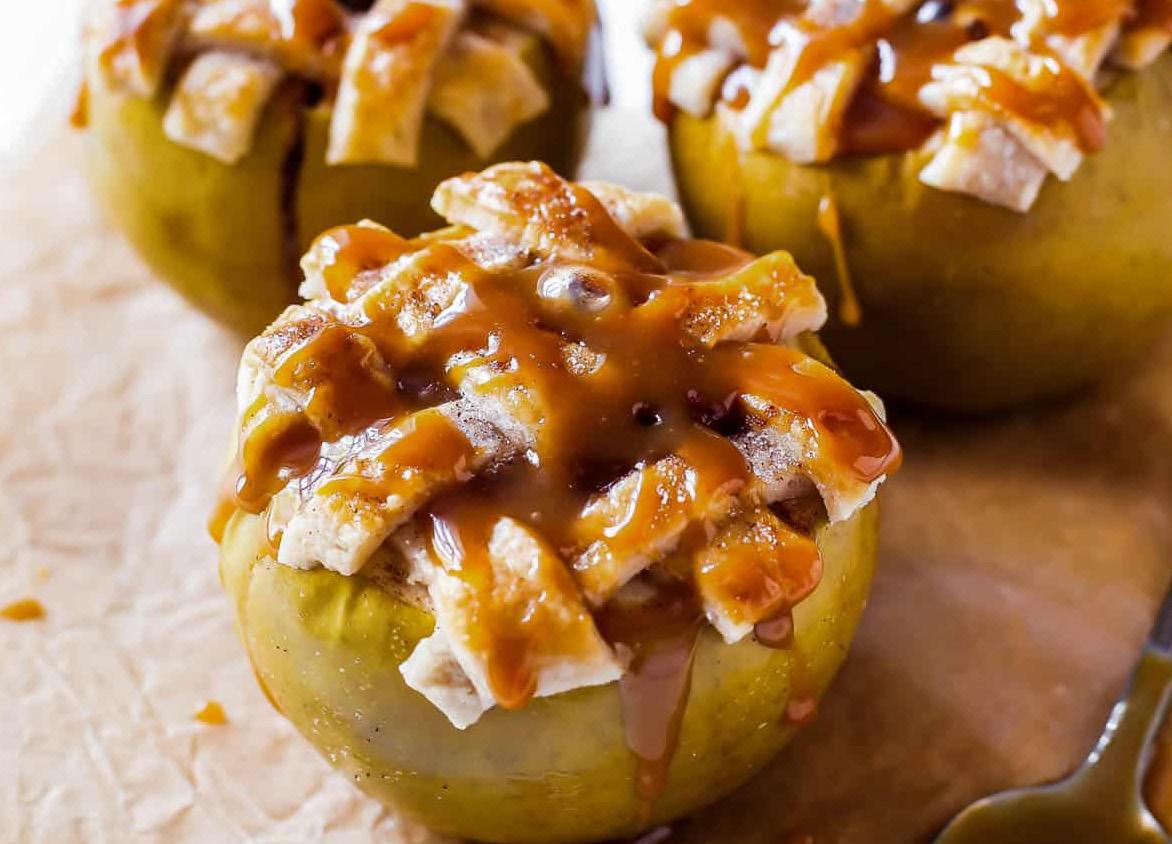
Bake for 25-30 minutes or until the crust is browned and the filling is bubbly.
If desired, drizzle each with salted caramel. We ate ours with a knife and fork and vanilla ice cream on the side. These apples are best enjoyed immediately.
BY: JOSH RINK https://www.tasteofhome.com
DIRECTIONS:
Preheat oven to 350° F.

INGREDIENTS: 1 HR 10 MIN
1 c. packed brown sugar
2 tsp. ground cinnamon
1/2 tsp. salt
1/4 tsp. ground nutmeg
3/4 c. unsalted butter, melted
2 large eggs, room temperature
1 c. apple cider or juice
1/4 c. chunky applesauce
1 tbsp. vanilla extract
2 & 2/3 c. all-purpose flour
2 & 1/2 tsp. baking powder
CINNAMON SUGAR:
1 c. sugar
3 tsp. ground cinnamon
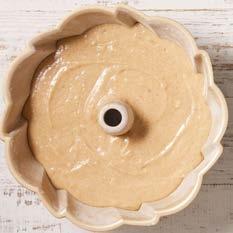
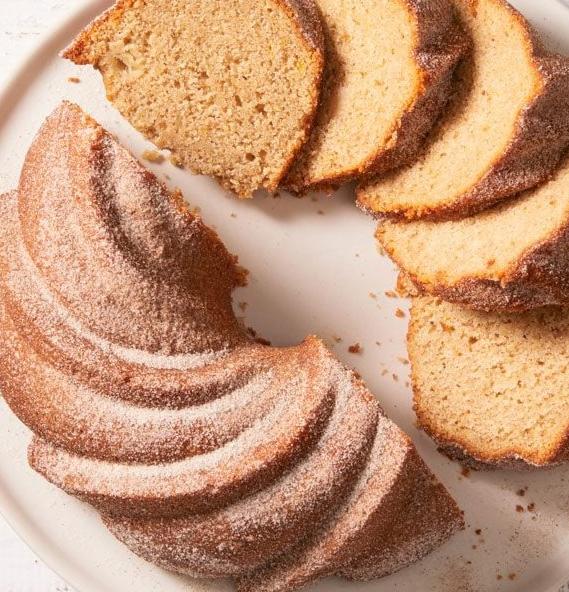
Grease and flour a 10-in. fluted tube pan. Place sugar, cinnamon, salt and nutmeg in a food processor; process for 30 seconds. Transfer to a large bowl.
Beat in melted butter, eggs, apple cider, applesauce and vanilla until well blended. In another bowl, whisk flour and baking powder; gradually beat into sugar mixture.
Pour batter into prepared pan. Bake until a toothpick inserted near center comes out clean, 45-50 minutes. Cool in pan 10 minutes before removing.
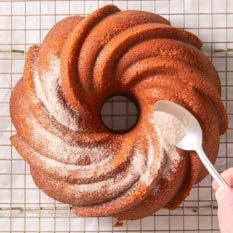
In a small bowl, combine sugar and cinnamon. Sprinkle over warm cake, pressing it onto the sides as needed. Let cool completely.
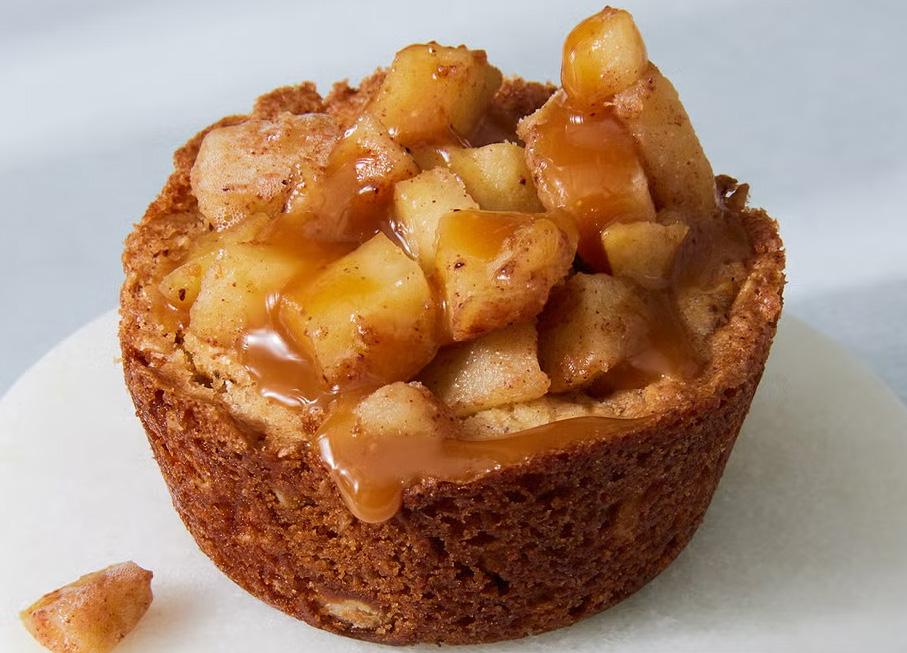
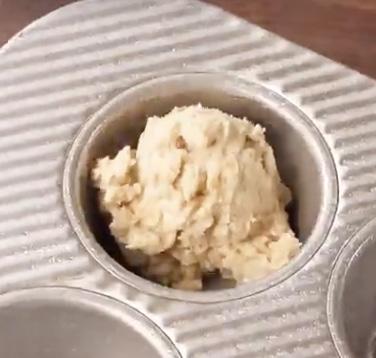


Cooking spray
1 c. butter, softened (plus more for cooking apples)
1 & 1/4 c. brown sugar (divided)
3/4 c. granulated sugar (divided)
2 large eggs
1 tsp. pure vanilla extract
1 & 1/4 c. all-purpose flour
1 & 3/4 c. rolled oats
1 tsp. baking powder
1/2 tsp. ground cinnamon
1/2 tsp. kosher salt
4 Granny Smith apples, peeled, cored and finely chopped
1 & 1/2 tsp. cornstarch
1/2 tsp. ground nutmeg
1/2 tsp. ground cinnamon
Caramel sauce, for serving
DIRECTIONS:
Preheat oven to 350° F.
Grease 2 muffin tins with cooking spray. In a large mixing bowl using a hand mixer, add butter, 1 cup brown sugar, and 1/2 cup granulated sugar and beat until light and fluffy. Add eggs and vanilla and mix until evenly combined. Add flour, oats, baking powder, cinnamon, and salt and stir until just combined.
Using a medium cookie scoop, scoop dough into muffin tins, and press to flatten. Bake until cookie cups are golden brown and set, 18 to 20 minutes.
While cookies are still warm, make the cups. Spray the bottom of a small shot glass with cooking spray and press shot glass down into center of each cookie to create cups. Let cool in pan for 10 minutes, then transfer to wire cooling racks to cool completely.
Meanwhile, melt about 2 tablespoons butter in a medium skillet over medium-high heat. Add apples and cook until beginning to soften. Add remaining 1/4 cup brown sugar, 1/4 c granulated sugar, cornstarch, nutmeg, and cinnamon and cook until soft and caramelized.
Spoon apple filling into cups. Drizzle with caramel and serve warm or at room temperature.
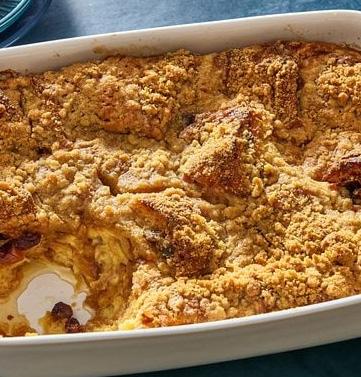
DIRECTIONS:

INGREDIENTS:
1/3 c. raisins
1 c. apple butter
6 croissants, split
CUSTARD:
8 large eggs
3 c. 2% milk
1 & 1/2 c. sugar
2 tsp. vanilla extract
1/4 tsp. salt
STREUSEL:
1/2 c. all-purpose flour
1/2 c. packed brown sugar
1/4 tsp. salt
1/4 c. cold butter


Place raisins in a small bowl. Cover with boiling water; let stand for 5 minutes. Drain and set aside.
Combine apple butter and raisins. Spread over croissant bottoms; replace tops. Cut each croissant into 3 pieces; place in a greased 13x9-in. baking dish.
In a large bowl, combine the eggs, milk, sugar, vanilla and salt. Pour over croissants; let stand for 30 minutes or until bread is softened.
In a small bowl, combine the flour, brown sugar and salt. Cut in butter until mixture resembles coarse crumbs. Sprinkle over top. Bake, uncovered, at 350° F for 50-60 minutes or until a knife inserted in the center comes out clean. Serve warm. Refrigerate leftovers.
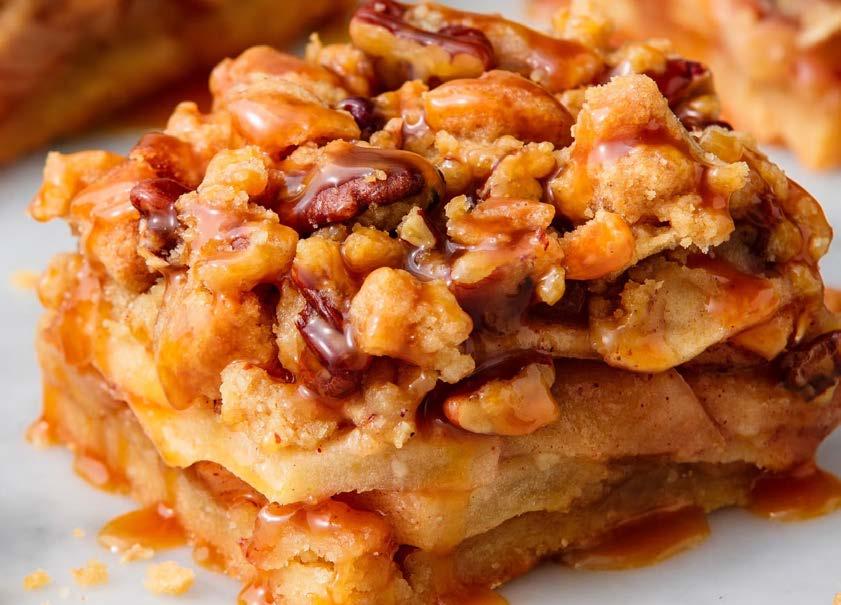
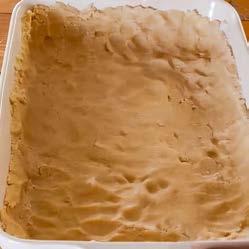

FOR THE CRUST:
Cooking spray
1 c. butter, softened
1/2 c. granulated sugar
1/4 c. packed brown sugar
2 & 1/2 c. all-purpose flour
1/2 tsp. kosher salt
FOR THE FILLING:
6 apples, peeled, cored, and sliced
Juice of 1/2 lemon
1/2 c. packed brown sugar
1 tsp. ground cinnamon
1 tsp. pure vanilla extract
1/2 tsp. kosher salt
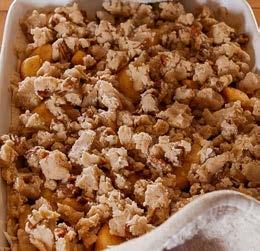
FOR THE TOPPING:
1 & 1/2 c. all-purpose flour
1 c. chopped pecans
1 c. packed brown sugar
1/2 tsp. kosher salt
3/4 c. butter, melted
Caramel, for serving
https://www.delish.com
DIRECTIONS:
Preheat oven to 350° F.
Line a 9”-x-13” pan with parchment then grease with cooking spray. In a large bowl using a hand mixer, beat butter and sugars together until light and fluffy. Add flour and salt and mix until just combined.
Press into prepared pan about 1/2” up sides. Bake until lightly golden, 20 minutes.
In a large bowl, toss apples, lemon juice, brown sugar, cinnamon, vanilla, and salt together. Spread apples over crust.
In a medium bowl, whisk together flour, pecans, brown sugar, and salt. Stir in melted butter until coarse clumps form.
Sprinkle crumb topping over apples and bake until top is golden and apples are soft, about 1 hour.
Let cool at least 15 minutes then slice into sq

November often brings a packed schedule, from work deadlines to holiday prep, which can make fitness feel impossible. The good news? Staying active doesn’t require a gym or fancy equipment. Small, intentional movements add up. Here’s a practical 30-day guide with one simple activity each day, designed to fit into your everyday life whether you’re at the office, at home, or on the go.
Day 1: Desk Chair Stretch – Sit tall, reach arms overhead, clasp hands, and stretch side to side. (Office, dining chair)
Day 2: Bedside Calf Raises – Rise onto your toes, hold for 2 seconds, lower slowly. (Bedroom, while brushing teeth)
Day 3: Standing March – Pump arms and lift knees high for 1 minute. (Office break, kitchen)
Day 4: Wall Push-Ups – Lean against a wall, lower and press back up. (Hallway, office)
Day 5: Couch Squats – Sit to stand from your couch or chair, no hands. (Living room)
Day 6: 5-Minute Walk – Around your block, office building, or even inside while on a call.
Day 7: Seated Core Twist – Sit upright, twist gently side to side. (Office chair, dining chair)
Day 8: Kitchen Counter Plank – Hands on the counter, step back and hold for 20 seconds.
Day 9: Ankle Circles – Great for circulation, especially while traveling. (Plane, desk, couch)
Day 10: Step-Ups – Use a safe step or sturdy platform. (Front porch, stairs)
Day 11: Arm Circles – Forward and back for 30 seconds. (Office, hallway)
Day 12: Standing Side Leg Lifts – Balance on one leg, lift the other slowly to the side. (Anywhere)
Day 13: Turkey Trot Walk – Join a community walk/run or do a short stroll Thanksgiving week.
Day 14: Bedtime Stretch – Gentle full-body stretch before sleep. (Bed)
Day 15: Shoulder Rolls – Loosen tension from computer time. (Desk, car at a stop)
Day 16: Seated Knee Lifts – March legs while seated. (Office chair, couch)
Day 17: Mindful Walk – 5 minutes without your phone, focusing on breathing.
Day 18: Standing Quad Stretch – Hold one ankle behind you, switch sides. (Desk, kitchen)
Day 19: Leaf Raking Cardio – Turn yardwork into a workout. (Yard)
Day 20: Seated Forward Fold – Reach toward toes, stretch hamstrings. (Chair, bed)
Day 21: Kitchen Counter Push-Offs – Place hands on the counter, push away like a mini chest press.
Day 22: Toe Taps – Tap toes quickly on a step or sturdy surface. (Stairs, porch)
Day 23: Gratitude Stretch – Reach arms overhead, breathe deeply, focus on 3 things you’re thankful for.
Day 24: Standing Hip Circles – Gentle circles to loosen hips. (Office, bathroom break)
Day 25: Seated Posture Reset – Sit tall, squeeze shoulder blades together. (Office, dinner table)
Day 26: Mall Walking – Holiday errands? Use it as fitness time.
Day 27: Bed Bridge – Lie on your back, lift hips up, lower slowly. (Bed or floor)
Day 28: Standing Calf Stretch – Lean into a wall, stretch calves. (Office, kitchen)
Day 29: Couch Side Lunges – Step out to the side, bend knee, return. (Living room)
Day 30: Holiday Hustle Walk – Take a walk after Thanksgiving or shopping to refresh body and mind.
Movement doesn’t have to be complicated or timeconsuming. By sprinkling these simple activities throughout your month, you’ll keep your body moving, improve circulation, reduce stiffness, and boost your energy during one of the busiest times of the year. Think of it as 30 small wins because every step counts.


After the relaxed pace of summer, heading back to a structured routine can feel daunting. Lazy mornings, spontaneous plans, and slower schedules often leave us out of sync with work, school, and daily responsibilities. Reclaiming structure doesn’t mean squeezing all the fun out of life—it’s about creating a rhythm that balances productivity, self-care, and flexibility, so you feel grounded and ready to tackle the months ahead.

Jumping straight into a full schedule can feel overwhelming. Begin by identifying the non-negotiables in your day—work, school, exercise, and essential chores—and slot them in first. Once those are in place, layer in additional tasks gradually. This approach helps you regain control without the stress of an abrupt transition, making your routine feel manageable and realistic.
Routines are easiest to maintain when they have consistent anchors. Establishing a morning ritual—like stretching, journaling, or enjoying a cup of coffee mindfully—signals the start of the day. Evening rituals, such as winding down with a short walk, reading, or planning for the next day, signal closure. These small, repeatable habits build a sense of structure and help smooth the transition from summer’s unpredictability.
Taking a few minutes to plan your week can reduce stress and keep you organized. Make a simple to-do list, schedule your meals, or block out exercise time in your calendar. Visualizing your commitments gives you a sense of control and helps prevent last-minute scrambling. Planning doesn’t have to be rigid—it’s about creating a flexible framework that supports your goals and daily needs.
Reintroducing structure shouldn’t feel like punishment. Combine responsibilities with enjoyable habits. Take breaks to move, hydrate, or step outside. Schedule moments for hobbies, connecting with friends, or quiet reflection. By intentionally weaving self-care into your routine, structure becomes a tool for well-being rather than a source of stress.

Your routine doesn’t need to be perfect from day one. Check in with yourself weekly to see what’s working and what isn’t. Adjust wake times, workloads, or personal habits as needed. Flexibility ensures your routine remains sustainable and tailored to your life rather than forcing you into a rigid template.
Reclaiming structure after summer is about balance, intentionality, and patience. By starting small, creating rituals, planning ahead, and incorporating self-care, you can ease back into a rhythm that supports productivity, well-being, and peace of mind. With a little effort, you’ll be ready to face the season ahead with clarity, energy, and confidence.

The new year often brings ambitious resolutions, but drastic changes rarely stick. Instead of overhauling your entire routine overnight, focus on small, achievable steps that can gradually become habits. Even simple actions like taking a daily 10-minute walk, adding an extra serving of vegetables, or drinking more water consistently can build momentum and give you confidence. These small wins form the foundation for long-term success and help you approach health goals with patience and purpose.

Vague goals like “get healthier” are easy to forget. The key is to make your intentions specific and actionable—commit to walking three times a week or prepping three healthy lunches. Clear objectives make tracking progress easier and allow you to celebrate achievements along the way. By starting small and building gradually, you create a realistic roadmap that grows with you without feeling overwhelming.
Health isn’t about perfection—it’s about consistency. One missed workout or indulgent meal doesn’t erase your progress. Focusing on habits rather than perfection allows you to adapt without guilt and makes sticking with your goals more achievable over time. Routines that feel natural and manageable give you the best chance of lasting improvement.
Wellness extends beyond exercise and diet. Stress management, quality sleep, and self-care are equally important. Short meditation sessions, journaling, or evening wind-down rituals can support both mental and physical well-being. Emphasizing daily habits rather than rigid rules helps you create a balanced routine that lasts.
Tracking your efforts through a journal, app, or calendar keeps you accountable and highlights patterns in your behavior. Celebrating even small milestones reinforces motivation and makes your goals feel attainable. Combining attention to physical activity, nutrition, and mental wellness creates a comprehensive framework for self-improvement that benefits every aspect of your life.
The most effective health goals fit your lifestyle and priorities. Yoga, walks with friends, or experimenting with plantbased meals work best when they match your routine and interests. Tailoring your approach increases the likelihood that you’ll stick with it long-term. Focus on routines that feel rewarding, sustainable, and uniquely suited to you.
Setting health goals for 2026 isn’t about radical change—it’s about building sustainable habits that support long-term well-being. By starting small, staying specific, embracing imperfection, and celebrating progress, you can make wellness achievable, enjoyable, and truly your own.

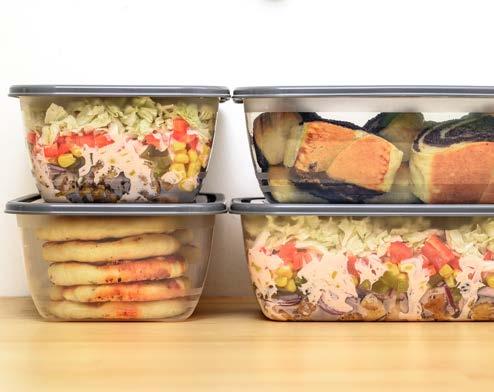
When the days get shorter and the air turns crisp, the kitchen becomes the heart of the home. Fall is full of comforting dishes—roasted veggies, hearty soups, and slow-cooked meats—that leave behind plenty of leftovers. Instead of letting them sit forgotten in the fridge, you can repurpose them into flavorful, fresh meals that save time, reduce waste, and keep your weekly menu exciting.
Legendary meal prep starts with smart storage. Use clear, airtight containers so you can see exactly what’s on hand, and stack them in an organized way in the fridge. Separating proteins, grains, and veggies gives you more flexibility later— think roasted chicken one night, chicken wraps or grain bowls the next. A quick label with the date keeps you on track and prevents food from going to waste.
Don’t just reheat—reimagine. Roasted squash can be blended into a creamy soup, while extra Brussels sprouts become the perfect base for a warm salad with apples and walnuts. Leftover turkey or chicken easily transforms into quesadillas, sandwiches, or a comforting pot pie. The trick is to view yesterday’s meal as an ingredient rather than a repeat.
Autumn is all about spice and warmth, which means you can give your leftovers a fall twist with a few pantry staples. Add cinnamon or nutmeg to roasted sweet potatoes, toss leftover grains with dried cranberries and pecans, or stir pumpkin purée into pasta sauces. Even simple drizzles of maple syrup or apple cider vinaigrette can instantly make a dish feel new and seasonal.

Cooking once and eating twice (or more) is a lifesaver when schedules get busier. Roast extra veggies, cook larger portions of grains, or prepare proteins that can flex into multiple dishes. A big batch of rice can support stir-fries, soups, and burrito bowls throughout the week. Think ahead while cooking and you’ll always have a base ready to transform.
Sometimes, all a leftover needs is a small upgrade. Fresh herbs, crunchy toppings, or a drizzle of sauce can turn a repeat meal into something exciting. Sprinkle feta or sharp cheddar over roasted veggies, add spiced nuts to salads, or top soup with a swirl of sour cream and chives. Little details make leftovers feel intentional rather than improvised.
With just a bit of creativity, your fall leftovers can become the foundation for fresh, delicious meals all week long. By storing thoughtfully, transforming dishes, and leaning into seasonal flavors, you’ll stretch your ingredients, save time, and enjoy the cozy comfort of autumn— without ever getting bored at the dinner table.
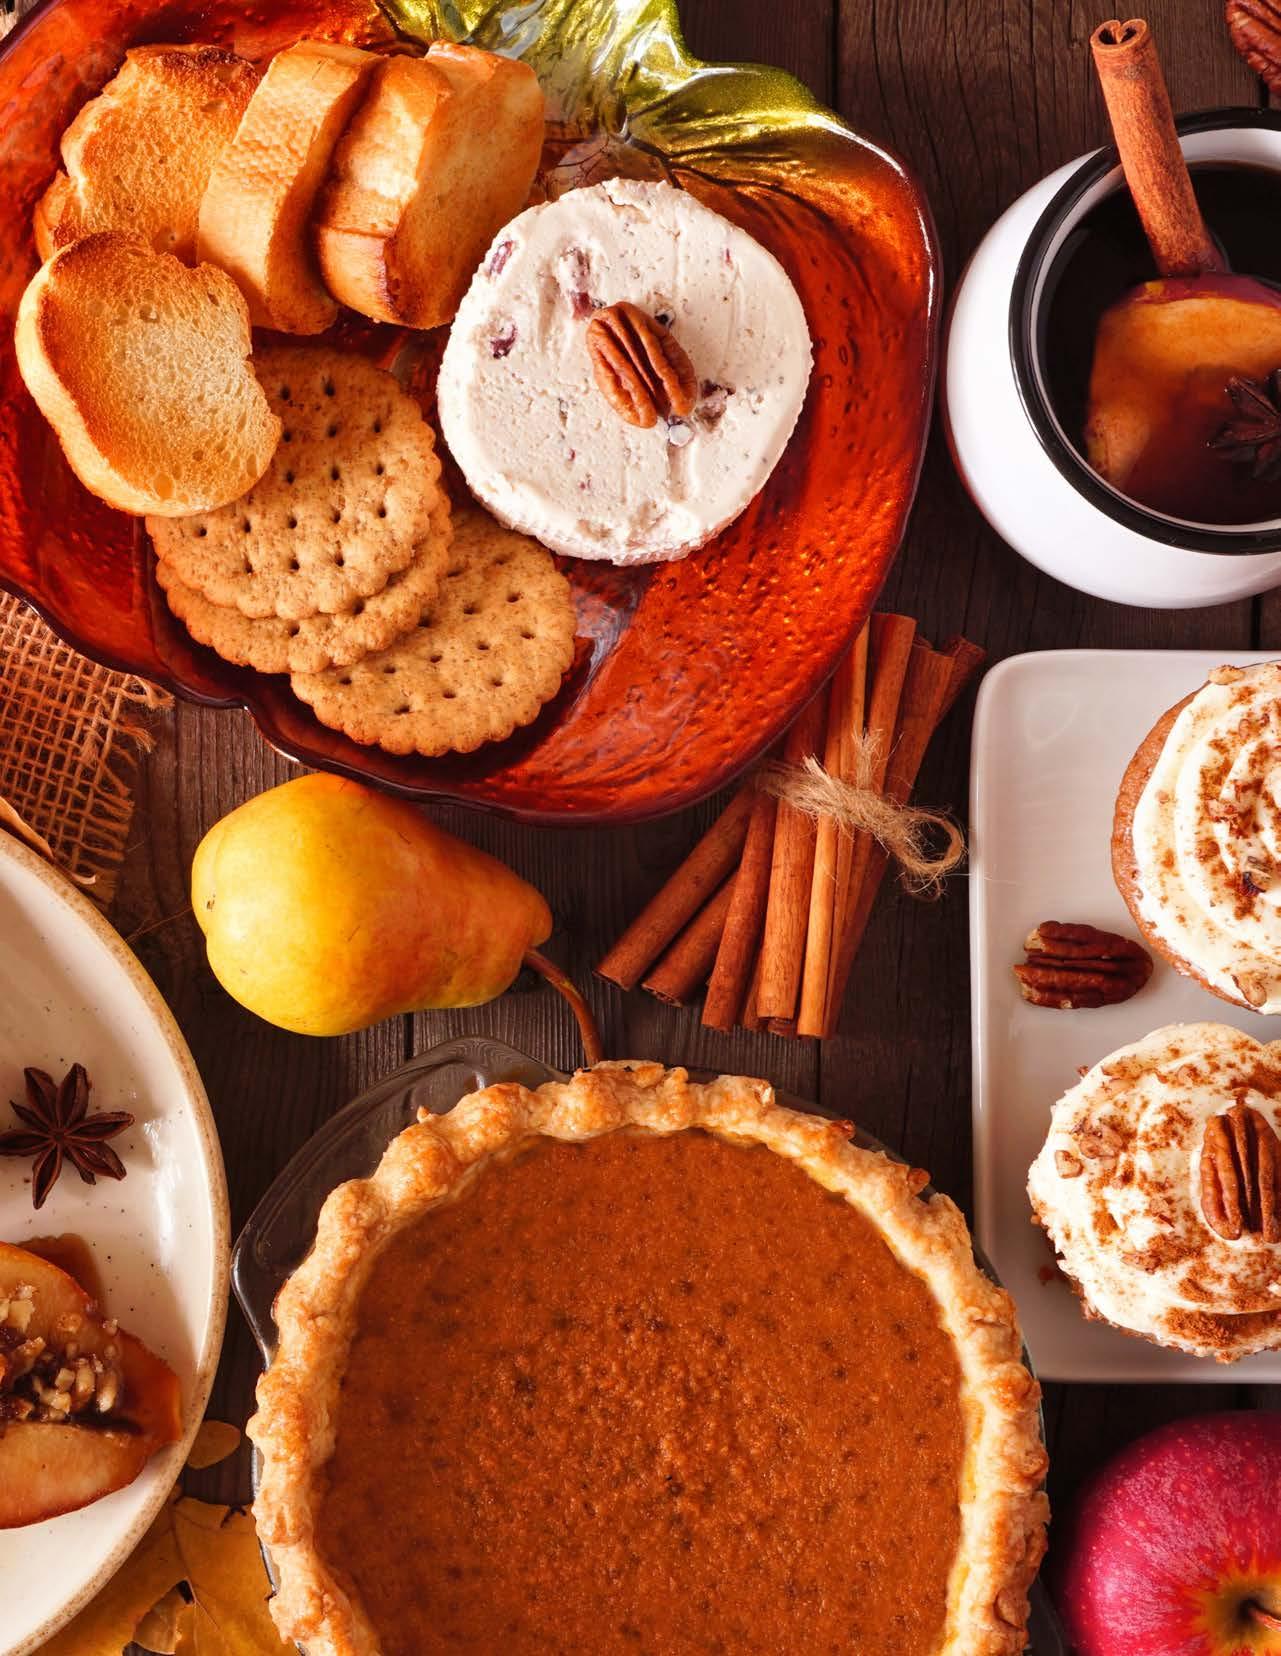
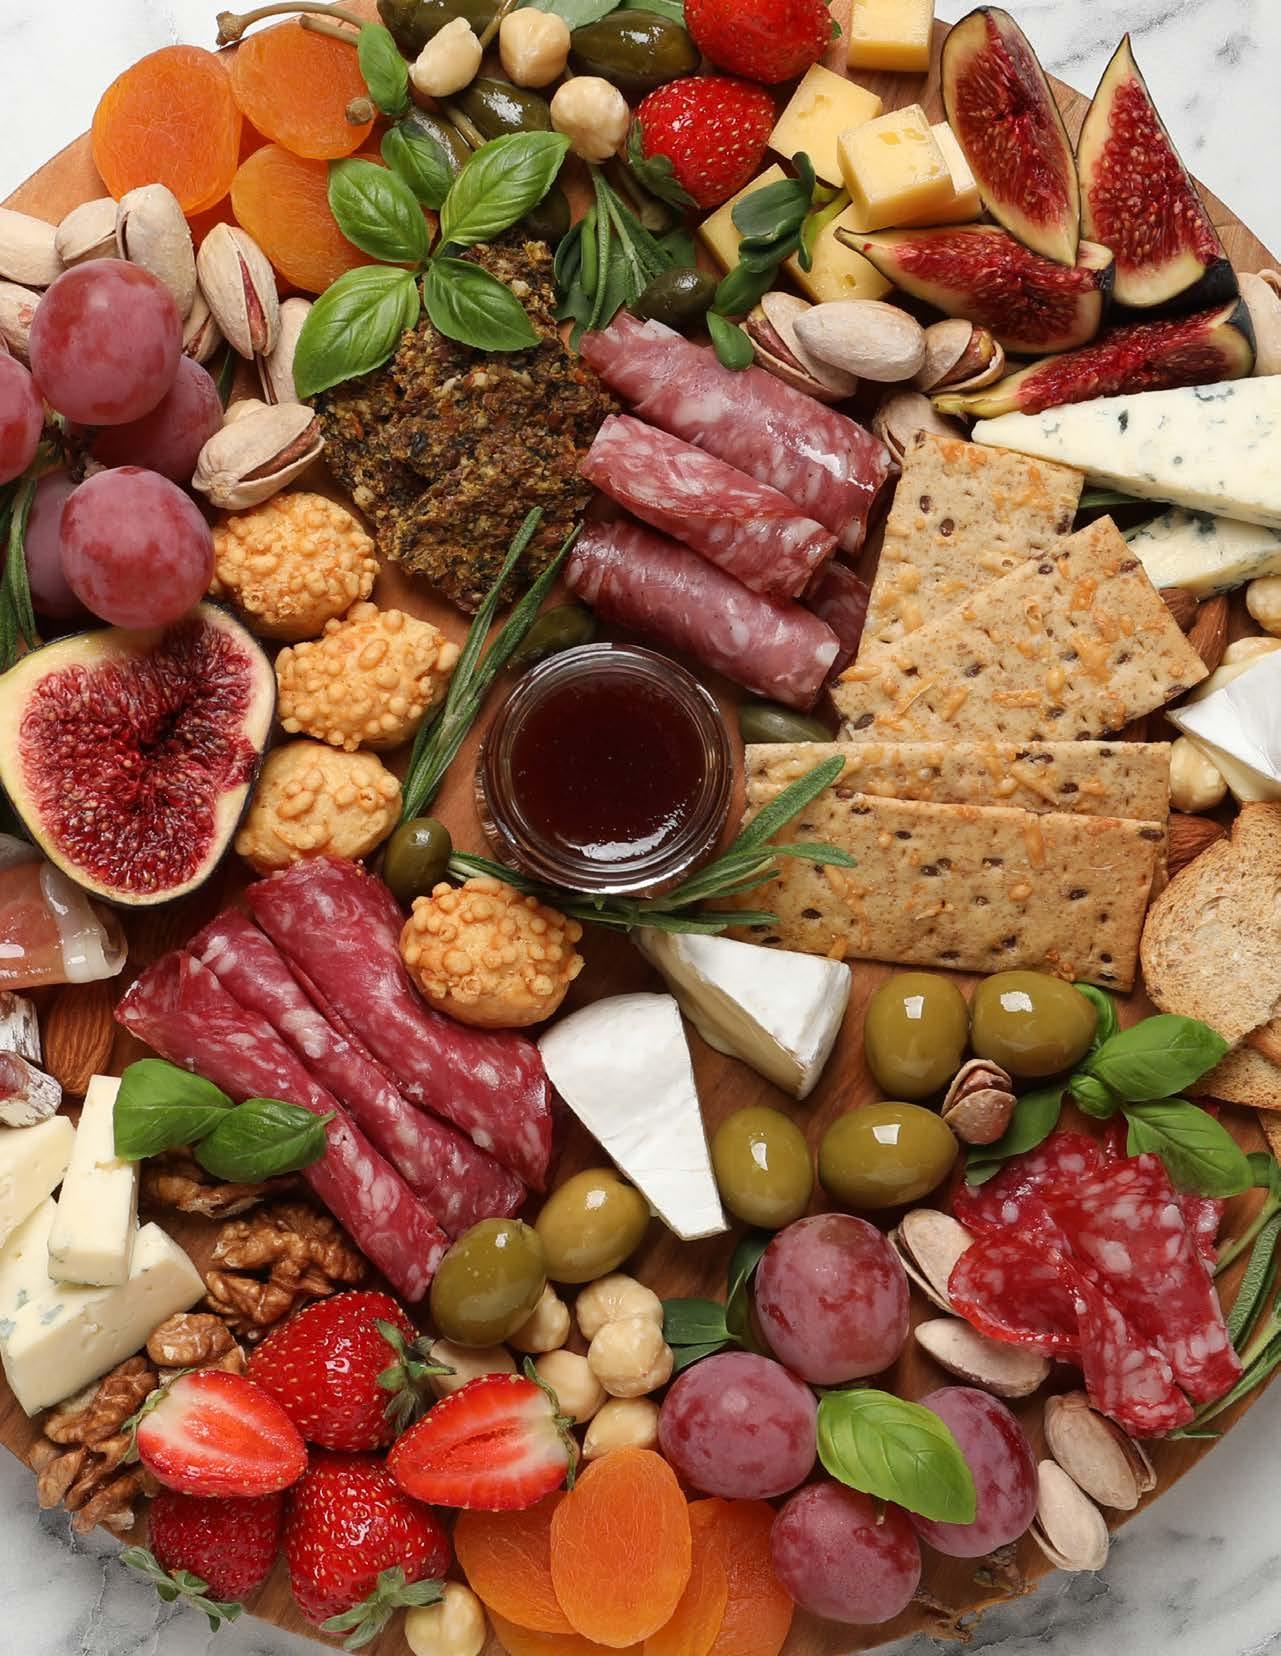
Autumn is the perfect time to gather friends, sip warm drinks, and indulge in the season’s flavors. A charcuterie board is more than just a snack—it’s a centerpiece that invites sharing, creativity, and a little seasonal magic. With the right mix of textures, colors, and flavors, you can craft a board that’s both visually stunning and irresistibly tasty.


Choose a sturdy board or platter as your canvas. Wooden boards, slate trays, or even a large cutting board work beautifully. Consider the size of your gathering and leave space for layering different elements without overcrowding. A thoughtful layout makes your charcuterie board feel curated and inviting.

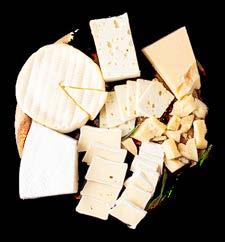
Autumn calls for bold, cozy flavors. Include a sharp cheddar for richness and a firm texture that pairs well with both sweet and savory accompaniments. Complement it with creamy brie, nutty gouda, or tangy blue cheese for variety. Slice or crumble some pieces, leaving others in wedges for visual interest.

Include a selection of cured meats to balance the cheese. Prosciutto, salami, and chorizo offer different flavors and textures. Fold slices into ribbons or rolls to create height and movement on your board. Mixing thin and thick slices adds dimension and makes each bite feel special.
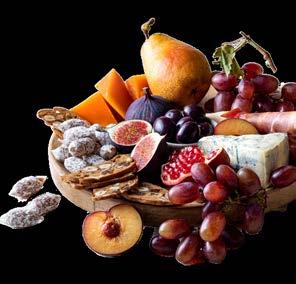
Autumn fruits bring color, flavor, and natural sweetness. Fresh figs, halved, add a jewel-like elegance. Pear slices, grapes, and dried apricots pair beautifully with cheese and meats. Toasted nuts—almonds, walnuts, or pecans—introduce crunch and richness, completing the seasonal palette.

Crisp crackers are essential for texture and functionality. Cinnamon crackers add a hint of fall spice that pairs perfectly with sharp cheddar and sweet figs. Include a mix of plain and flavored crackers to give guests options for combining flavors. Breadsticks or crostini work well too.
Small extras elevate your board from good to stunning. Drizzle honey, sprinkle fresh herbs, or include a few chocolate squares for contrast. Bowls of olives, jam, or mustard add variety and make it interactive. The goal is a balance of sweet, savory, soft, and crunchy— each element enhancing the others.
With a little planning and seasonal inspiration, your autumn charcuterie board can become the star of any gathering. Layer flavors, mix textures, and arrange ingredients thoughtfully. Invite friends, pour a warm cider, and let the board—and the season—take center stage.


This holiday season, let your pets in on the fun with safe, homemade treats that spread the cheer. Whether it’s a crunchy pumpkin biscuit for your pup or a catnip-packed nibble for your kitty, you’ll have them purring and wagging all December long. After all, the holidays aren’t complete without a little love from Santa Paws
Turn your homemade pet treats into the cutest holiday gifts:
• Package in mason jars tied with ribbon and a paw-print tag.
• Slip a handful into clear treat bags with festive bows.
• Add a label with the treat’s name and storage instructions — your friends will thank you.
Pet-Safe Notes
• Avoid chocolate, raisins, grapes, nutmeg, and artificial sweeteners (especially xylitol).
• Always introduce new treats in small amounts to make sure they agree with your pet’s tummy.
INGREDIENTS:
1 cup whole wheat flour
1/4 cup rolled oats
1/4 cup pumpkin puree
1/4 cup peanut butter
(make sure it's xylitol-free)
1 egg
INSTRUCTIONS:
Preheat your oven to 350°F (175°C).
In a bowl, mix together the whole wheat flour, rolled oats, pumpkin puree, peanut butter, and egg until it forms a dough.
Roll the dough out on a floured surface and cut into shapes using cookie cutters.
Place the cookies on a baking sheet lined with parchment paper and bake for about 20 minutes or until golden brown.
Let the treats cool completely before serving them to your dog.
Storage Tip: Keep in an airtight container for up to a week, or freeze for longer shelf life.
Why It’s Great for Dogs: Pumpkin is great for digestion, and peanut butter provides protein and healthy fats. Both ingredients are also perfect for the holiday season.
INGREDIENTS:
1 1/2 cups whole wheat flour
1/2 cup oat flour
1/2 cup applesauce (unsweetened)
1/4 cup water
1 egg
1 tsp cinnamon
INSTRUCTIONS:
Preheat your oven to 350°F (175°C).
In a large bowl, combine the whole wheat flour, oat flour, applesauce, water, egg, and cinnamon. Stir until the mixture forms a dough.
Roll the dough out on a floured surface and cut into shapes using cookie cutters.
Bake for about 20 minutes or until the edges begin to brown.
Allow the treats to cool before serving.
Storage Tip: Keep in an airtight container for up to a week, or freeze for longer shelf life.
Why It’s Great for Dogs: Apples are a great source of fiber and vitamins, while cinnamon can help support your dog’s digestive system. Just be sure to avoid any sugar or sweeteners in the applesauce.
INGREDIENTS:
1 banana, mashed
1/2 cup peanut butter (make sure it's xylitol-free)
1 cup whole wheat flour
INSTRUCTIONS:
Preheat your oven to 350°F (175°C).
In a bowl, mash the banana and mix with peanut butter and flour until a dough forms.
Roll the dough into small balls and flatten with a fork.
Bake on a parchment-lined baking sheet for 10-12 minutes.
Allow the bites to cool before serving.
Storage Tip: Keep in an airtight container for up to a week, or freeze for longer shelf life.
Why It’s Great for Dogs: Bananas are packed with potassium and fiber, and peanut butter is rich in healthy fats and protein, making these treats a nutritious option for your dog.
https://blacklabbrands.com
For the feline who thinks they’re the real star of Christmas morning.
INGREDIENTS:
1 can tuna in water (drained)
1 cup oat flour (blend rolled oats if you don’t have flour)
1 egg
1 tbsp dried catnip
INSTRUCTIONS:
Preheat oven to 325°F.
Combine tuna, oat flour, egg, and catnip in a food processor until a sticky dough forms.
Roll into small marble-sized balls and flatten slightly.
Place on a lined baking sheet and bake 12–15 minutes until firm.
Cool before serving to your furry friend.
Storage Tip: Store in an airtight jar in the fridge for up to 5 days.
INGREDIENTS:
1 1/4 cups oat flour
1/2 cup unseasoned, boneless, skinless turkey
1 egg
1/3 cup pumpkin puree (or mashed sweet potato)
INSTRUCTIONS:
Preheat oven to 350 degrees, and spread parchment paper on a baking sheet.
If raw, boil turkey breast or sauté’ ground turkey until cooked through, using coconut oil if needed.
Then grind turkey in a blender or food processor till smooth.
Combine ground turkey, pumpkin puree, egg, and 1 cup of oat flour in a bowl until the mix forms a dough.
Sprinkle some of the remaining flour on a cutting board and roll out dough to a ¼ inch thickness. Cut into desired shapes, or simple ½” squares, and place on the lined baking sheet.
Bake for 25 – 30 minutes, or until firm. Let cool before serving.
Storage Tip: Store in a closed container in the fridge for 3-7 days.
INGREDIENTS:
3/4 cup shredded, cooked, unseasoned chicken
1/4 cup plain, unsweetened applesauce
2 eggs
2 cups oat flour (plus extra for dusting)
INSTRUCTIONS:
Preheat oven to 350 degrees, and line baking sheet with parchment paper.
Add chicken, applesauce and eggs in blender and mix until smooth. Add flour and mix until a dough forms. If dough is too watery, add more flour by the tablespoon full until desired consistency. If too dry, add just a bit of water.
Drop dough onto a floured cutting board or surface, and roll out into ¼ inch thickness. Use a tree, or any shape, cookie cutters and place cut cookies on a baking sheet.
Bake for 15 minutes till firm. Let cool before serving.
Storage Tip: Store in an airtight container in the fridge for 4 – 5 days.
When the air gets crisp and the holiday lights start to twinkle, there’s no better way to bring people together than over a steaming mug of hot cocoa. But why stop at basic? This year, take your cocoa game to the next level with a DIY hot cocoa bar that’s as over-the-top (and fun) as Santa’s sleigh ride itself. Whether you’re hosting family, entertaining friends, or just treating yourself, here’s the ultimate blueprint.
The foundation of any good cocoa bar is, of course, the cocoa.
• Classic Hot Chocolate – A rich, creamy base using milk or dairy alternatives.
• Flavored Cocoa Packets – Peppermint, mocha, or even salted caramel.
• Make-Ahead Crockpot Cocoa – Perfect for large gatherings; it stays warm all evening.
Presentation is half the fun.
• Mismatched holiday mugs for a charming, eclectic look
• Sleek glass mugs for a modern vibe
• Disposable cups with festive sleeves if you’re keeping things low-maintenance
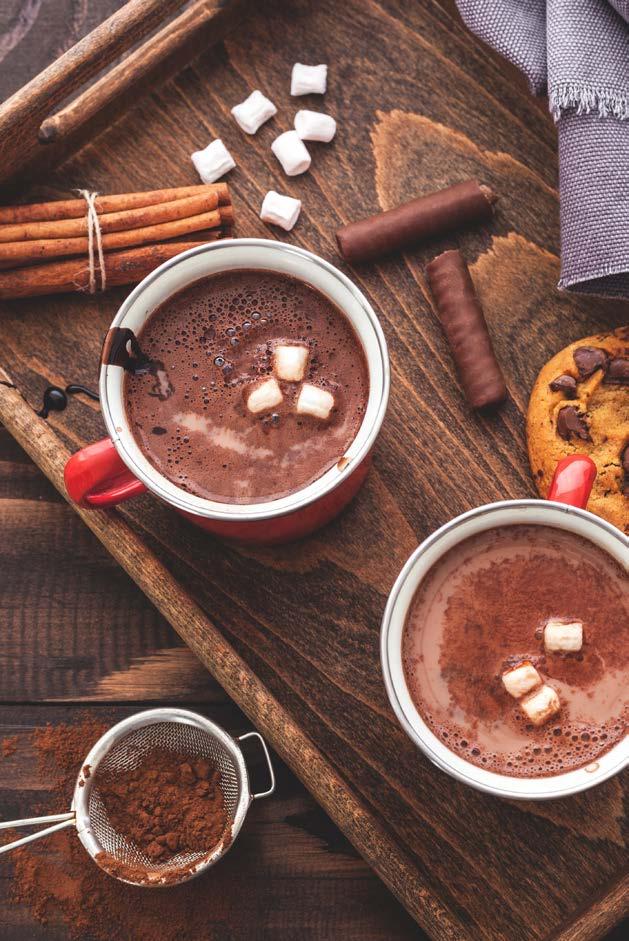
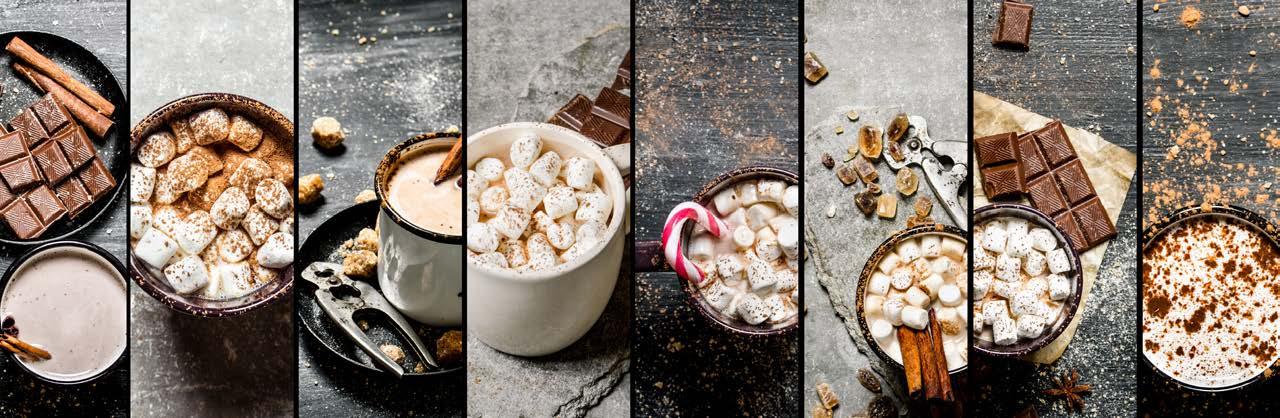
Here’s where your cocoa bar goes from cozy to completely extra. Create tiers of toppings so guests can mix, match, and customize:
• Whipped Cream – Classic, chocolate, or peppermint.
• Marshmallows – Mini, jumbo, peppermint, or even toasted with a kitchen torch.
• Candy Cane Stir Sticks – Double as garnish and spoon.
• Chocolate Shavings & Sprinkles – From dark to white chocolate curls.
• Cinnamon & Nutmeg – In little shakers for a warm, spiced touch.
• Special Add-Ins – Peanut butter chips, crushed cookies, or caramel drizzle.
Step
For the adult crowd, stock a few flavorboosters (clearly labeled, of course):
• Peppermint schnapps
• Irish cream liqueur
• Spiced rum
Keep these off to the side to avoid mix-ups with little ones.
What makes your hot cocoa bar sleigh-level extra are the details:
• Seasonal Decor: Garlands, twinkle lights, or a chalkboard sign with “Warm Up Here.”
• Snack Pairings: Biscotti, gingerbread cookies, or chocolate-dipped spoons.
• Take-Home Touch: Little jars of cocoa mix tied with ribbon make great party favors.
Encourage guests to show off their cocoa creations by snapping a pic. You can even create a fun hashtag or set out a Polaroid camera to build a “Cocoa Wall of Fame.”
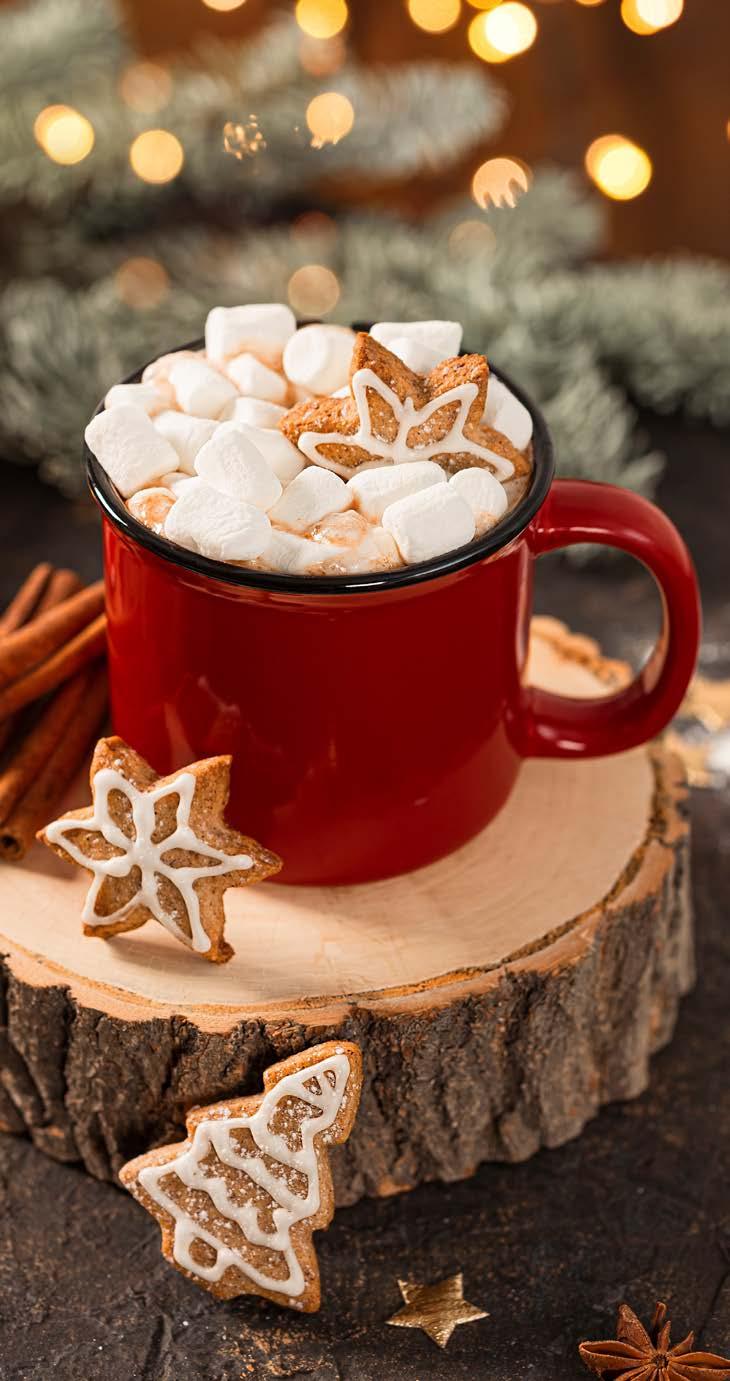
A hot cocoa bar isn’t just about the drink — it’s an experience. With the right mix of basics, bold toppings, and festive flair, you’ll create a gathering spot that’s as warm and inviting as the cocoa itself. This season, skip the ordinary and sip in style — because life’s too short for plain cocoa.
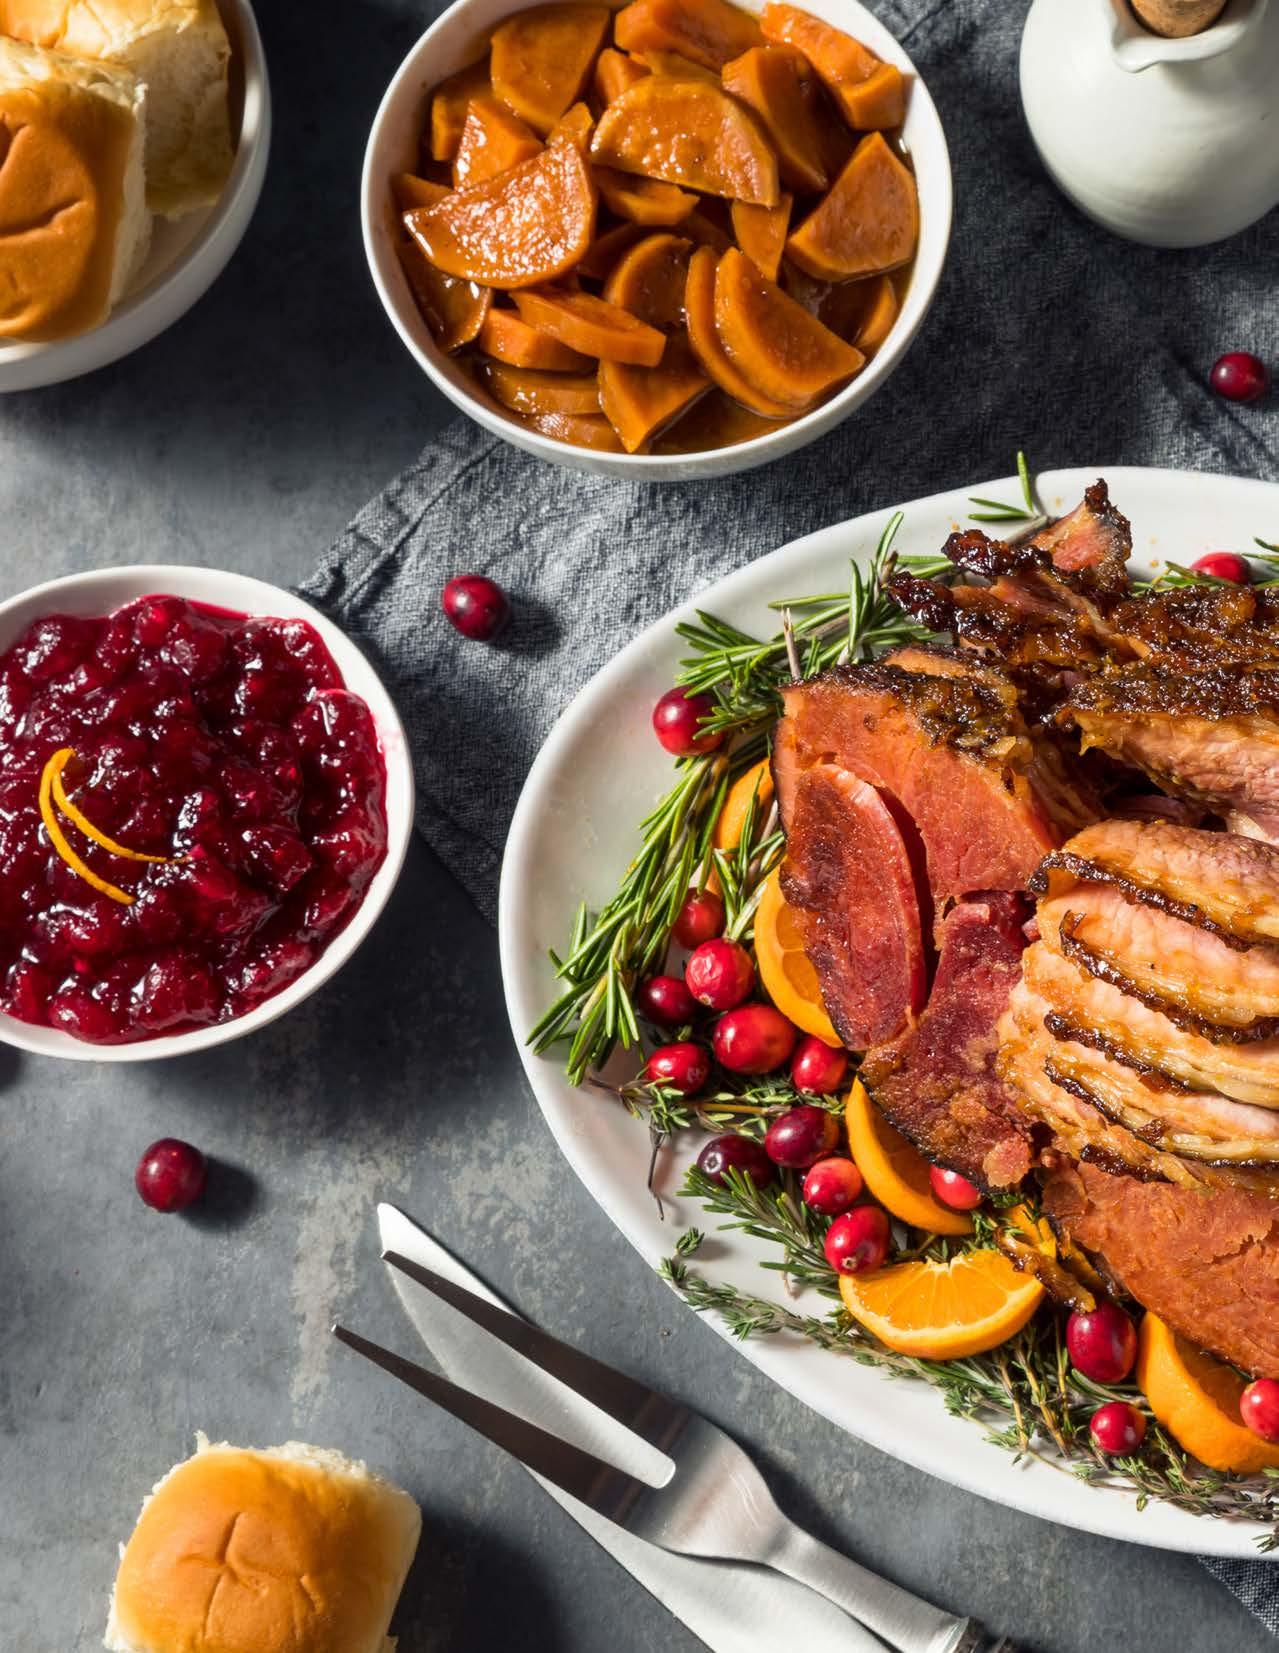
There’s something magical about gathering around the table during the holidays—the sparkle of lights, the scent of roasting herbs, and the warmth that comes from good food shared with loved ones. Crafting the ultimate Christmas dinner isn’t just about tradition; it’s about creating a meal that feels special, balanced, and full of festive flavor. From savory showstoppers to cozy sides and sweet finales, this menu brings holiday magic to every bite.
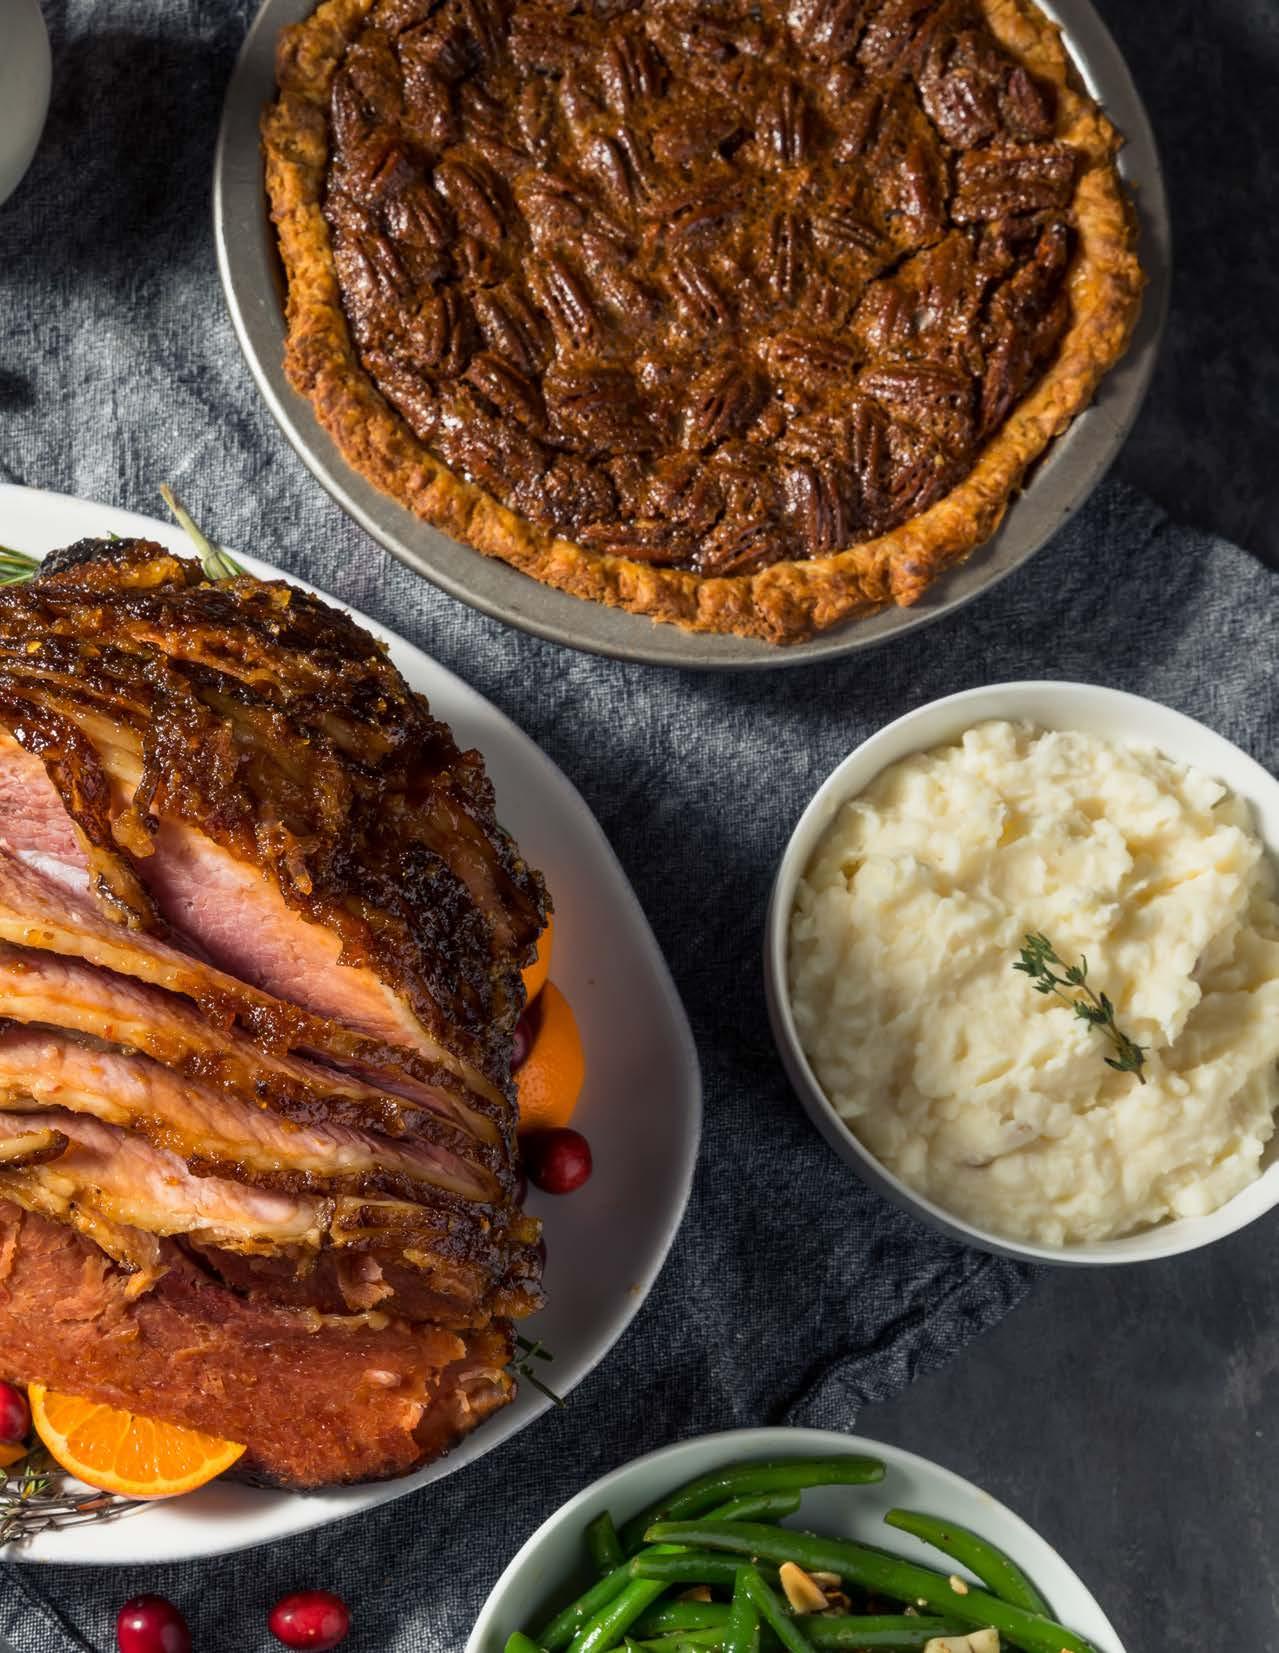
Begin the evening with small bites that set the tone for the celebration. Think baked brie topped with cranberry chutney, shrimp cocktail with a zesty twist of lemon and dill, or a charcuterie board filled with prosciutto, fig jam, and rosemary crackers. These simple starters give guests something to nibble while filling the room with anticipation (and incredible aromas).
For the centerpiece, go classic with a perfectly roasted prime rib or glazed ham, each paired with a rich sauce—think red wine jus or honey-mustard glaze. If you prefer poultry, a herbbuttered roast turkey never fails to impress. Complement the main dish with flavorful sides: buttery mashed potatoes, maple-roasted carrots, and garlicky green beans. Don’t forget a basket of warm rolls for sopping up every last bit of gravy.
A great Christmas meal is as much about the sides as it is the star. Scalloped potatoes layered with cream and cheese, stuffing baked with fresh herbs and sausage, and roasted Brussels sprouts with balsamic glaze all bring color and comfort to the plate. Add a bright, tangy cranberry sauce for a pop of flavor that ties everything together.
No holiday feast is complete without dessert. Keep it traditional with a rich Yule log, classic pecan or apple pie, or a creamy cheesecake topped with sugared berries. For a festive touch, serve peppermint bark or homemade truffles alongside coffee or mulled wine for a cozy finish.
The best Christmas dinners aren’t about perfection—they’re about connection. Mix old family favorites with a few new recipes, play your favorite holiday playlist, and let the glow of the evening linger long after dessert. With thoughtful planning and a touch of festive flair, your Christmas dinner can become a tradition worth savoring year after year.

MORTGAGE
Autumn has a way of reminding us to slow down and savor life’s transitions. The crisp air, the golden leaves, the cozy routines, it’s the season of preparing for what’s next. Just as we stock up on pumpkins and plan holiday gatherings, fall is the perfect time to prepare for one of life’s biggest milestones: buying a home.
And here’s the secret? Getting pre-approved now is like giving your future self a gift that keeps on giving long after the holiday lights come down.
WHY PRE-APPROVAL IS PURE MAGIC IN THE FALL
Beat the Holiday Rush
While many buyers hit pause until January, savvy shoppers know fall offers less competition. A pre-approval in hand positions you to move quickly when the right home appears.
Confidence in Your Budget
Think of pre-approval as a compass. Instead of wandering open houses unsure of what you can afford, you’ll have a clear price range and the confidence to make offers with purpose.
Stronger Negotiation Power
Sellers see pre-approved buyers as serious contenders. It’s like walking into the room with proof you’re ready.
Peace of Mind During the Holidays
Imagine sipping cider, decorating your tree, or carving a turkey knowing you’ve already set the stage for your next chapter. That peace of mind is priceless.
THE GIFT THAT LASTS BEYOND THE SEASON
Pre-approval isn’t just about buying sooner, it’s about removing uncertainty. You’re giving yourself the freedom to focus on family, traditions, and celebrations now, while knowing you’re steps ahead of the curve when the spring market heats up.
Much like setting aside time for fall rituals raking leaves, baking pies, or lighting a candle pre-approval is a simple, intentional step that future-you will thank you for.
If you’re dreaming of a new home, don’t wait for the New Year to set resolutions. Fall is the season of preparation, and pre-approval is the bow on top of your future plans.
This year, give yourself the gift of clarity, confidence, and calm. Your future self will look back and say, “Thanks for starting when the leaves were falling.”


There’s something about fall that invites us to pause and reflect. The air turns crisp, the calendar edges closer to year’s end, and families naturally gather to take stock of what matters most. Between holiday planning and financial year-end reviews, autumn offers the ideal backdrop to think strategically about one of life’s biggest goals: becoming a homeowner.
Fall is a natural checkpoint. Many households review budgets before the holiday rush, preparing for both celebrations and the new year ahead. This moment of reflection pairs perfectly with evaluating your readiness for homeownership. Do you know how much you can comfortably afford? Are there financial habits you want to strengthen before taking the leap?
By using this season of planning, you can align your housing goals with your broader financial picture.
As families gather to talk about plans, priorities, and even next year’s milestones, conversations often drift toward “What’s next?” For many, that includes exploring a new home, a bigger space, or a neighborhood that better fits their lifestyle.
• Review Your Spending: Look back at the year. Where did your money go? Small adjustments now can grow your savings quickly.
• Check Your Credit Health: A stronger score can mean better loan options. Consider pulling a free report this season.
• Map Out Your Timeline: Are you hoping to move in spring or summer? Setting a budget now creates a roadmap.
• Build a “Home Fund”: Whether it’s for a down payment, closing costs, or furniture, earmarking funds helps you prepare with intention.


Budgeting for homeownership in the fall isn’t just about timing—it’s about perspective. You’re closing the books on one year while planting seeds for the next. By the time the calendar flips, you’ll be financially positioned to move with clarity and confidence.
So as you sip cider, carve pumpkins, or gather around the table, consider this: your future home could be closer than you think. All it takes is a thoughtful budget, a little preparation, and the vision to see beyond the season.
This fall, give yourself more than just a financial plan, give yourself a pathway to home.