
Managing Chickens From Chicks to Peak Egg Production
Joseph Okoh , USU Extension Small Ac reage Livestock Specialist
Essence Perry, Intern, Department of Animal, Dairy, and Veterinary Sciences
Introduction
Chickens were first domesticated for cultural purposes, but selective breeding has focused on egg production (Rose, 1996). Choosing the right breeds and good management practices are essential for farmers to maximize egg yield, quality, and safety. This fact sheet covers poultry history, top egg-laying breeds, egg anatomy, nutrition, and practical tips to help farmers improve productivity and run successful egg production ventures.
Understanding Poultry Domestication and Breeding History
Chickens were among the later animals to be domesticated. Early on, they were kept not for food, but for religious rituals, cultural practices, and cockfighting. In the mid-1800s, people started getting very interested in raising chickens, mainly for their looks, not for their eggs (Rose, 1996).
In the 1950s, the White Leghorn became popular for its egglaying capabilities. Later, mixing Rhode Island Reds with other chickens made brown egg layers. This helped create the egglaying chickens we use today (Rose, 1996).
Egg Production
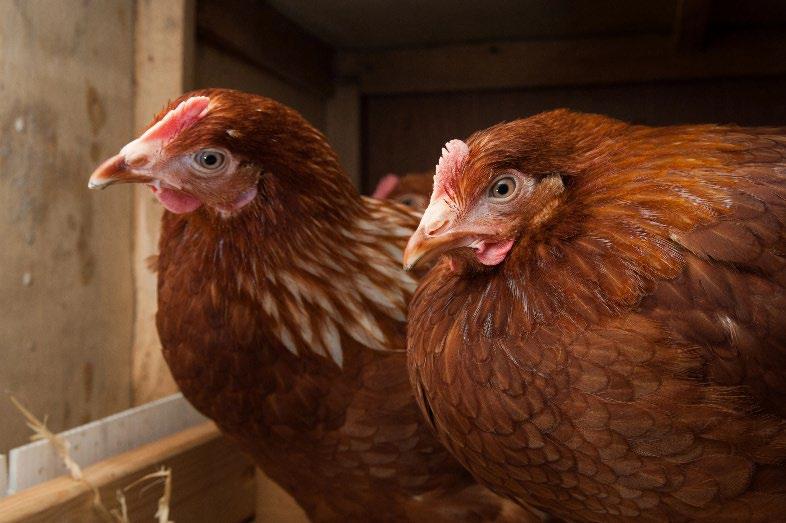
Egg production starts with hens, called “layers,” and ends when the eggs are eaten or sold. It's important to handle eggs carefully at every step from laying to packaging to keep them safe and fresh. Layers are chickens that have been developed to lay eggs (see Table 1). Some common egg-laying breeds include:
• White Leghorn.
• Rhode Island Red.
• Nera Black.
• ISA Brown.


Highlights
• Choosing the right breeds and good management practices are essential for farmers to maximize egg yield, quality, and safety.
• As laying birds develop, they undergo internal growth that strengthens their muscles and skeletal structure while gradually accumulating body fat.
• Proper management during this stage is essential to support healthy development and future egg production.
• Hens go through several distinct growth phases including brooding, pullet, prelay, laying, and spent.
• Premature laying, calcium deficiency, feather pecking, heat or cold stress, and parasites are challenges that may be prevented by careful management.


Table 1. Top Egg-Laying Breeds: Comparison Table
Breed
ISA Brown (hybrid) Light brown 300–320 Medium Calm, docile Consistent layer, great for beginners
Lohmann Brown (hybrid) Brown 300–320 Medium Easy to handle Popular in commercial egg production
White Leghorn White
Golden Comet (hybrid)
Brown
Active, flighty Efficient, high feed-to-egg ratio
Medium Calm, friendly Early maturity, great backyard choice
Australorp Brown 250–300 Heavy Gentle, quiet Holds egg-laying record
Rhode Island Red Brown 250–300 Medium Hardy, assertive Dual-purpose, weather tolerant
Sussex Light brown 250–300 Heavy Calm, alert Excellent foraging, cold hardy
Ancona White 220–280 Light Energetic, nervous Heat tolerant, Mediterranean origin
Easter Egger (mix) Blue, green, pink 200–280
Plymouth Rock Brown 200–250
Mixed breed, multi-colored eggs
Curious, calm Good for both meat and eggs
Ameraucana Blue to green 200–250 Medium Friendly, quiet “Easter egger” breed, colorful eggs
Barnevelder Dark brown 180–200 Heavy Calm, quiet Attractive plumage, dark eggs
Welsummer Speckled dark brown 160–200 Medium Friendly Speckled eggshells
Marans Dark chocolate brown 150–200 Heavy Reserved Known for rich egg color
Sources: American Poultry Association (APA), 2023; Damerow, 2012; Kilpatrick, 2011; Ussery, 2011
Choosing Breeds Based on Needs
Egg-Laying Categories
• Hybrids – These chickens are bred by crossing two or more different pure breeds (or lines) to produce offspring with specific desirable traits. These traits often include high egg production, fast growth, efficient feed-to-egg or feed-to-meat conversion, hardiness or disease resistance, and docile temperament.
Examples: ISA Brown, Golden Comet (high egg yield but shorter lifespan).
• Heritage breeds – These traditional breeds were commonly raised by farmers before the rise of industrial agriculture. These breeds are valued for their natural hardiness, ability to reproduce naturally, long productive lifespans, and adaptability to outdoor or free-range systems.
Examples: Australorp, Plymouth Rock (lower production but longer life and more resilience).
• Color layers – These breeds or hybrids of chickens were specifically developed or selected to lay eggs in a variety of shell colors beyond the standard white or brown. These birds are prized for their egg color diversity and are often kept by backyard chicken keepers, small farms, or anyone who wants a visually striking egg basket.
Examples: Ameraucana, Easter Egger (lay colorful eggs, great for aesthetic appeal [APA, 2023]).
Climate-Adapted Breeds
Table 2 displays the best breeds for varying weather conditions.
Climate Recommended breeds
Cold weather Australorp, Sussex, Rhode Island Red, Plymouth Rock
Hot weather Leghorn, Ancona, Easter Egger, Minorca
Best Breeds Selection by Use
Breed selection varies by intended use. Table 3 shows breed recommendations for different uses.
Table 3. Recommended Breeds Based on Use
Use
Recommended breeds
Beginners ISA Brown, Golden Comet, Plymouth Rock are known for ease and high production
Children and family Easter Egger, Sussex, Australorp are noted for friendly temperaments and colorful eggs.
Unique eggs Marans (dark), Ameraucana (blue), and Welsummer (speckled) lay unique and colorful eggs.
Growth and Management of Laying Birds
As laying birds develop, they undergo internal growth that strengthens their muscles and skeletal structure while gradually accumulating body fat. Proper management during this stage is essential to support healthy development and future egg production.
1. Build strong muscles.
Birds grow muscles as they move and eat well. Muscles are made mainly of protein and water. Providing highquality, rich protein feed to young birds involves offering clean, age-specific rations containing 18% to 22% protein. Other vital building blocks to support healthy growth, muscle development, and overall vitality are essential vitamins like A, D3, E, and B-complex, minerals such as calcium (around 1%) and phosphorus (0.45%), and easily digestible ingredients
2. Develop the frame.
Bird growth and bone strength depend on key minerals. Chicks need the following to:
• Grow strong bones: 1.5% to 2.5% calcium and 0.5% to 0.9% phosphorus (at a 2:1 ratio).
• Support muscle, nerve, fluid balance, and digestion: Magnesium (0.04%–0.08%), potassium (0.3%–0.8%), sodium (0.1%–0.3%), and chloride (0.15%–0.3%).
• Support vital oxygen transport, immunity, bone formation, metabolism, and growth: trace minerals, including iron (40–80 mg/kg), zinc (40–60 mg/kg), manganese (40–60 mg/kg), copper (5–10 mg/kg), and iodine (0.5–1.0 mg/kg).
Meeting these mineral needs prevents health issues and supports strong bones, muscles, immunity, and egg production throughout a bird’s life.
3. Build body fat.
Birds also store fat in their bodies, which gives them energy and helps keep them warm. Fat is made from energyrich food, like grains or corn.
4. Grow internally and externally.
Feathers, skin, and organs (like the heart and liver) also grow as the bird grows. These parts don’t add a lot to the bird’s weight, but they’re still important for overall health (Rose, 1996).
Developmental Stages of Laying Hens
Hens go through several distinct life stages (Table 4), each requiring specific management practices: the brooding stage or chick phase (0–6 weeks), the growing stage or pullet phase (6–16 weeks), the pre-lay phase (16–20 weeks), the laying stage (20–72 weeks), and the spent phase (72+ weeks). During the brooding stage, chicks need warmth, proper nutrition, and protection to support early development. In the pullet stage, rapid growth occurs, and the reproductive system begins to mature. The pre-lay phase bridges growth and egg production, preparing hens for laying. Once they reach sexual maturity, hens enter the laying stage, where nutrition, lighting, and housing are carefully managed to support consistent and high-quality egg production. In the spent phase, egg production declines, and management decisions are made regarding flock replacement. Each stage is critical and demands tailored care to ensure healthy development and peak performance (Akinbobola, 2022)
Key Management Focus
Grower (pullet) 6–16 weeks Feathering, skeletal growth Bone health, steady growth Fidar Fee, UF/IFAS
Pre-lay
15–20 weeks
Reproductive system maturing
Layer 20–72+ weeks Regular egg production
Spent hen 72+ weeks Egg-laying decline
Calcium build-up, behavioral preparation Fidar Feed, Livine
High calcium/protein nutrition, egg collection Fidar Feed, Wikipedia
Molting or retirement, health maintenance Purina, Wikipedia
Preparing to Receive Day-Old Chicks
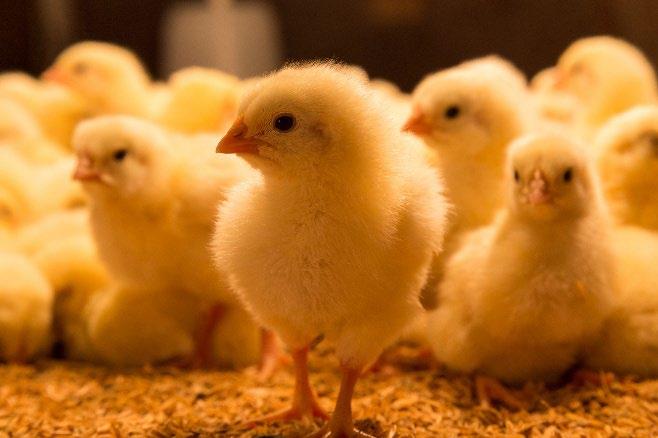
Proper preparation before the arrival of day-old chicks is important to ensure their health, welfare, and optimal growth. Planning early helps create a clean, safe, and comfortable environment that reduces stress and risk of disease. The first three days of a chick's life are critical, and all management practices should be focused on ensuring their health and wellbeing.
Two Weeks Before Arrival
1. Thoroughly clean and disinfect.
Begin by thoroughly cleaning the brooder area. Remove all the old bedding, dirt, and debris. Use appropriate disinfectants that are effective against common poultry pathogens. Common disinfectants used in poultry housing include benzalkonium chloride, didecyl dimethyl ammonium chloride, cresols, orthophenylphenol, formalin (37% formaldehyde), Cidex™, hydrogen peroxide, peracetic acid, Virkon S®, povidone-iodine, and sodium hypochlorite (bleach). Ensure that surfaces are properly disinfected. After disinfecting, allow the brooder to dry completely to prevent dampness, which can encourage bacterial growth.
Table 4. Phases of Chicken Development and
2. Check ventilation and air circulation.
Proper air circulation is essential for maintaining good air quality and preventing respiratory problems. Inspect ventilation systems to ensure correct functioning, with no blocked vents. Aim for fresh airflow that keeps the environment comfortable for the chicks by opening windows periodically for cross ventilation, especially in housing without controlled ventilation vents.
3. Inspect housing conditions.
Check the brooder for any damage, and if found, fix it appropriately. Look for any gaps, holes, or weak points that could let in pests or predators. Ensure that windows and doors close securely.
One Week Before Arrival
1. Inspect lighting features.
Lighting plays a vital role in the chicks' behavior and development. Inspect all lighting points to confirm they are working and replace any faulty bulbs. Proper lighting (14 to 16 hours of consistent light per day) helps maintain a regular laying cycle and encourages feeding and activity, which are important for growth and muscle development.
2. Clean and disinfect drinkers and feeders.

Proper lighting (14 to 16 hours of consistent light per day) helps maintain a regular laying cycle and encourages feeding and activity, which are important for growth and muscle development.


Remove and thoroughly clean all drinkers and feeders to eliminate residues and microbial contamination. After washing, disinfect them using safe, poultry-approved solutions, e.g., cresols, formalin (37% formaldehyde), Cidex, hydrogen peroxide, Virkon S, povidone-iodine, and sodium hypochlorite (bleach). Rinse well to remove any chemical residues that might harm the chicks.
3. Remove cobwebs and perform general cleaning.
Clean cobwebs from walls, ceilings, and corners to prevent dust accumulation and pests. Sweep and mop floors if necessary to maintain hygiene.
Final Preparations Before Arrival
1. Control pests and vermin.
Ensure that the brooder and surrounding housing areas are free from vermin, such as rodents, insects, and wild birds that may carry disease or compete for feed. Use approved pest control measures to eliminate these threats.
2. Predator-proof the brooder.
Secure all entrances and exits to prevent access by predators like cats, dogs, foxes, or birds of prey. Other top predators are mink or weasels, raccoons, skunks, opossums, etc. Reinforce fencing and cover openings with wire mesh as needed.
3. Set up bedding and heating.
Lay down fresh, dry bedding material such as wood shavings or straw to provide insulation and comfort. The bedding depth should be about 5–10 cm and increase as the birds grow. Arrange heating equipment, such as heat lamps or brooders, to maintain an optimal temperature (90 °F to 95 °F initially), gradually reducing as chicks grow.
4. Prepare feed and water.
Stock up on starter feed formulated for day-old chicks and fill drinkers with clean, fresh water. Position feeders and drinkers at chick height for easy access.
On Arrival
1. Unbox the chicks and perform an initial inspection.
• Carefully unbox the chicks to avoid injury or stress. Handle them gently.
• Inspect each chick for physical defects or signs of illness, such as deformities, lethargy, unresponsiveness, or wounds.
• Remove any dead or weak chicks immediately.
• Count the chicks to confirm that the number matches the delivery invoice. Keep a record for inventory and management.
• Discard the box.
2. Isolate the weak chicks.

• Place weak or visibly sick chicks in a separate, warm isolation area for close monitoring and treatment to prevent the spread of disease and to give them specialized care.
3. Place the healthy chicks in the pre-heated brooder.
• Transfer the healthy chicks gently into the brooder that has been pre-heated and prepared with bedding.
• Distribute chicks evenly to avoid overcrowding and ensure all have access to warmth and resources.
4. Supply fresh water and feed.
• Provide clean, fresh water always in chick-friendly drinkers designed to prevent spillage, contamination, and accidental drowning
• Offer starter feed formulated for day-old chicks to support early growth and development.
5. Provide health support; administer antibiotics and anti-stress supplements.
• Administer prophylactic antibiotics as recommended to help prevent early infections, especially if the chicks come from uncertain hatchery conditions or if disease risk is high. Always follow veterinary guidelines to avoid misuse.
• Provide anti-stress supplements such as vitamin E or commercial products like Vita-Lyte to boost immunity and reduce stress from transport and environmental changes.
• Monitor chicks closely for any signs of adverse reactions.
Stage-by-Stage Management Guidelines
1. Chick Phase (0–6 Weeks)
• Temperature: Start at 89.6 °F to 95 °F and reduce weekly
• Lighting: Provide 23–24 hours of light for the first week, then reduce.
• Feed: Provide high-protein starter (18% to 20% crude protein).
• Vaccines: Vaccinate for Marek’s, Newcastle disease (ND), and infectious bronchitis (IB).
• Housing: Offer a clean, dry brooder with good air circulation
2. Grower Phase (6–16 Weeks)
• Feed: Feed a grower diet (14% to 16% protein)
• Lighting: Keep low (10–12) hours to avoid early laying and prevent pullets from maturing too early. Longer light exposure can trigger premature egg laying, leading to small body size, poor-quality eggs, and health issues. Controlled lighting ensures birds develop proper body weight and bone strength before laying, supporting long-term productivity.
• Space: 0.1–0.14 square meters per bird is the ideal space requirement.
• Care: Watch for parasites like mice by checking under bird feathers and monitor weight
3. Pre-Lay Phase (16–20 Weeks)
• Calcium: Start layer feed (2%–4% calcium)
• Lighting: Gradually increase to 14–16 hours
• Preparation: Introduce nest boxes.
• Health: Deworming is essential, particularly for backyard chickens raised in free-range or semifree-range systems. Administer booster vaccinations as required, based on flock health status and vaccination schedules.
4. Layer Phase (20–72 Weeks)
• Feed: Provide 16%–18% protein with 3.5%–4% calcium
• Lighting: Maintain 14–16 hours daily.
• Eggs: Collect often and keep nesting areas clean.
• Environment: Use perches, clean floors, and monitor bird health (Komba et al., 2025).
5. Spent Hen Phase (72+ Weeks)
• Options: Induce molt for second cycle or cull if unproductive.
• Care: Reduce feeding if molting; maintain hygiene
• Biosecurity: To prevent disease transmission, dispose of spent hens separately and never mix them with the active-laying flock
Common Challenges in Layer Flocks


Some common challenges in layer flocks include the following Table 5 displays strategies to prevent them.
1. Premature laying due to excessive light exposure
2. Calcium deficiency leads to weak eggshells.
3. Feathers pecking from overcrowding or boredom
4. Heat or cold stress.
5. Parasites like lice, mites, and worms
Table 5. Preventing Common Challenges in Layer Flocks
Challenge Prevention
Premature laying due to excessive light exposure
Calcium deficiency leading to weak eggshells
• Follow a controlled lighting program appropriate for the bird's age and breed.
• Limit light exposure to 10–12 hours per day until pullets reach sexual maturity (around 18 weeks). This can be managed by switching off artificial lights once the required duration is achieved.
• Use low-intensity lighting during the growing period and gradually increase duration and intensity at point-of-lay.
• Ensure diets contain adequate calcium levels (around 3.5% to 4.5% during lay).
• Supplement with limestone or oyster shell grit for slow-release calcium (Mehmood, 2025).
• Balance calcium with phosphorus (0.4%–0.6%) and vitamin D3 to enhance absorption and utilization. This can be achieved by providing layer mash or pellets formulated for egg production, supplemented with oyster shell or limestone grit for additional calcium. Ensure vitamin premixes contain vitamin D₃ to support calcium metabolism, and avoid excess phosphorus, which can interfere with calcium utilization.
• Monitor egg quality and adjust feed formulation accordingly. Adjust feeds to match the stage of production, ensuring the right balance of protein, calcium, phosphorus, and vitamin D₃. Proper formulation improves egg yield and shell quality, supports bird health, prevents deficiencies, and makes feeding more cost effective (Smart-Bird, 2023).
Feather pecking from overcrowding or boredom
• Maintain proper stocking density (e.g., 0.14–0.19 sq. meters per bird in floor systems).
• Provide environmental enrichment (perches, pecking blocks, straw).
• Ensure uniform feed and water access to prevent competition.
• Avoid sudden changes in lighting, feed, or housing that can trigger stress.
• If necessary, trim beaks (in accordance with welfare guidelines) to prevent injuries.
Heat or cold stress
Parasites (lice, mites, worms)
• Insulate and ventilate housing to maintain temperatures between 60 °F to 75 °F for optimal layer performance.
• During hot weather:
o Increase ventilation, use fans, foggers, or coolers.
o Provide cool, clean water with electrolytes. (Check producer’s directions for electrolyte use).
o Reduce dietary energy and increase vitamin C.
• In cold weather:
o Use heating systems or insulation to prevent chilling.
o Increase energy content in feed to compensate for heat loss.
• Maintain strict biosecurity protocols (limit outside visitors and control rodents and wild birds).
• Regularly inspect birds and housing for signs of infestation.
• Implement a routine deworming and parasite control program using approved veterinary treatments.
• Keep bedding clean and dry and practice frequent litter removal and disinfection between flocks.
Creating a Proper Brooding Environment

Best Practices for Success
• Keep daily records (feed, weight, egg count)
• Ensure clean housing and tools
• Observe birds for unusual behavior or signs of illness
• Enrich the environment (e.g., perches, scratch areas)
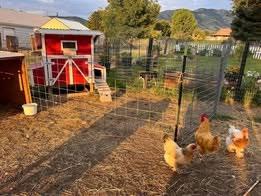
• For free-range systems, rotate pastures regularly.
Brooder Management
1. Temperature management
• Week 1: 89.6 °F to 95 °F
• Reduce weekly by 4.5 °F to 5.4 °F
• Weeks 5–6: 69.8 °F to 75.2 °F
• Chick behavior shows comfort:
o Huddled means too cold
o Spreading out means it is too hot
o Evenly distributed means ideal temperature
2. Ventilation
• Avoid stuffy air and ammonia buildup. Ammonia irritates the eyes and respiratory system, leading to poor growth and higher disease risk. Good ventilation provides fresh air, removes harmful gases, and maintains a healthy environment.
• Ensure airflow without direct drafts
• Use fans or natural cross ventilation
3. Lighting
• Week 1: Provide 24 hours of bright light
• Weeks 2–6: Gradually reduce to 16 hours
• Use warm white or red lights (20–30 lux)


The success of raising poultry really hinges on how well the brooding phase is managed, as this stage sets the groundwork for the birds’ health, growth, and productivity. During brooding, keeping the right temperature is essential because chicks can’t regulate their body heat on their own; even slight changes can cause stress, lead to poor feeding, or even increase mortality rates. Good ventilation is key to ensuring a steady flow of fresh air, preventing harmful gases like ammonia from building up, and helping to control humidity levels. Proper lighting not only encourages activity and feeding but also promotes uniform growth and healthy development. It’s crucial for chicks to have continuous and easy access to clean feed and water, as this helps them establish good feeding habits early on, which directly impacts their weight gain and the overall performance of the flock. Maintaining litter hygiene is vital for minimizing disease risks and creating a comfortable environment, while keeping an appropriate stocking density helps avoid overcrowding, reduces competition for resources, and enhances welfare outcomes. By carefully managing these factors during the brooding stage, you set the stage for optimal performance in the later phases of poultry production (Kilpatrick, 2011).
4. Feeding
• Weeks 1–2: Offer pre-starter feed (20%–22% protein).
• Weeks 3–6: Provide starter feed (18%–20% protein).
• Placement: Place feeders at chick’s back level.
5. Water
• Fresh, cool water should always be available.
• Use chick-friendly drinkers.
• Add vitamins/electrolytes during first 3–5 days.
6. Litter and hygiene
• Use dry bedding like wood shavings or straw
• Keep depth 5–10 cm, increasing as chicks grow.
• Clean and disinfect before chicks arrive.
• Monitor for diseases like pasting or lameness.
7. Stocking density
• 0–2 Weeks: Stock 40–50 chicks/m²
• 3–6 Weeks: Stock 25–30 chicks/m²
Conclusion
Successfully managing egg-laying chickens from hatch to peak production requires informed decision-making, consistent care, and strategic planning at every stage of development. By selecting the right breeds, maintaining a clean and wellequipped brooding environment, and applying good management practices, farmers can significantly improve flock health, egg quality, and overall productivity. Preventing common challenges like disease, stress, and nutritional deficiencies is not only possible, but also essential. With proper preparation, attention to detail, and ongoing observation, both small-scale and commercial producers can achieve sustainable and profitable egg production.
References
Akinbobola, A. (2022, March 5). A beginner’s guide to layer farming. Livestocking. https://www.livestocking.net/beginners-guide-to-layer-farming American Poultry Association. (2023). American standard of perfection (Latest ed.). American Poultry Association. Damerow, G. (2012). The chicken encyclopedia: An illustrated reference. Storey Publishing. Kilpatrick, S. W. (2011). Backyard chickens: A guide to raising your own chickens. Hobby Farm Press. Komba, A. O. A., Kanungo, B., Milimo, M., Phili, Y., Balogun, T., Wairimu, A., Adenike, A., Orina, E., Kazembe, A., & Gary. (2025, February 12). Difference between starter, grower, and finisher chicken feeds. JustAgriC. Retrieved from https://justagric.com/types-of-chicken-feeds/ Mehmood, A. (2025, May 20). The best natural supplements for free-range poultry health. Poultry Hatch. https://www.poultryhatch.com/2025/05/natural-supplements-for-free-range-poultry-health.html
Rose, S. P. (1996). Principles of poultry science. CABI Publishing. SmartBird. (2023, July 28). How to start a layer farm for egg production. SmartBird Poultry Manager. https://smartbirdapp.com/how-to-start-a-layer-farm-for-egg-production/ Ussery, H. (2011). The small-scale poultry flock. Chelsea Green Publishing.
In its programs and activities, including in admissions and employment, Utah State University does not discriminate or tolerate discrimination, including harassment, based on race, color, religion, sex, national origin, age, genetic information, sexual orientation, gender identity or expression, disability, status as a protected veteran, or any other status protected by University policy, Title IX, or any other federal, state, or local law. Utah State University is an equal opportunity employer and does not discriminate or tolerate discrimination including harassment in employment including in hiring, promotion, transfer, or termination based on race, color, religion, sex, national origin, age, genetic information, sexual orientation, gender identity or expression, disability, status as a protected veteran, or any other status protected by University policy or any other federal, state, or local law. Utah State University does not discriminate in its housing offerings and will treat all persons fairly and equally without regard to race, color, religion, sex, familial status, disability, national origin, source of income, sexual orientation, or gender identity. Additionally, the University endeavors to provide reasonable accommodations when necessary and to ensure equal access to qualified persons with disabilities. The following office has been designated to handle inquiries regarding the application of Title IX and its implementing regulations and/or USU’s non-discrimination policies: The Office of Equity in Distance Education, Room 400, Logan, Utah, titleix@usu.edu, 435-7971266. For further information regarding non-discrimination, please visit equity.usu.edu, or contact: U.S. Department of Education, Office of Assistant Secretary for Civil Rights, 800-421-3481, ocr@ed.gov or U.S. Department of Education, Denver Regional Office, 303-844-5695 ocr.denver@ed.gov. Issued in furtherance of Cooperative Extension work, acts of May 8 and June 30, 1914, in cooperation with the U.S. Department of Agriculture, Kenneth L. White, Vice President for Extension and Agriculture, Utah State University. July 2024 Utah State University Extension

October 2025
Utah State University Extension Peer-reviewed fact sheet