
Issuing Materials
This guide illustrates how to issue (pull) materials using the eStock Checkout app.
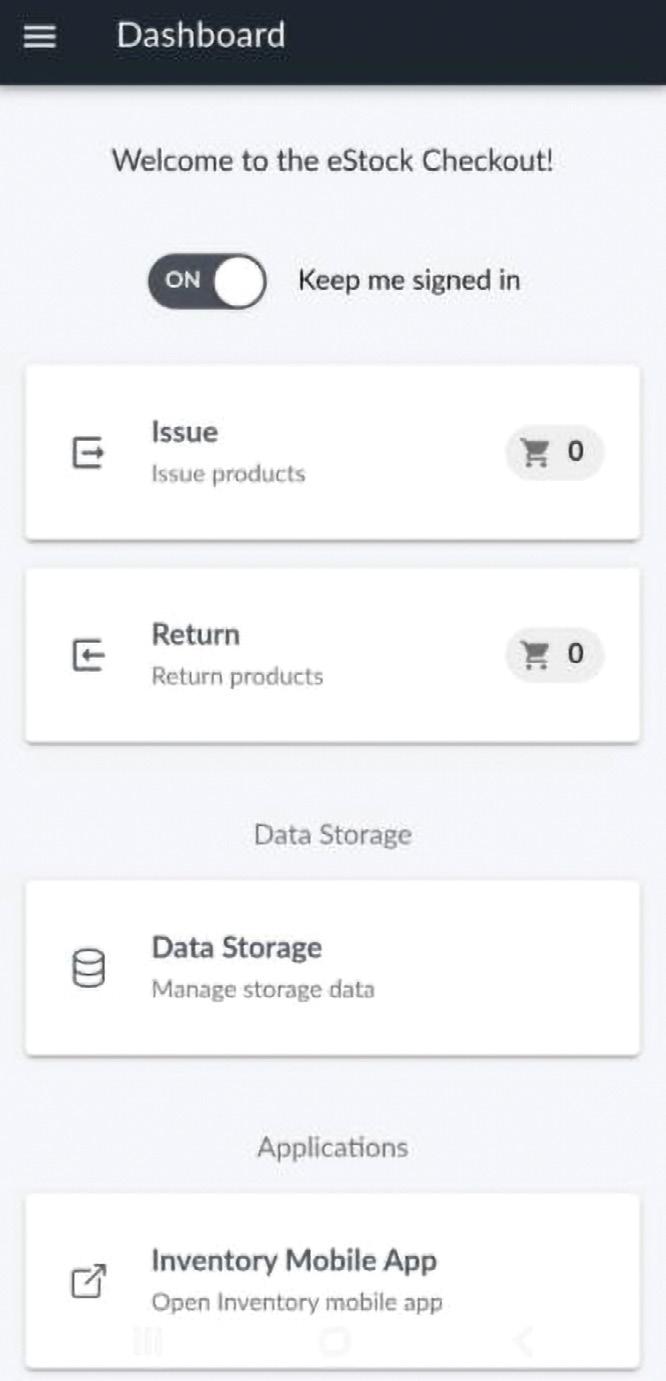
Step 1
Select Issue on the home screen.
Step 2
Choose the Ship-To Location
• Select the Filter icon.
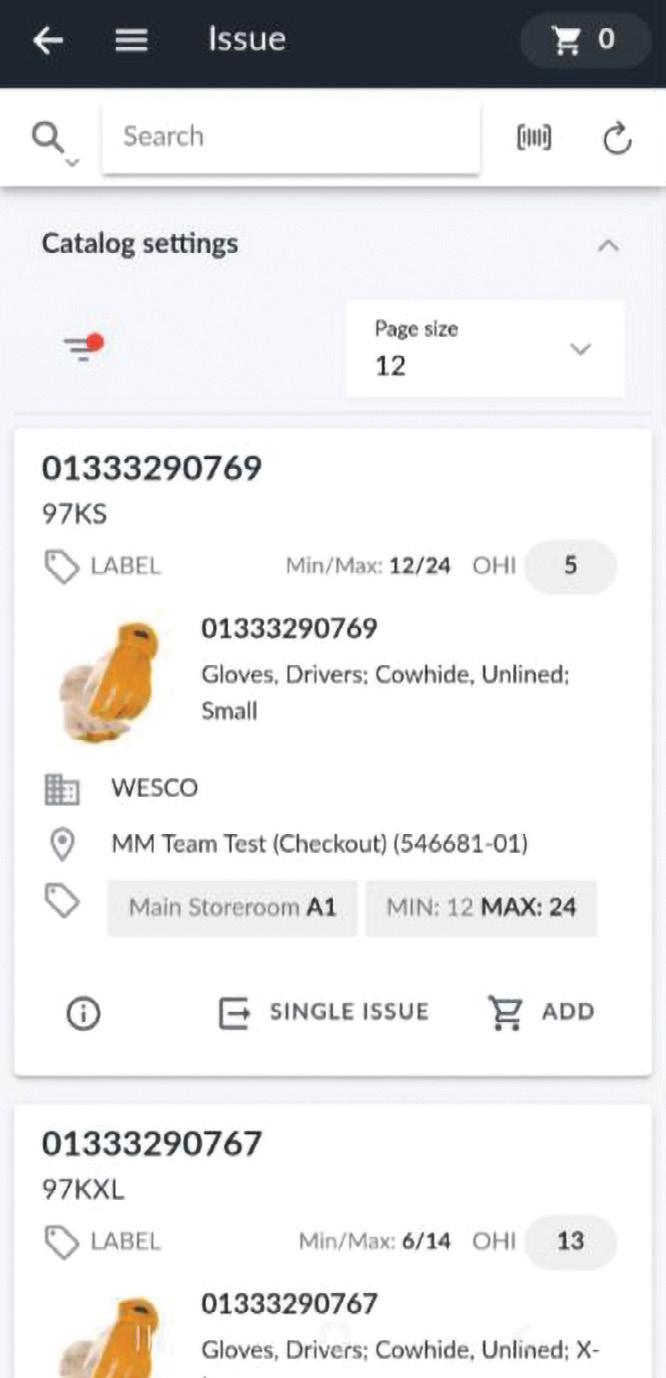
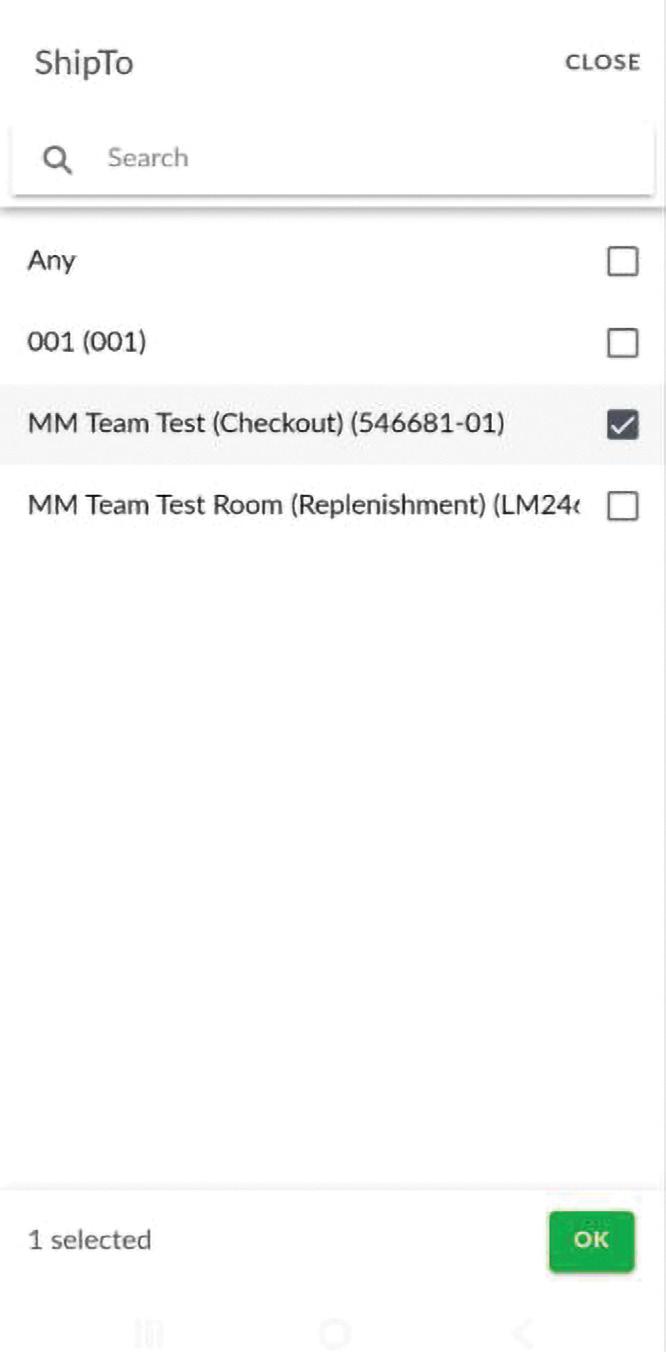
Step 2.a
Select the correct Ship-To location.
Step 2.b
Select Ok (bottom right).
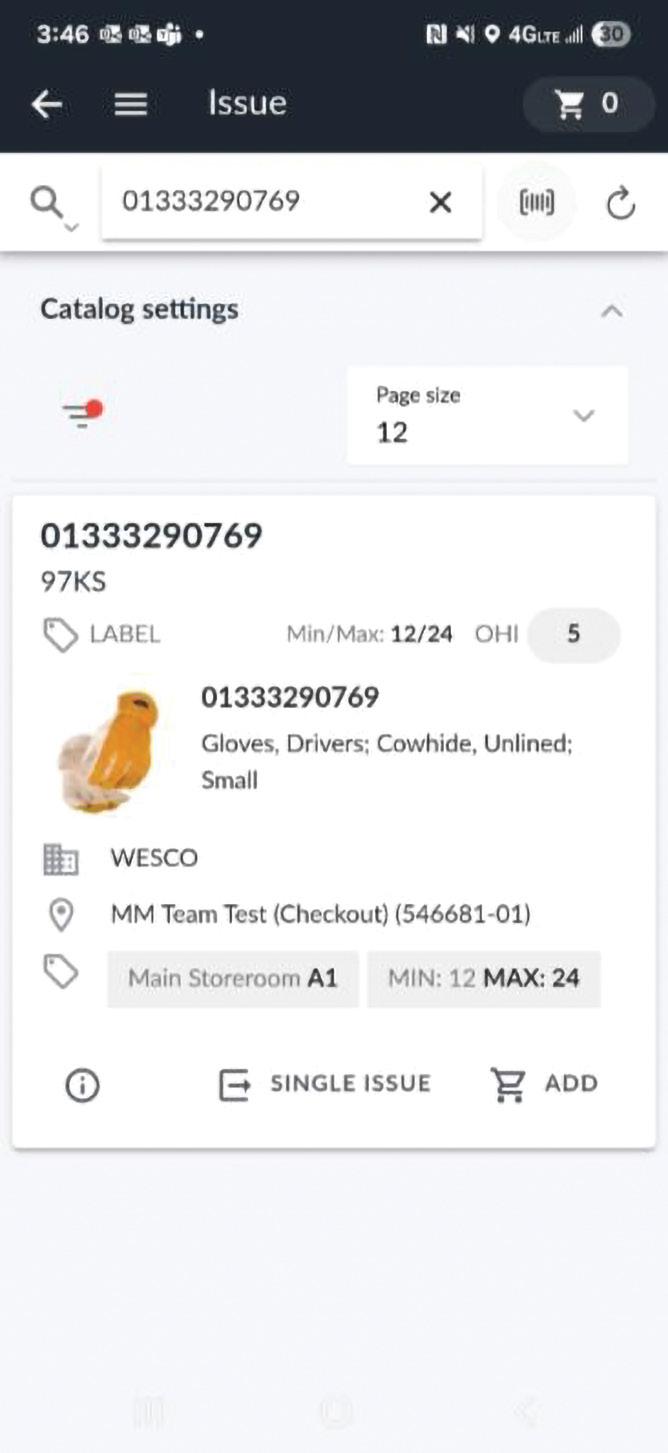
Step 3.a
Search bar – type item details.
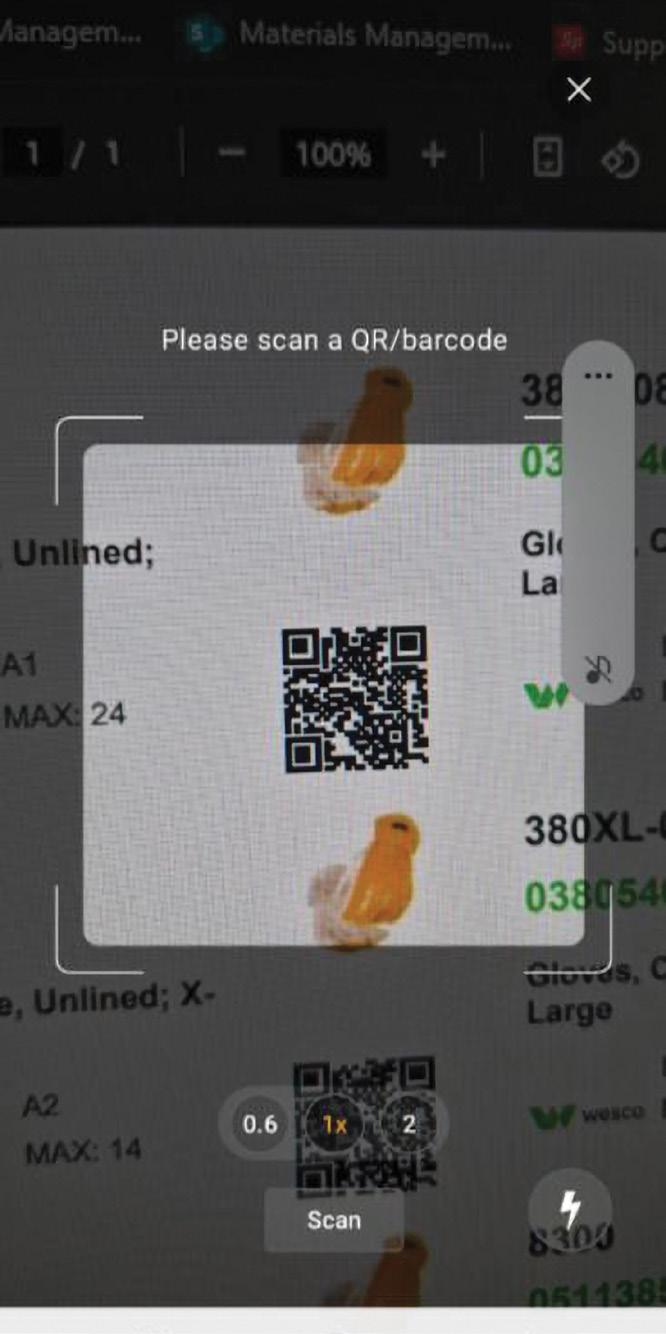
Step 3.b
Scanner – Use your phone’s camera to scan a barcode or QR code.
Step 3.c
Swipe and scroll – Browse the item list manually.
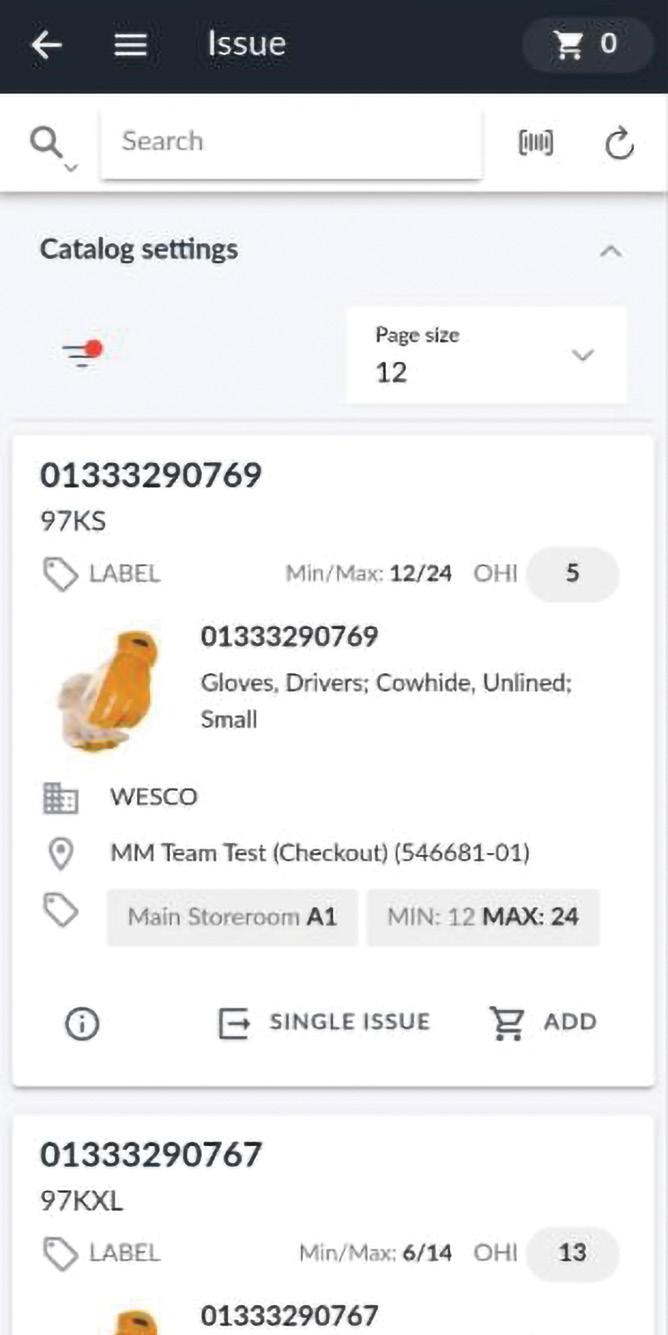
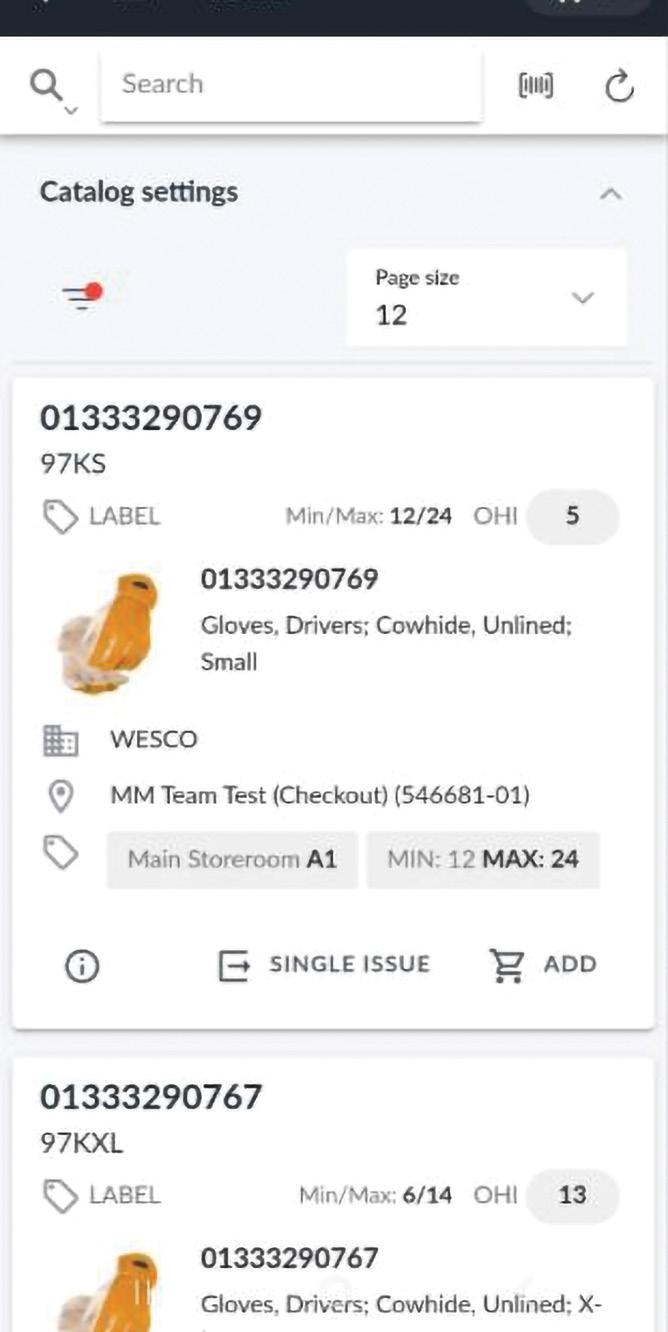
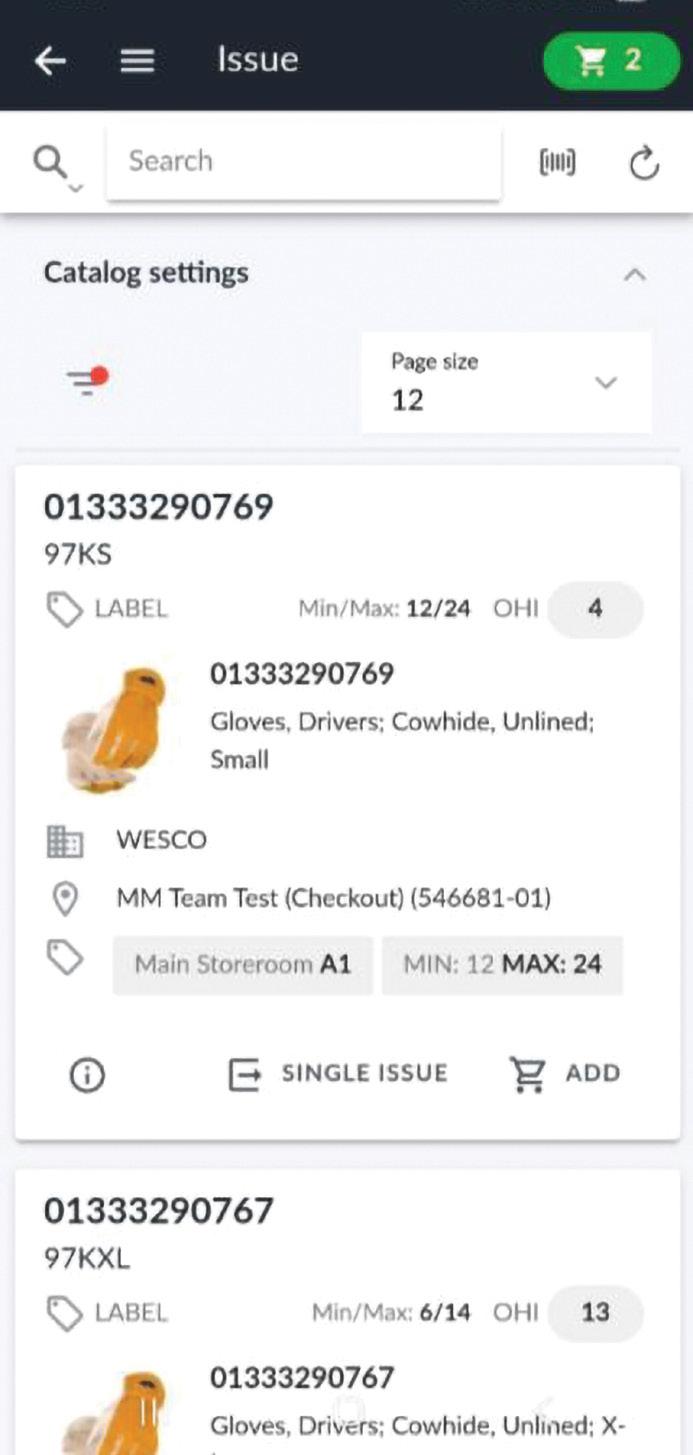
Step 4
Add Items to Cart Select Add next to the item.
• *If you use Single Issue, only one item will be issued, and you’ll be logged out afterward.
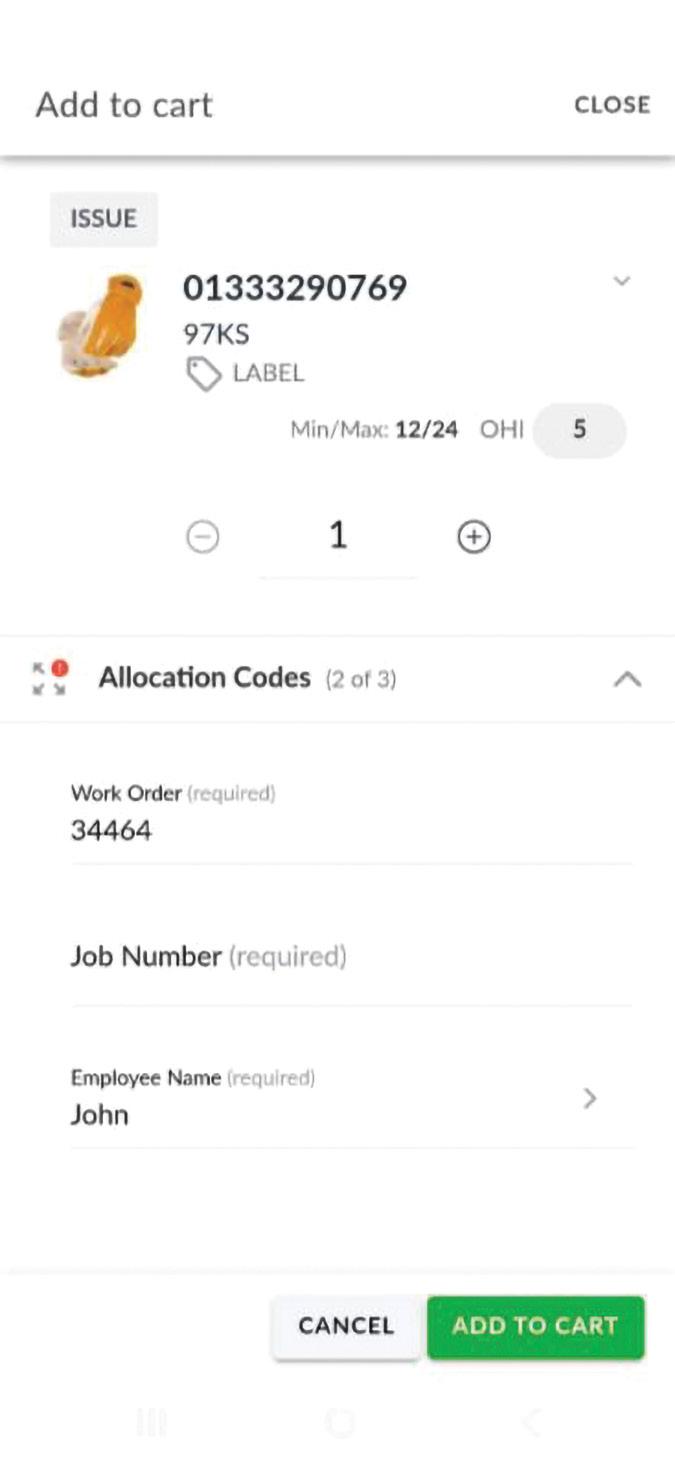
Step 5
Set Quantity
• Use + / – buttons or tap the number to enter a new quantity.
Step 6
Allocation Codes (Optional)
• Enter Allocation Codes now or later before checkout.
• *For help, refer to the training doc: Creating Allocation Codes.
Step 7
Confirm Item
• Select Add to Cart (bottom right).
• Repeat steps 3–7 for each item.
Step 8
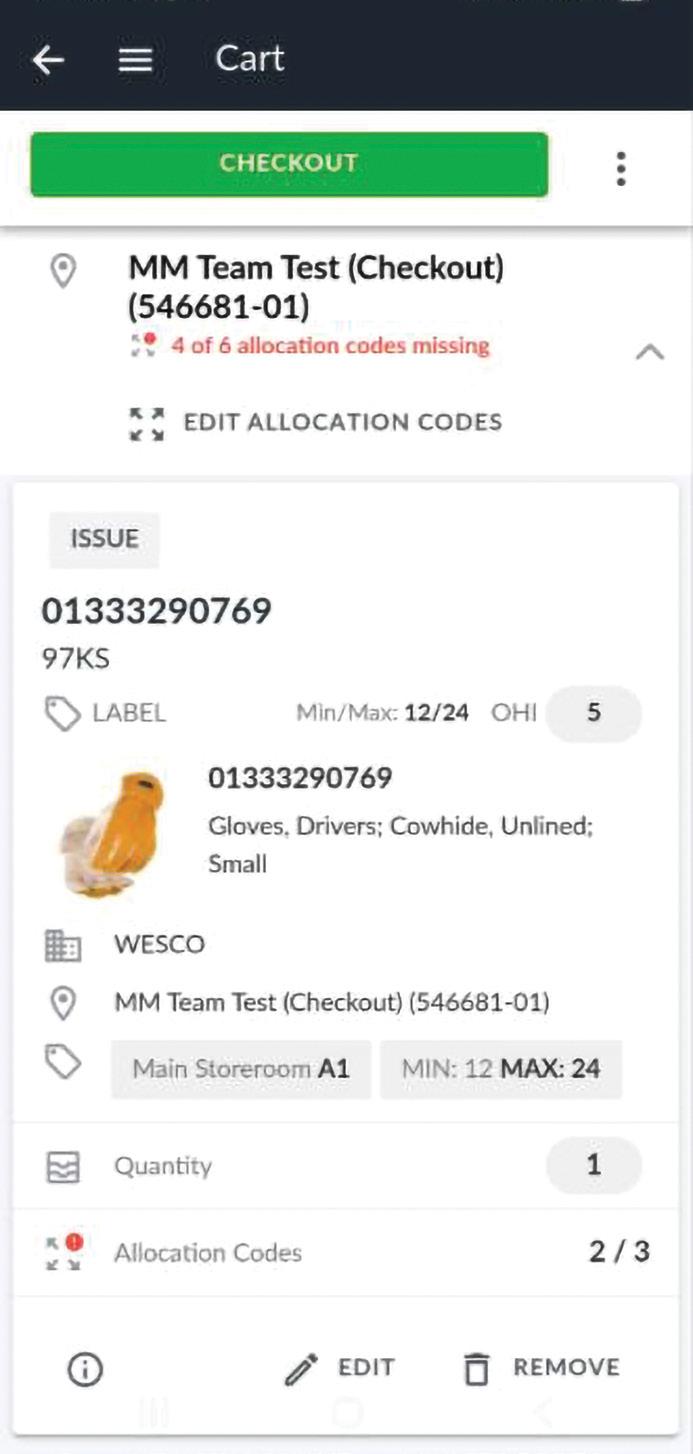
Review Cart
• Select the Cart icon (top right) to begin checkout.
Step 9
Edit Items (Optional)
• Select Edit under an item to adjust quantity or allocation code.
Step 10
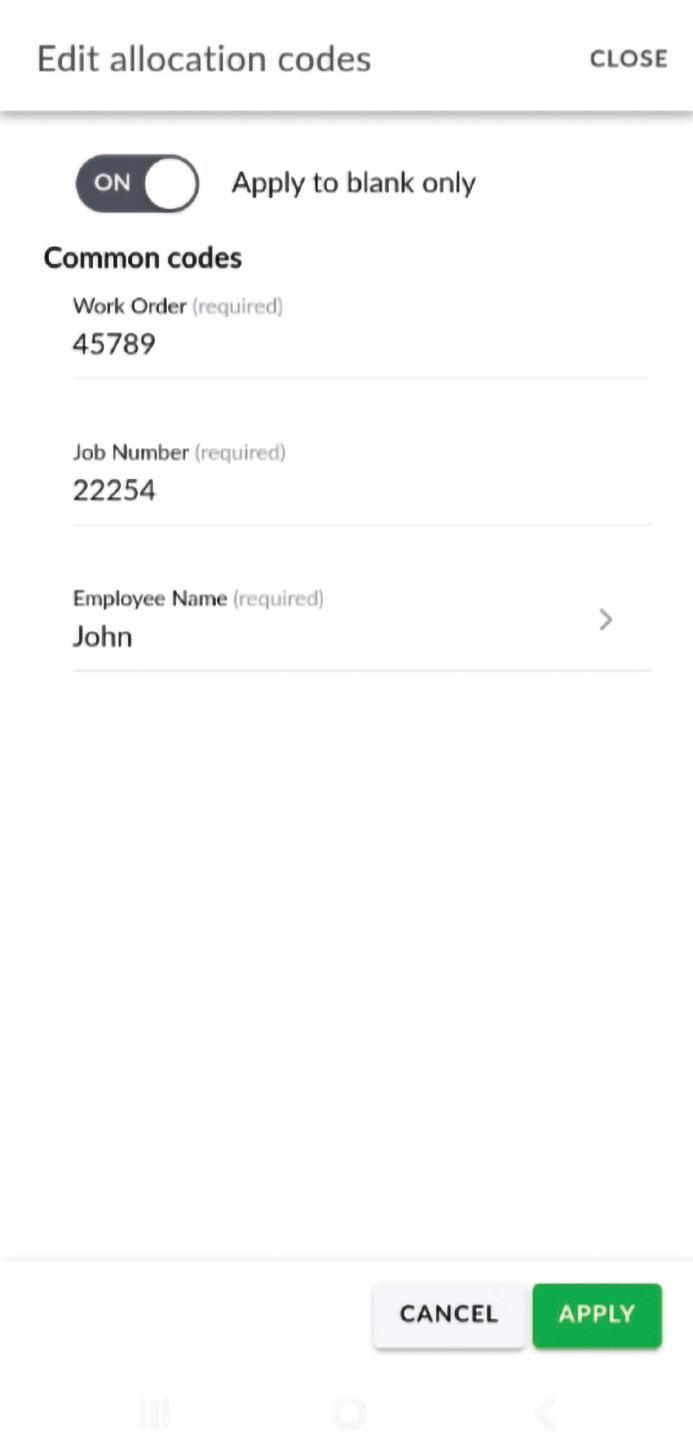
Edit All Allocation Codes (Optional)
• Select Edit Allocation Codes (above item list).
Step 10.a
Choose:
• ON – Apply only to items missing allocation codes.
• OFF – Overwrite all existing codes.
Enter new code and select Apply (bottom right).
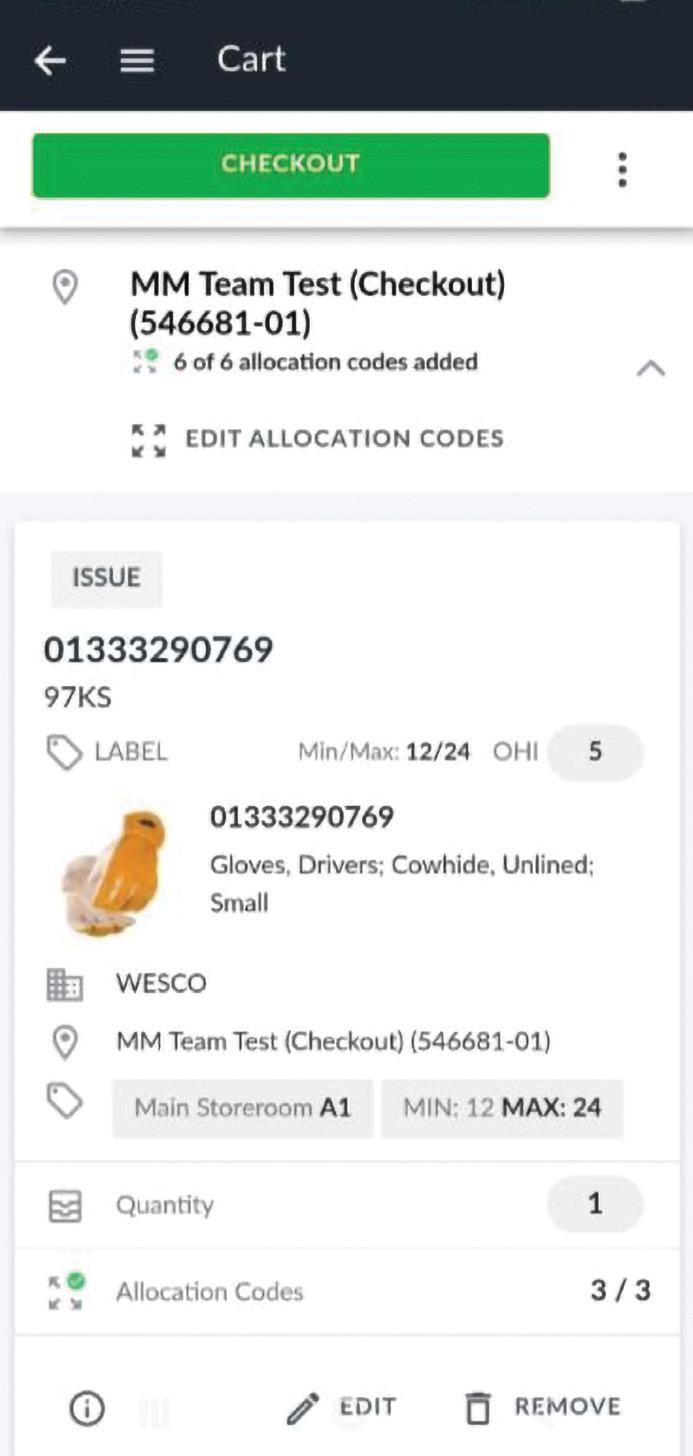
Step 11
Select Checkout when ready.
• *Inventory will update instantly, and changes will reflect in the Report section on the eStock web portal.
10.a